With the release of Nutrient Web SDK 2017.3, among other improvements, we added more public CSS classes. The CSS classes of Nutrient Web SDK get obfuscated and can not be used easily to customize the look and feel. The public CSS classes, however, are classes that are not obfuscated and therefore available to our developers for customization.
While working on the 2017.3 release, our very first idea was that we could just add some CSS Classes here and there, create a list of them and hand it out to our customers. But then we’re developers. Even though we knew it was not going to be easy, we are optimists by nature! Our clients’ developers need to know which CSS class is associated with which element in Nutrient Web SDK, therefore we need to test these so a class would not be unintentionally removed or changed in a new release.
So the things we had to do first were:
-
Generate organized CSS documentation
-
Test all CSS classes
and because we love making awesome products, and always strive to make more developers’ lives easier:
-
Create neat and interactive CSS documentation

Step 1 — Generating a list with all the classes
Our goal was to end up with an HTML file holding a list of all CSS classes with a short description for each. Our initial approach was to produce one JSON file holding all that information – which is fairly easy to generate – and then use that to generate the HTML file. Something similar to this:
{
	"name": ".PSPDFKit-Container",
	"description": "The element where Nutrient Web SDK gets mounted within your application."
}
Step 2 — Testing all the CSS classes
At Nutrient, we feel strongly about testing. We work hard on providing extensive test coverage for our Nutrient Web SDK because we believe it to be one of the most important cornerstones of delivering high-quality software. In addition to the unit tests for Nutrient Web SDK, we’re using Webdriver to control the browsers for our integration tests. We implemented this in Elixir, using Hound, which creates a nice wrapper of the Webdriver API. So we now can write code like this, that adds a CSS class to the JSON file if it exists. Otherwise, it writes an error message.
case Hound.Helpers.Page.find_all_elements(:css, element_class_name) do
  [] -> # No element found, we need to error ...
  elements -> # Add class with the description to the JSON file ...
end
We now have code that generates a JSON file with all classes and checks if it’s in the DOM — we’re done, right?

Actually, not just yet. I mentioned we wanted to generate “interactive” documentation, so what does this mean?
Step 3 — Interactive CSS documentation
The first time our team discussed CSS documentation, we joked about how great it would be if the documentation shows where the CSS class is used in our SDK, with an image the user can click around to see which CSS class a certain element is using. One of those silly “probably not possible, at least not easy” ideas, resulting in something like this:
We thought it’d be amazing to have an interactive part in our documentation, but it will be hard to maintain all those screenshots for every release. We had to figure out a way to completely automate the screenshot generation!

Step 3a — Magic! Or: WebDriver to the rescue
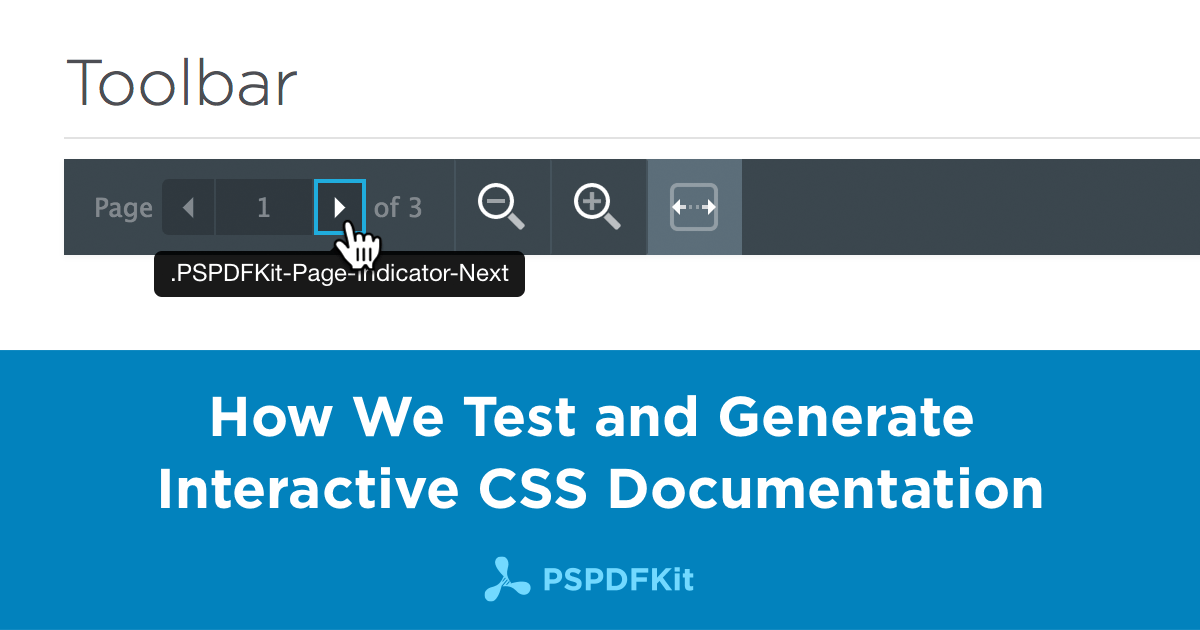
Webdriver helped us again, because it can take a screenshot of certain elements and get the boundingbox (position and size for each element). We now just have to take a screenshot of each component and store the boundingbox for every class. For every boundingbox we then render a div over the image that shows a tooltip with the according classname when you hover over with the mouse as you can see here with the Toolbar.
We also store the positions and sizes and compare the values in our tests, which give us something like snapshot testing to see if elements moved intentionally or not. Hope this insight will help you when you need to document CSS classes for your project.
Follow us on X if you’re interested in more of the cool things we do!


