Muhimbi PDF Converter - New Setup experience
Table of contents

At the time of writing our range of Server Side PDF Conversion and Automation based products, including the Muhimbi PDF Converter for SharePoint(opens in a new tab) and the Muhimbi PDF Converter Services (for Java, .NET, PHP, Ruby) have been in the market for over 7 years. Although our setup experience has always been fine, it has never been excellent. Being excellent is something we strive for so we have dug through our historical support desk tickets to determine the worst pain points and address them as part of the new installation ‘experience’.
Carrying out a full deployment still requires some work and preparation – the entire product is a bit ‘enterprisey’ - getting the proper Windows account in place, granting privileges and installing some prerequisites, these steps are explained in detail in Chapter 2 of our comprehensive Administration Guide(opens in a new tab). Do yourself, and our support desk, a monumental favour and read that chapter in full. You will save yourself a lot of time and frustration.
Let’s walk through a typical deployment and highlight some of the decision points. The screenshots and process below is based on the PDF Converter for SharePoint. Being less complex, the PDF Converter Services setup process is largely the same, it just lacks some of the SharePoint specific screens (and that installer uses a yellow background colour so it is immediately clear which product you are installing).
Naturally the first step is to download the free trial version(opens in a new tab). Once downloaded run setup.exe, resulting in the following screen. This screen allows for the Administration Guide to be opened in your PDF Reader, open it and start reading at chapter 2. We know you don’t want to read manuals, but it will save you time later.
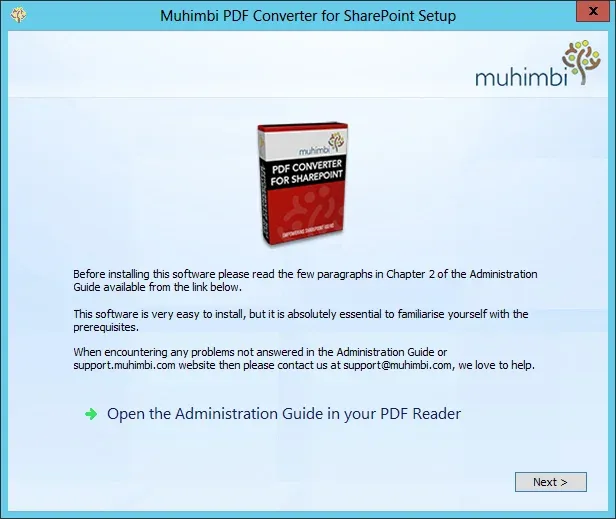
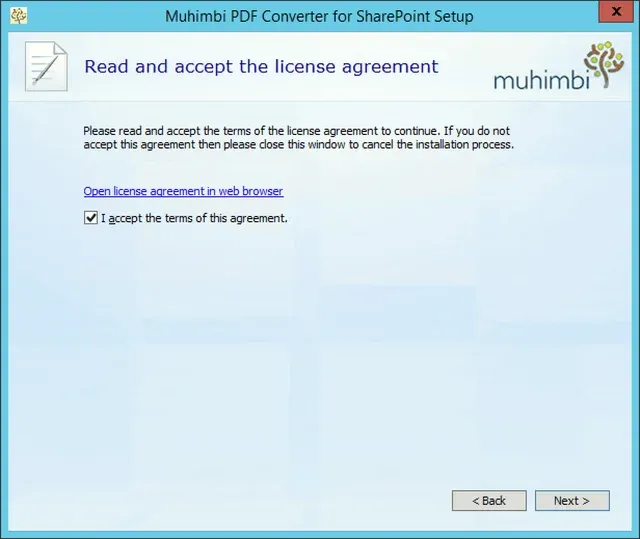
Click Next to continue, read the boring but essential license agreement and accept the terms to continue. You can even print it and use it as wallpaper, everyone is a winner.
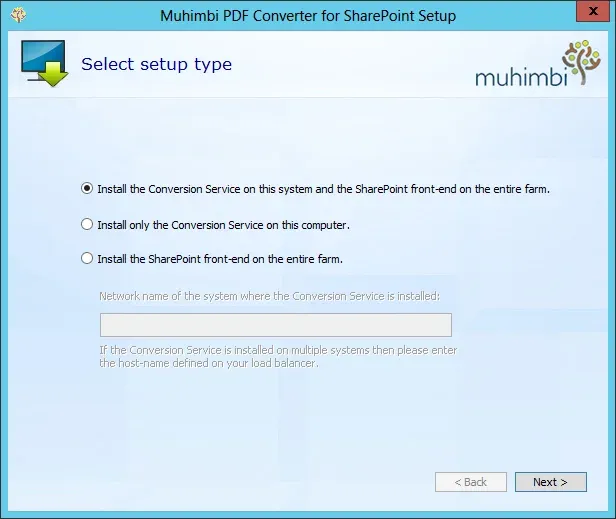
The following screen only applies to the PDF Converter for SharePoint and provides the following three options. Please read our blog post about typical deployment scenarios to learn more about how highly scalable products like the Muhimbi PDF Converter are typically deployed. When executing the installer on a machine that is not part of a SharePoint farm then the SharePoint related options will be disabled.
- Install the Conversion Service on this system and the SharePoint front-end on the entire farm: This is the recommended option for most installations providing the installer is being executed on a single server SharePoint farm or on one of the App servers. This option deploys the conversion service (a Windows service that does all the heavy processing work) on the current server and pushes the SharePoint ‘WSP’ file out to all SharePoint servers.
- Install only the Conversion Service on this computer: Use this option to install only the conversion service on the current system, and skip the deployment of the SharePoint WSP files. This is a good option when installing the conversion service on a system that is not part of a SharePoint farm, or if you are not yet ready to deploy the SharePoint front-end software.
- Install the SharePoint front-end on the entire farm: This option must be executed on only one of the SharePoint servers. It automatically pushes the SharePoint WSP to all servers in the farm. When selecting this option you will be asked to specify the name of the server that will host (or already hosts) the conversion service. Doing so will automatically update the location of the conversion service in our Central Administration screen.
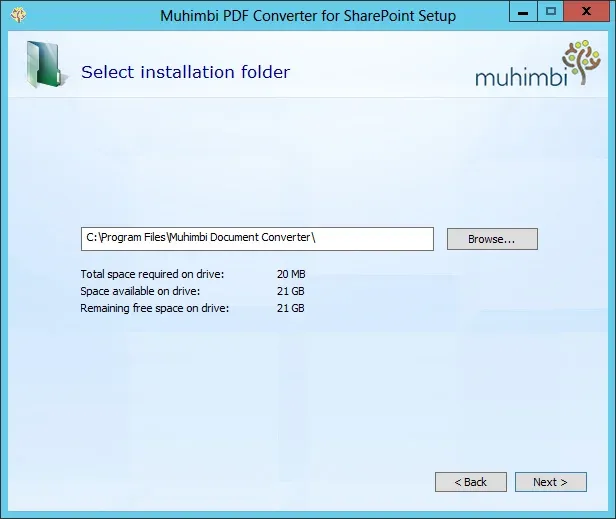
If the conversion service is being deployed as part of the current installation then use the following screen to specify the path to deploy it to. It is recommended to accept the default path, or just change the drive letter. It will work fine in other locations, but it may make troubleshooting more difficult.
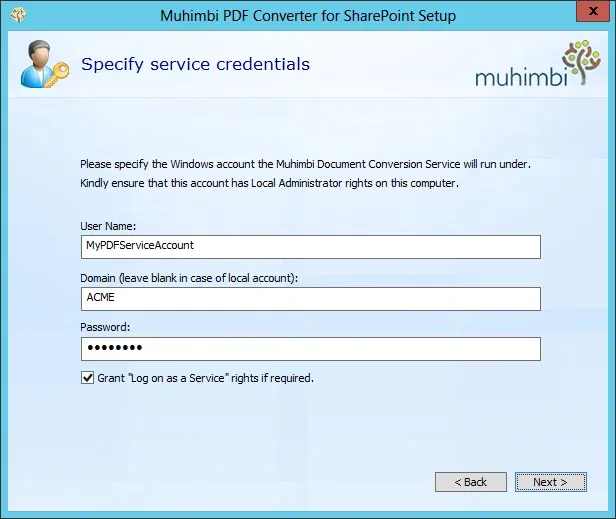
Providing the conversion service is being deployed as part of the current installation process, you will be asked to specify the name of the Windows account the conversion service will run under. This may be a local machine account (in that case leave the domain name empty) or a domain account (please enter the domain in the separate field). This account must be a member of the local Administrators group and does not require any other special settings. Unless specified otherwise, the account will be granted ‘Log on as a Service’ rights automatically.
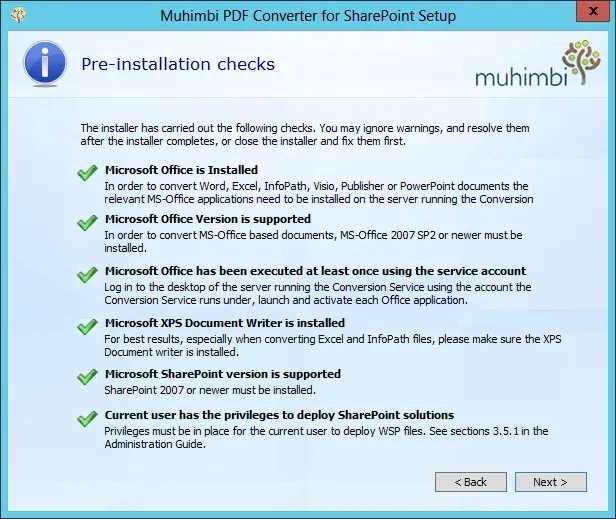
Now, this is where it (finally) gets interesting. As mentioned previously, there are some prerequisites you must get in place, as described in Chapter 2 of the Administration Guide. The installer will check that all these prerequisites are indeed in place and highlight any problem areas with a red X. If any warnings are displayed then you may continue with the installation process and address, or ignore, them after the installation completes. However, for the best experience you should close the installer, address any issues, restart the installer and check that the problems have been resolved.
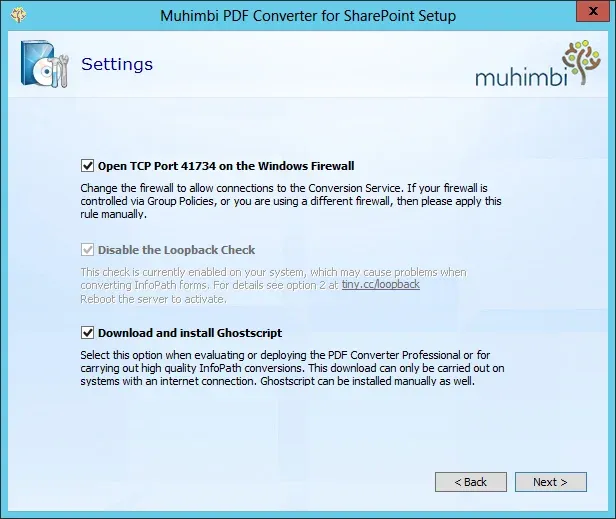
Depending on your exact needs, and providing you are deploying the conversion service, you may want to change the following settings in the next screen:
- Open TCP Port 41734 on the Windows Firewall: In a multi-server farm it is essential that the front end servers can communicate with the conversion server. The installer can open the correct port automatically, but please take into account that this only works for a basic Windows Firewall installation. When deploying the software in an environment with a different firewall or when the firewall is automatically configured and locked down, you may need to open this port manually.
- Disable the Loopback Check: In certain cases a security feature in Windows makes it difficult to connect to a server by machine name, this is known as the Loopback Check. Providing this option is enabled (the default option in Windows) you can use the installer to disable this check. If this option is already disabled (perhaps by an administrator or another process) then you will not be able to change it using the Muhimbi installer. This prevents interoperability problems with other software. If you wish to change this setting by hand then see this blog post.
- Download and install Ghostscript: Some functionality provided by the Muhimbi PDF Converter leverages a technology known as Ghostscript. If you expect to carry out conversions to PDF/A, conversions between different PDF versions or use the recently introduced high fidelity InfoPath converter then you should select this option. The installer will download and install Ghostscript automatically, but if the server you are deploying the conversion service on does not have internet connectivity, which is quite common in data centres, then you have the option to download and install Ghostscript manually(opens in a new tab). Providing it is installed in the default path (on any of the system’s drives) the PDF Converter will automatically detect it.
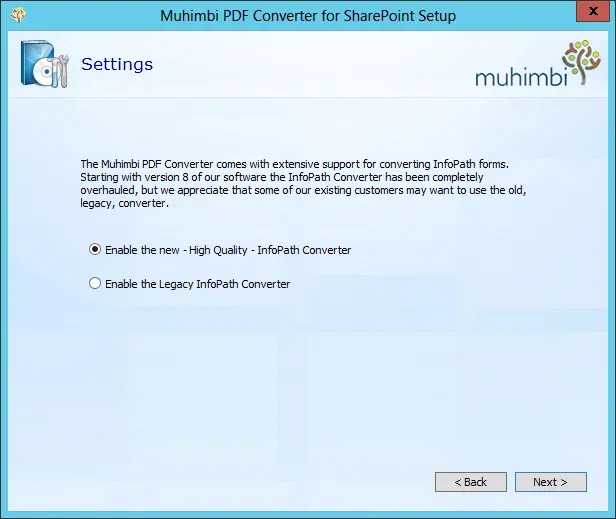
Our range of PDF Converters provide support for some less than common file formats including Microsoft InfoPath. ( Microsoft has discontinued support so start archiving to PDF). Microsoft has slowly crippled InfoPath PDF support over the past few years so if you are running a Windows version newer than Windows Server 2008R2 or an Internet Explorer version newer than version 9, you will find that InfoPath PDF output does not work very well. On those systems, as well as other systems, it is highly recommend to enable our new converter. The only reason to use the ‘Legacy Converter’ is if you already use the Muhimbi PDF Converter in your environment to convert InfoPath to PDF and everything is working well. If it ain’t broke, don’t try to fix it.
Please note that the new InfoPath converter requires Ghostscript to be installed on the system running the conversion service (see the previous screen). In order to use the new InfoPath converter on 64 bit systems, please install the 64 bit version of Office / InfoPath. 32 bit Windows versions work fine with the 32 bit version of Office / InfoPath.
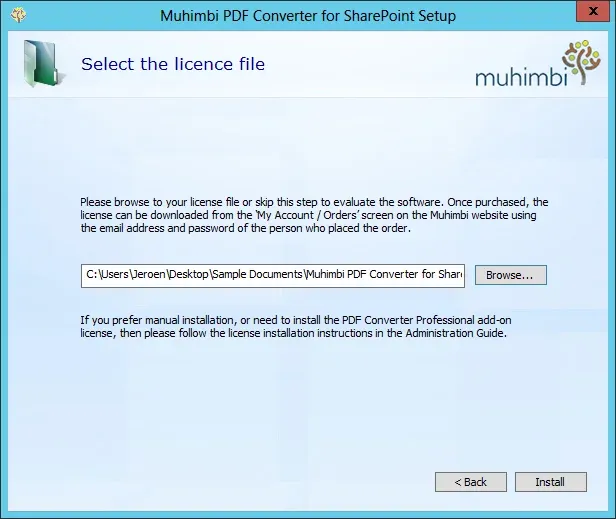
If you already have a license key then specify its location in the following screen. To install the trial version there is no need(opens in a new tab) to specify a license file. If you have a license for the PDF Converter Professional add-on license then please copy that license file to the path the conversion service is being deployed to. Once the conversion service has been deployed you will find a handy shortcut to this folder in the Windows Start Menu.
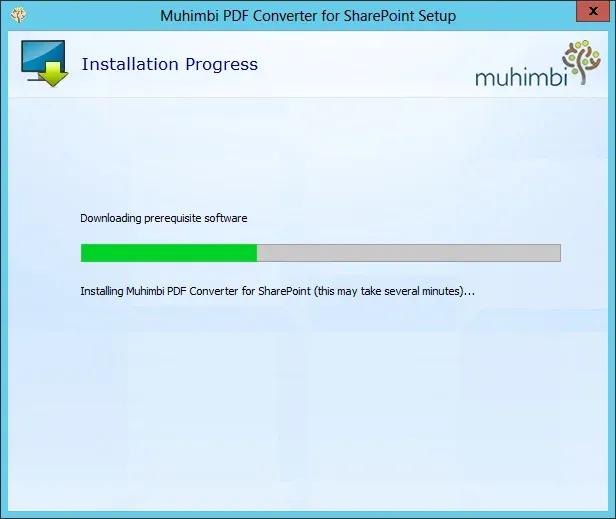
That is it, the installer will now deploy the selected components and configure the local system in line with the specified settings. This may take a couple of minutes.
If all went well you will see the following screen. Congratulations, you have done it, woohooooo!
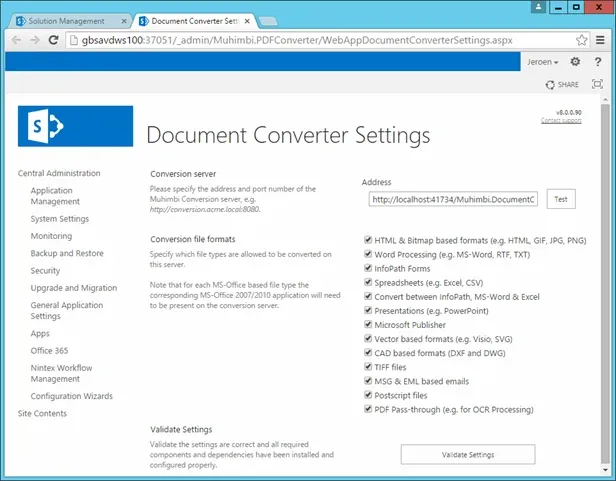
Providing you are installing the SharePoint front-end as part of the current installation process, our Central Administration screen will be opened automatically. Use this screen to configure the system further or execute a validation test to check that everything is indeed working as expected. If you encounter any problems with the validation process then please see this Knowledge Base article.
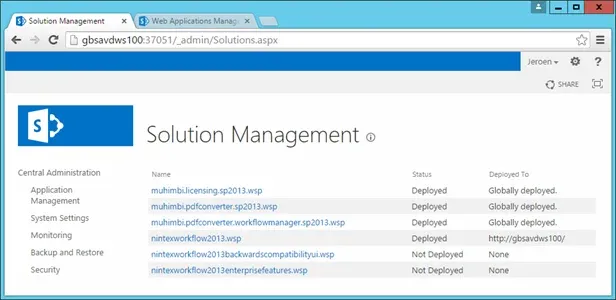
We recommend using Central Admin’s Solution Management screen to verify that the SharePoint WSP files were deployed without errors or warnings. The following WSP files are typically deployed.
- muhimbi.pdfconverter.*.wsp: This WSP contains the main PDF Converter facilities.
- muhimbi.licensing.*.wsp: The Muhimbi License Manager.
- muhimbi.pdfconverter.workflowmanager.*.wsp: Deployed on SharePoint 2013 (and newer) systems only. This WSP file contains the workflow actions for the new ‘Workflow Manager’ based workflows.
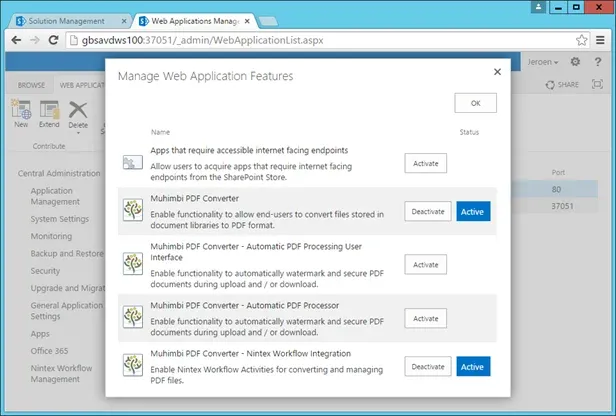
Once it has been confirmed that everything is installed correctly, you may want to enable or disable various SharePoint Features related to the Muhimbi PDF Converter. A full list of all SharePoint Features can be found in the SharePoint Administration Guide(opens in a new tab), but some of the key ones are:
- Muhimbi PDF Converter: Enable the main PDF Converter user interface and activate the workflow activities for SharePoint Designer and SharePoint 2010 workflows. This Feature is enabled by default.
- Muhimbi PDF Converter – Automatic PDF Processing User Interface: Enable the user interface for the real-time watermarking and security facility. Please enable Muhimbi PDF Converter – Automated PDF Processor before enabling this Feature.
- Muhimbi PDF Converter – Automated PDF Processor: Enable the module that controls real-time processing .
- Muhimbi PDF Converter – Nintex Workflow Integration: Enable Nintex Workflow integration.
Upgrading from a pre-8.0 version.
If you currently have a version of the Muhimbi PDF Converter installed, a version older than 8.0, then please uninstall that version manually before installing version 8.0. Before starting the uninstallation process have a look at the Upgrading section in the Administration Guide to make sure you don’t lose any changes that may have been made by manually adjusting various files.
- Uninstall SharePoint Front-End: Manually retract and remove the WSP files from Central Administration or run the uninstall.cmd scripts that ship alongside the version of the PDF Converter that is currently installed. Please make sure that both the PDF Converter and License Manager WSPs are uninstalled.
- Uninstall Conversion Service: Use Windows’ Add or Remove Programs facility to uninstall the conversion service.
Leave questions or comments below, or contact our friendly support desk(opens in a new tab), we love to help.


