Power BI Automated Export to PDF Using Power Automate
In this guide, you’ll convert a Power BI report to PDF using Power Automate and Muhimbi PDF Connector. This specific example shows how to create a flow that runs once a day and automates the process of delivering a PDF version of Power BI reports.
This example uses Power Automate to convert a Power BI report to PDF in SharePoint. However, you can save your PDF file to Dropbox, Google Drive, OneDrive, or any platform supported by Power Automate. You can also extend our example by adding additional automation, such as sending the converted PDF as an email.
Prerequisites
Before starting, ensure all prerequisites are in place:
-
Working knowledge of how to use Power Automate
-
A full, free, or trial subscription to [Muhimbi Document Converter][]
-
Permissions to publish Power BI reports
-
Appropriate privileges to create flows
Publishing Power BI Reports to a Web URL
-
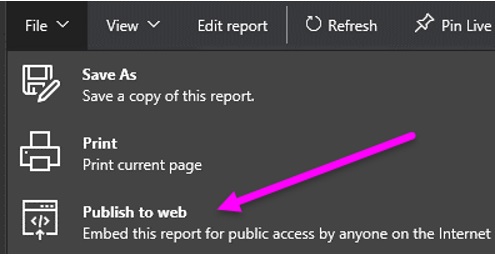
Navigate to a report in your workspace that you can edit, and select File > Publish to web.
-
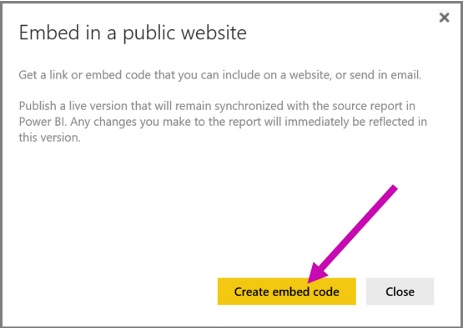
Review the content in the dialog, and click Create embed code.
-
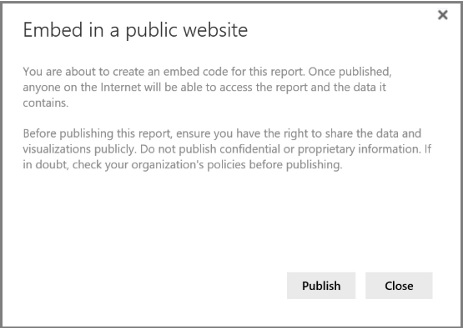
Review the warning, which is shown in image below. It ensures you’re aware that proceeding with this action will publish data in the public domain. If you agree with this, click Publish. Otherwise, click Close.
-
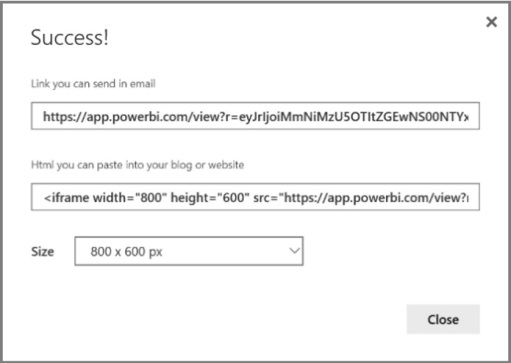
If you clicked Publish, you’ll be given a public URL. You can copy the topmost URL, which will be the public URL that you’ll use later in the flow
You have now successfully published the Power BI report to a web URL.
Using Power Automate to Convert Power BI Reports to PDF
-
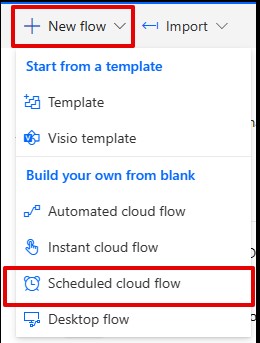
Log in to Power Automate and select the My Flows tab. Navigate to New flow > Scheduled cloud flow.
-
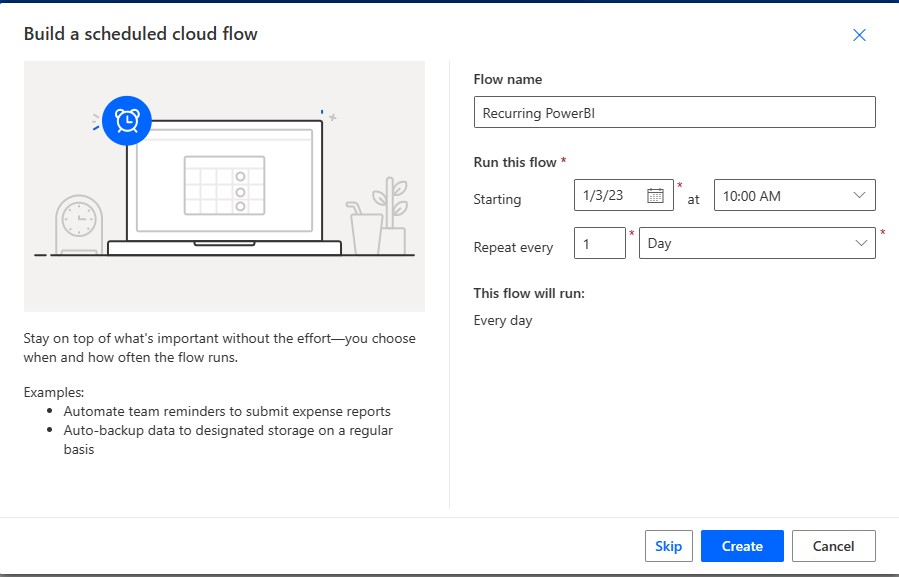
In the Build a scheduled cloud flow field, enter a name in the Flow name field, and specify a suitable starting date and time. In the Repeat every box, specify how often you want the flow to run. For example, specify 1 as the interval and Day as the frequency if you want the flow to run every day. Then, click Create.
-
A new flow will be created. Select + New step and add an action, and then type Muhimbi into the search box to search for all actions related to Muhimbi Document Converter. Select the Convert HTML to PDF action.
-
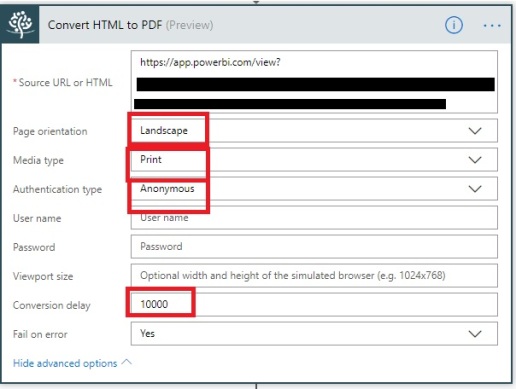
Configure the Convert HTML to PDF action by pasting the URL obtained from the previous section. Update the other parameters as shown in the screenshot below.
-
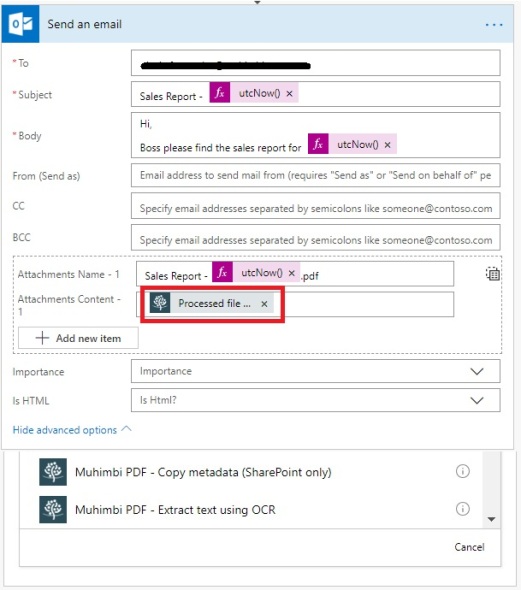
Select + New step and choose the Office 365 Outlook – Send an email (V2) action. Configure this as shown in the screenshot below.
-
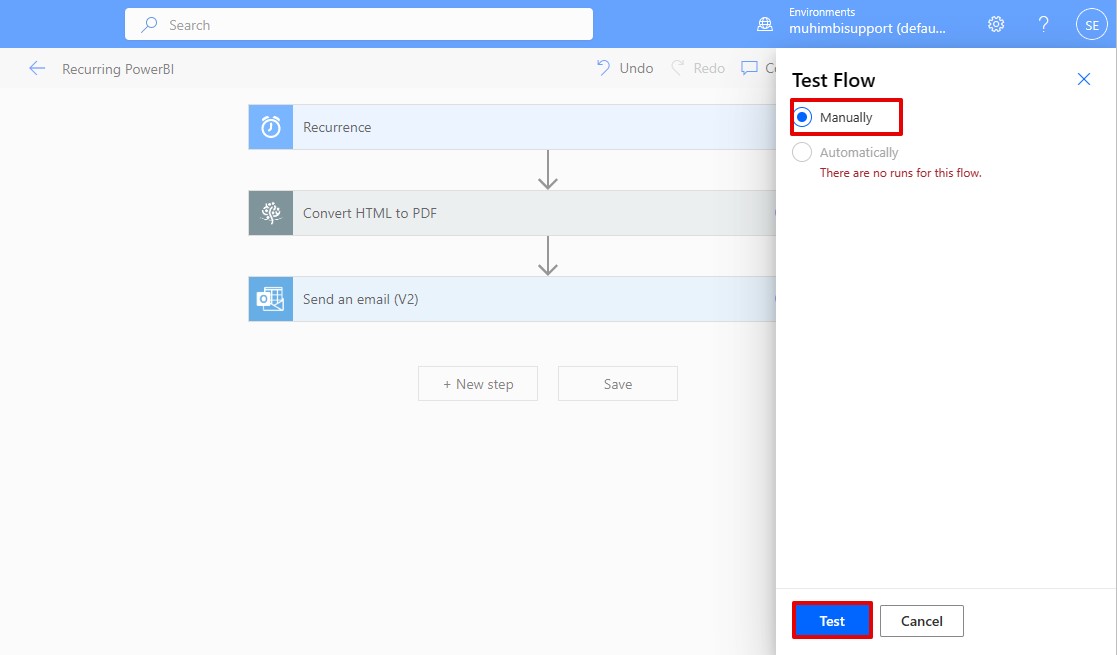
Publish and test the flow by clicking Test.
-
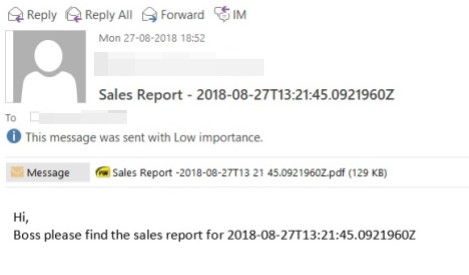
You should now receive an email with a Power BI report as a PDF attachment.
Frequently Asked Questions
-
When you use Publish to web, can the report or visual be viewed by anyone on the internet?
Yes, anyone on the internet can view the report, as no authentication is used when viewing these reports. Only use Publish to web with reports and data that anyone on the internet (unauthenticated members of the public) should be able to see. This includes detail level data that’s aggregated in your reports. Before publishing a report, ensure you have the right to share the data and visualizations publicly. Do not publish confidential or proprietary information. If in doubt, check your organization’s policies before publishing.
Workaround: The generated URL cannot be guessed unless it’s physically shared.
-
My report has multiple pages. Which page does it convert?
It converts the first (default) page.
Workaround: If you want to convert a different page, then append &pageName=ReportSection2 to the end of the URL, where 2 is the page number. For more details, refer to this issue.
-
Does the PDF capture refreshed data?
Yes, it captures refreshed data. Data refreshes are automatically reflected in your embedded report or visual. It can take approximately 1 hour for refreshed data to be visible. You can disable automatic refresh by selecting the option not to refresh on the schedule for the data set used by the report.