Remove PDF pages in SharePoint
Muhimbi’s PDF Editor for SharePoint lets you remove PDF pages directly in SharePoint Online or on-premises without needing to download and open your PDF in another tool. Simply open your PDF in SharePoint, select the page you want to delete, and save your PDF.
Step 1: Opening PDFs

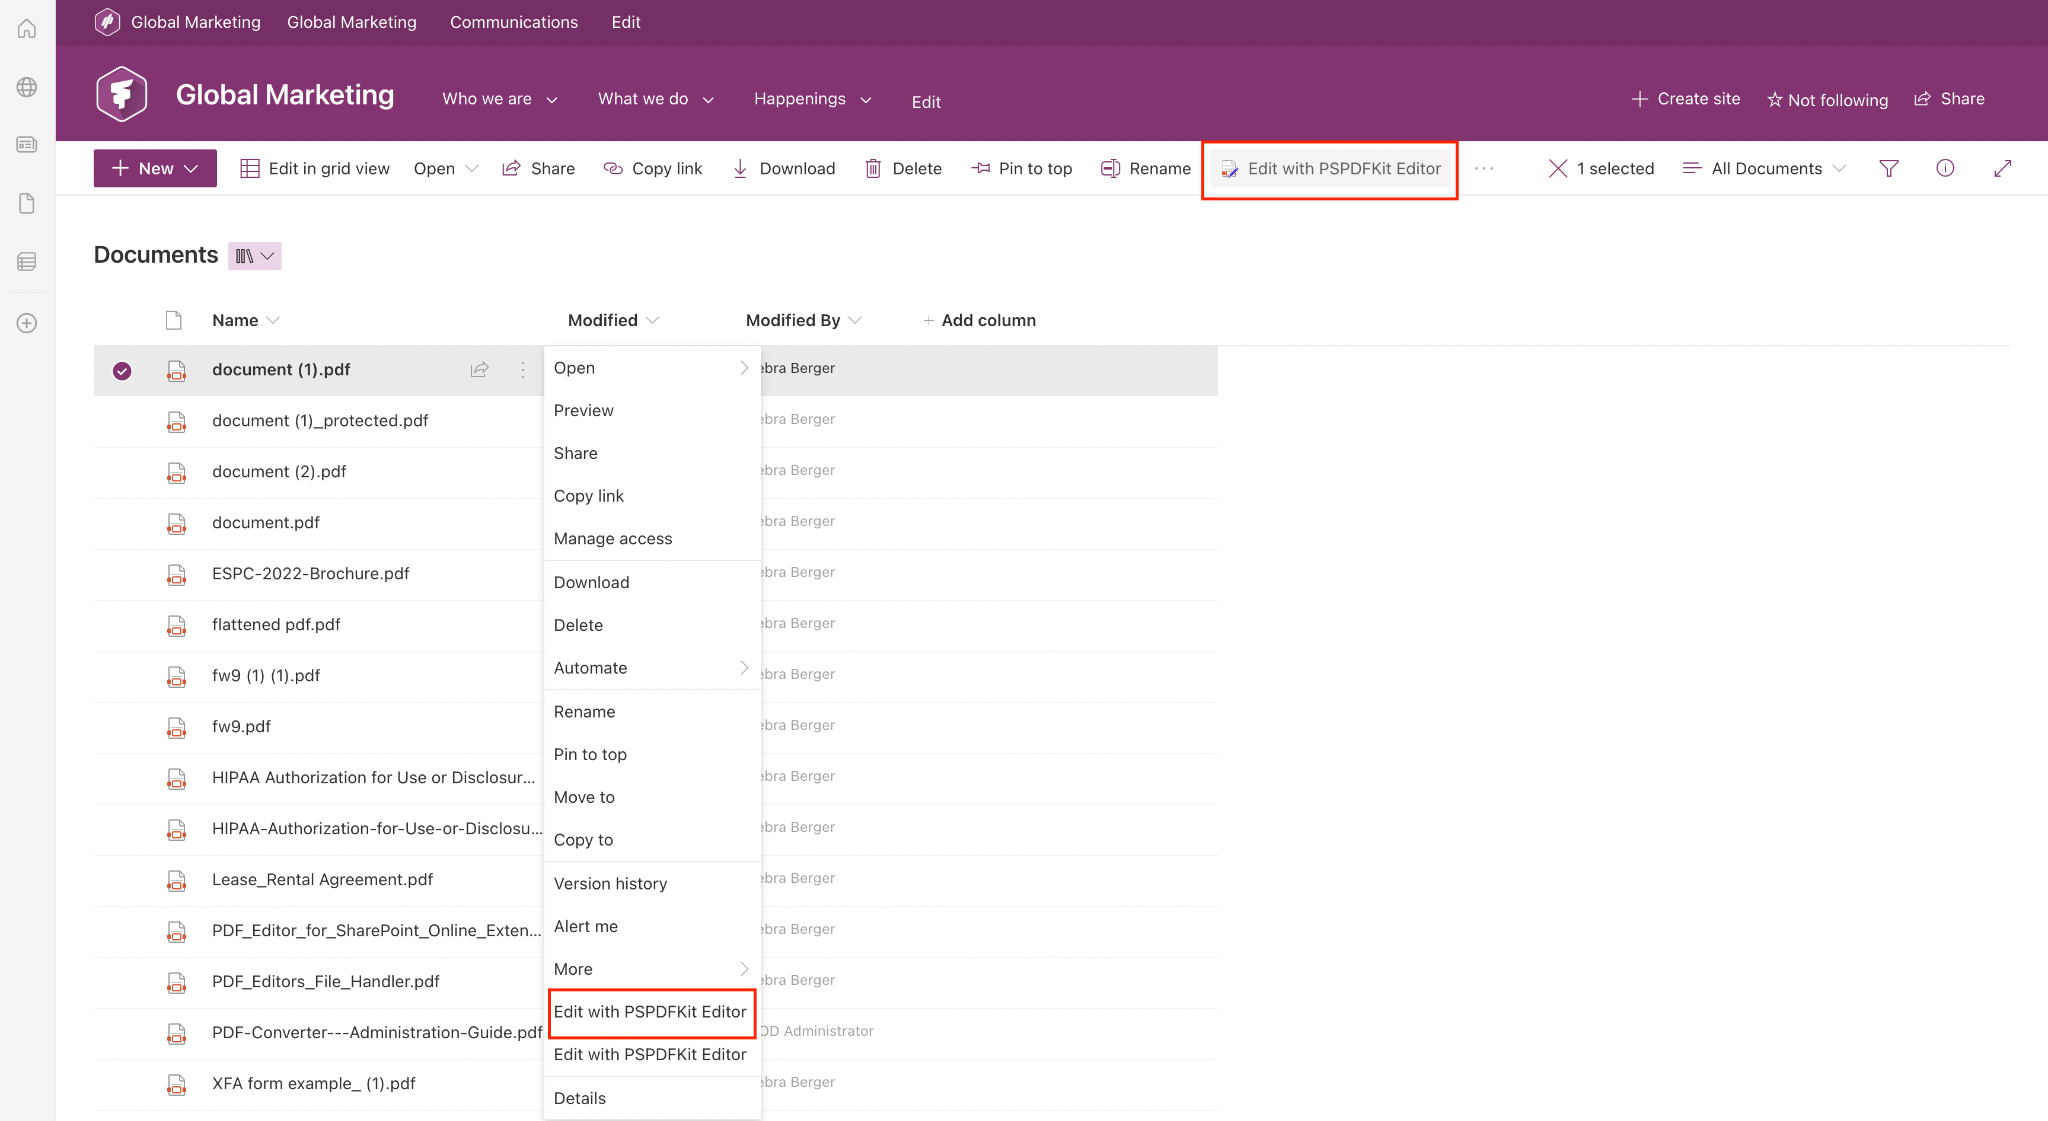
Select a PDF from the SharePoint library and right-click on the three dots menu. Click Edit with PSPDFKit Editor. In the top-right toolbar, click the icon to the left of the magnifying glass to open the Document Editor.
Step 2: Deleting pages

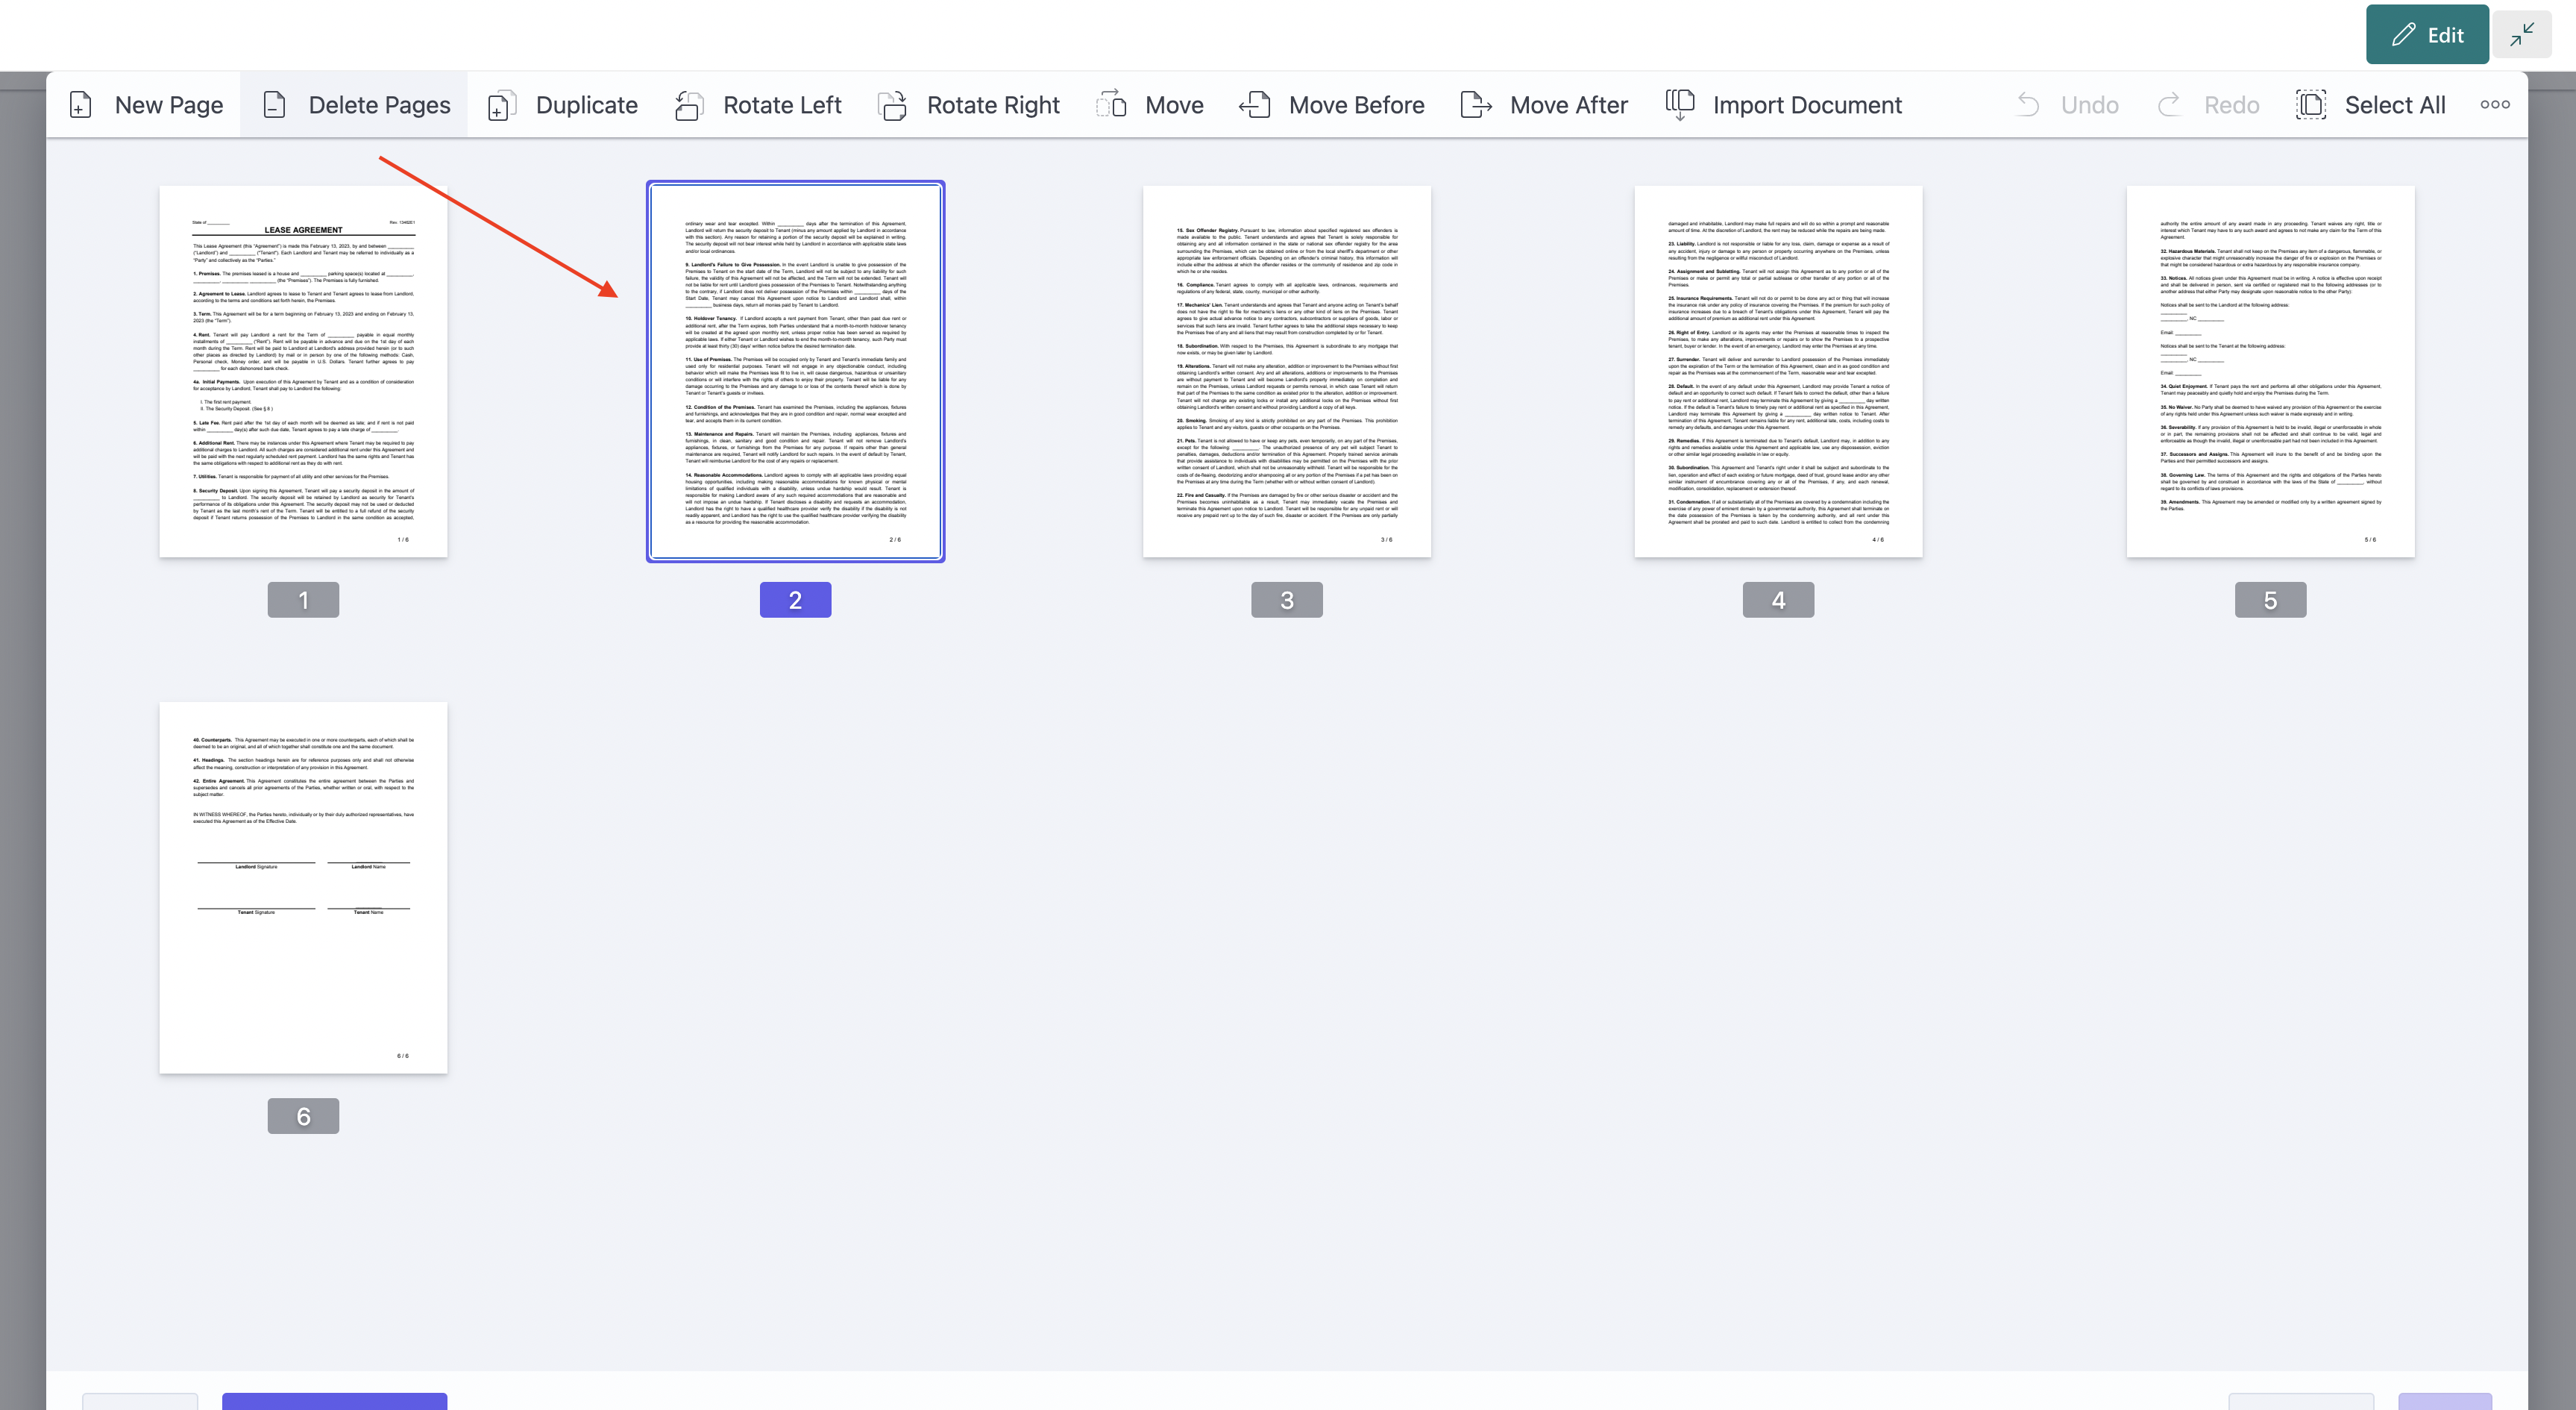
Select the page(s) you want to remove from your PDF and click Delete Pages. The page(s) will automatically be deleted from the PDF. If you accidentally deleted the wrong page, click Undo to retrieve it.
Step 3: Saving or exporting the new PDF file
Click Save to save the changes to your PDF document. Click Save As to export the PDF to your computer.
Free trial
Try PDF Editor for SharePoint Online free for 14 days by downloading the app directly from Microsoft App Source. This is a full trial version, without watermarks, but limited in time. There’s an unlimited trial version, where all files are watermarked, and you can choose between three different installations: file handler, web part, or online extension. Refer to the table on the free trial page to learn more.
PDF Editor for SharePoint On-Premises covers all different license types and SharePoint editions (2013–2019 and SE). The detailed installation guide is included in the download. During the free trial, all your documents will be watermarked.