Embed Outlook and Google calendars in your dashboard
Getting more out of dashboards
Nutrient Workflow Dashboards are a great way to communicate information and provide users with tools to get their work done.
We've discussed the idea of using your Nutrient Workflow dashboard as an "Intranet"(opens in a new tab) in the past, but we wanted to point out a specific use case that you may want to employ.
The HTML Panel in our dashboard allows for rich text formatting and embedding links, images, videos, etc. but it also allows you to embed code to display things like iFrames that display content from another Website. Currently, we restrict the use of javascript in the HTML panel for security reasons.
Embedding calendars
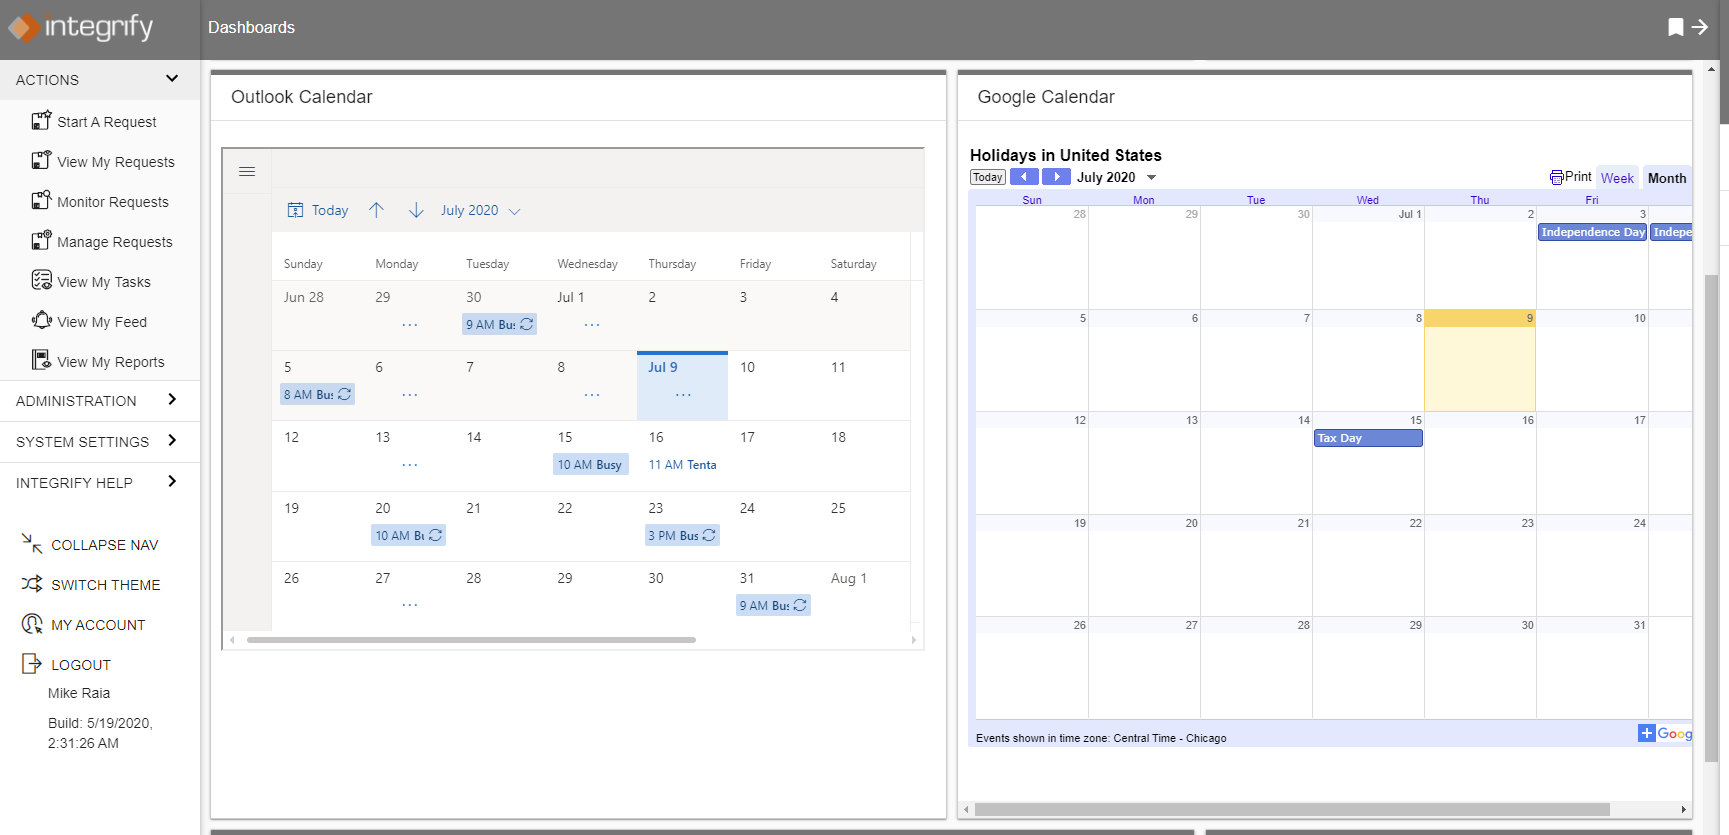
All this is leading to the idea of embedding calendars on your dashboard. It's fairly simple to embed both Outlook and Google calendars as panels within any dashboard. Take a look at the example below:

Embedding calendars can be helpful for sharing schedules with employees. For instance, the Google Calendar shown is a public US Holiday calendar. The Outlook Calendar shown is a Marketing department campaign calendar.
You might want to share
- a project calendar
- a product launch calendar
- an HR lunch and learn calendar
- an executive meeting calendar
Really, any calendar that's shared is fair game. Here's how to do it.
Embedding an Outlook calendar
Note: Depending on which version of Outlook your company is using, the instructions may differ slightly. Also, you'll need to have access to the Web version of Outlook to do this.
- Go to the Nutrient Workflow dashboard you want to add the calendar to in Edit mode.
- Create a new HTML Panel by clicking "Add Item" at the top and selecting "HTML Panel."
- Click on "Edit Body" in the new panel and then click on the <> button in the toolbar, this will open a Source Code window. Leave this open for now.
- In a new browser window, using the Web version of Outlook, go to Settings and then "View All Settings."
- Click on "Shared Calendars."
- Under "Publish a Calendar," select the calendar you want to publish.
- Select the permission level you'd like. You can allow people to just see time blocked out, titles and locations, or all details.
- Click "Publish." Outlook will generate two links. Leave this window open.
- Return to the Nutrient Workflow Dashboard. Copy the code below and paste it into the Source Code window.
- Return to Outlook and click on the generated HTML link and choose "Copy Link."
- Return to the Nutrient Workflow Dashboard and paste the HTML link over where it says PASTE OUTLOOK LINK HERE in the source code. Make sure to paste it BETWEEN the quotes so the quotes aren't deleted.
- Click "OK" in the source code window.
- In a second or two, you'll see your calendar display.
- Click "Save Content"
Embedding a Google calendar
NOTE: Your embedded calendar will only be visible to people you've shared it with. To allow all visitors to see your calendar, you'll need to make it public(opens in a new tab).
- Go to the Nutrient Workflow dashboard you want to add the calendar to in Edit mode.
- Create a new HTML Panel by clicking "Add Item" at the top and selecting "HTML Panel."
- Click on "Edit Body" in the new panel and then click on the <> button in the toolbar, this will open a Source Code window. Leave this open for now.
- Open Google Calendar in a Web browser.
- In the top right, click "Settings."
- On the left side of the screen, click the name of the calendar you want to embed.
- In the "Integrate calendar" section, copy the code displayed (the iFrame code is provided directly in this case).
- Under the embed code, click Customize.
- Choose your options, then copy the HTML code displayed.
- Return to your Nutrient Workflow Dashboard and paste the code into the Source Code window.
- Click the "OK" button.
- Click Save "Save Content."
Please note that Nutrient Workflow does not support and accepts no responsibility for issues related to Outlook or Google Calendar. Please use the instructions above at your own risk.