How to configure the dynamic assigner task
The Dynamic Assigner task allows the use of SQL and collected form data (or other request-specific information) to define task recipients.
Dynamic Assigner Task Configuration
To configure theDynamic Assigner task, select it from the Task options and drag it to your process canvas:
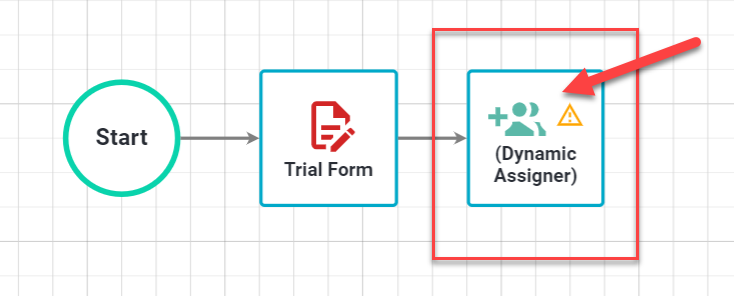
Select Configuration > Configure Task to access the window below:
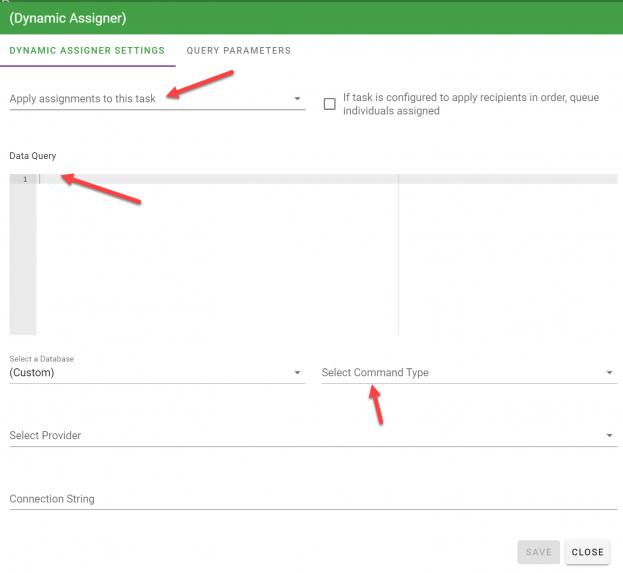
Note: To configure the dynamic assigner task you must define the following, located on the settings tab.
-
Apply Assignments To This Task : This is the task to which you want to assign recipients. Only tasks included in your process will be shown. The task assigned should never be the dynamic assigner task itself.
-
Data Query : A SQL statement is used to return the users to be assigned as task recipients. A valid profile field pulled directly from the Integrify Contact table, such as Email, Contact ID, or Username, must be included in the results set. Data collected in the request, or request-related information, can be used within the query. (See Calling a Stored Procedure below for details on configuring this option)
-
Select Command Type : Defines whether a text-based query or stored procedure.
Optional Settings
-
If task is configured to apply recipients in order, queue individuals assigned : Slide Button. If selected (and the process rule is “For All Recipients in Order”) the process will retrieve, retain and enforce the order and processing information at the time that this request first fires. If not selected the system will default to No.
-
Source : Select the predefined data source that the query or stored procedure will run against. If no source is selected the system will default to the Integrify Database.
Calling a Stored Procedure
As stated above, another option available with the Dynamic Assigner task is the ability call a stored procedure to return assignment data.
To configure the task to use a Stored Procedure rather than SQL Statement (Text-based Data Query) you would need to adjust your settings in the Configure screen as follows:
-
Data Query: exec spName @Parameters
spName = the stored procedure you wish to execute
@Parameters = the Query Parameters or data you wish to use within the operation -
Command Type: Select stored procedure from the select list.
Note: The Dynamic Assigner does not accept OUT parameters from a stored procedure - data must be returned via the procedure itself.
To set the Query Parameters , or map specific Data Values from the request or request related information for use in the assignment, click on the Query Parameters tab:

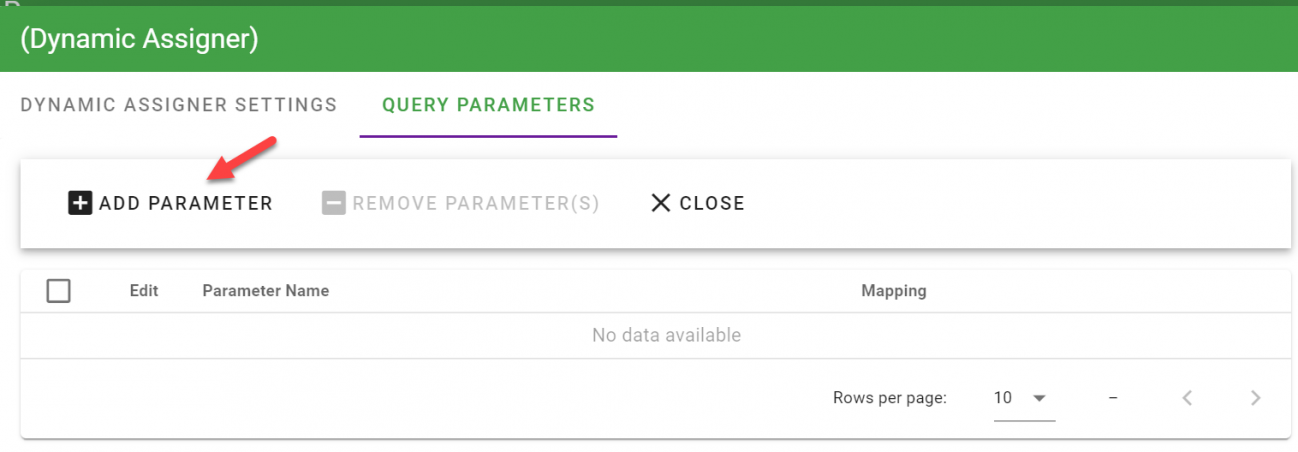
Map each parameter to the source of the data within the request and click “Close” on the Configure screen when complete.
Oracle Users Only: Take care on order of the parameters. Due to an Oracle Provider constraint, they must be created in the exact same order in the Query Parameters screen.
Training Example
Our training example is a New Employee Onboarding Process. In this process, the employee will fill in an initial New Employee Information form. After the completion of this form, the Dynamic Assigner plugin will execute and use data provided by the New Employee to assign the appropriate HR representative for initial approval.
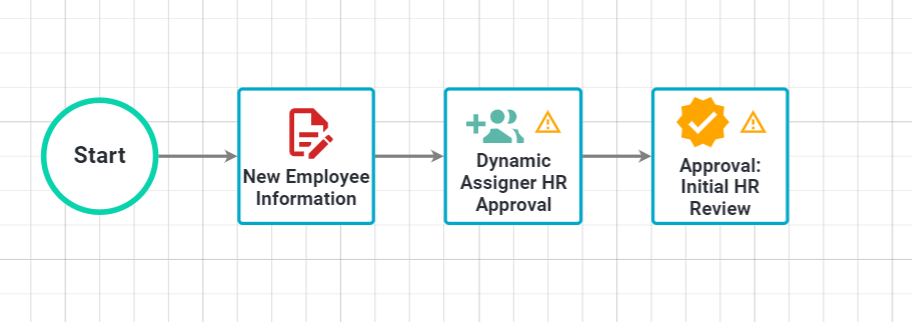
In this example, we will assume that the HR organization is large and experiences high turnover. For those reasons, the use of traditional recipient assignments would lead to a complex set of rules and require constant maintenance and review. Instead, the Dynamic Assigner task will use the State value provided in the form, perform a query against a cross-reference table and the Contact table, and assign the appropriate HR Group to approve the form for the New Employee.
The Dynamic Assigner Settings for this example are as follows:
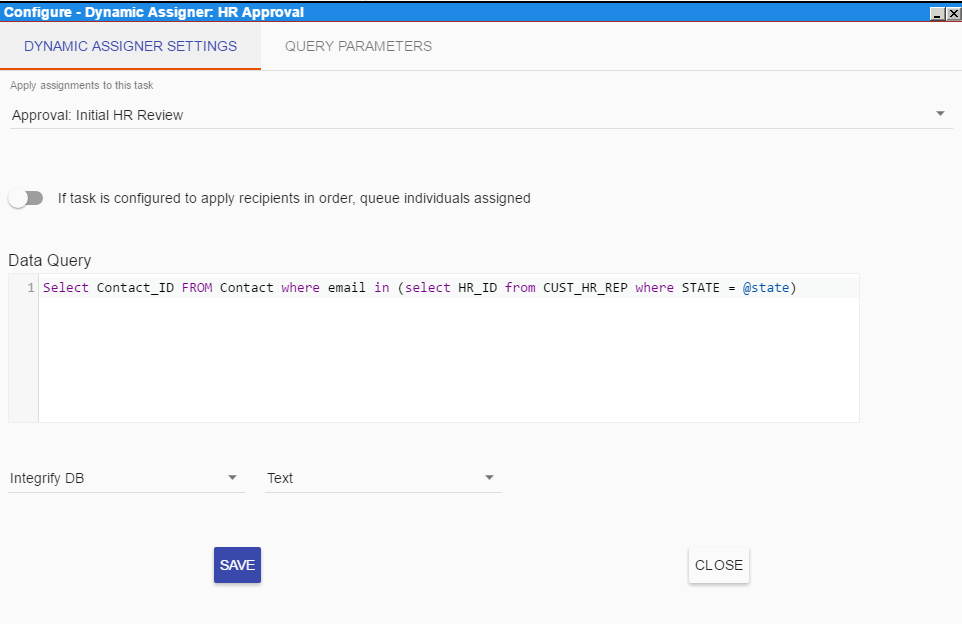
Note: The SQL statement must pull a distinct Contact_ID element from the Integrify Contact table for the Dynamic Assigner to execute properly. If you use a custom table to do your own user-permission tracking, be sure that your query returns that integer field “AS Contact_ID”.
The connection between the data collected in the form and the data query above is the query parameter of @State. To complete the mapping you must also set the Query Parameters tab settings. In this instance the source is Data from a form, the Task Containing that form and the specific field are then mapped. Multiple parameters, or the use of the same parameter multiple times, is permitted.
Specific mappings for this training example are as follows:
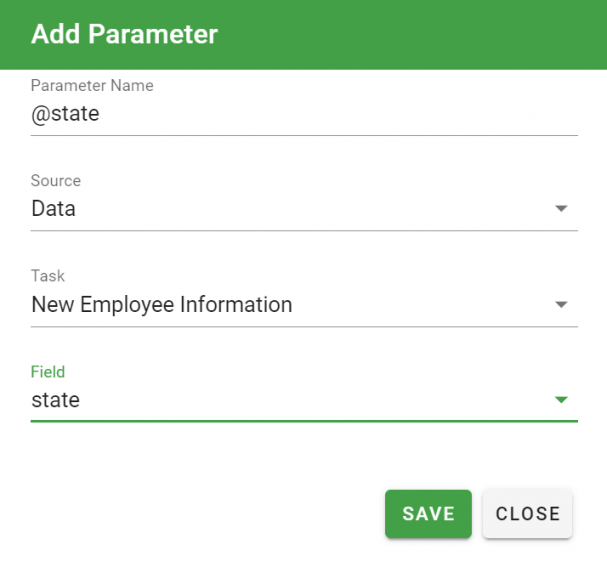
Click Save , then Close on the Configure Screen to save these mappings and complete your configuration.
To verify correct configuration, you can open the recipients list of the task you are setting assignments for and it should have a recipient with a name like “XXX: from Dynamic Assigner”.
When the New Employee submits their initial form the Dynamic Assigner plugin will check our custom table, select the name of the HR Representative assigned to that State and assign the HR Review task to that contact from the Integrify system.