Meet Sarah, a seasoned contract manager with a tendency for precision. Sarah’s daily chores involved diving into a sea of contracts, each one bearing the weight of manual revisions, approval bottlenecks, and the constant fear of missing a crucial detail.
Challenges of Contract Management in PDF Format
In Sarah’s world, the challenges resembled a labyrinth. Manual revisions led to version control nightmares, making it tedious to ensure every contract was up-to-date. Collaborating on PDFs felt like a relay race with high stakes, risking miscommunication and errors. Approvals, once straightforward, turned into bottlenecks, causing delays and frustration.
Benefits of PDF Editor for SharePoint
Discover PDF Editor for SharePoint, the behind-the-scenes hero in Sarah’s contract management journey. With this tool, dealing with contracts went from being a daily headache to a place of smooth teamwork and quick approvals. Real-time editing, working together seamlessly, and electronic signatures became Sarah’s go-to moves. The outcome? Sarah slashed revision time by 30%, boosted collaboration efficiency by 40%, and got approvals at lightning speed—50% faster than before.
How to Edit Text in PDF Directly in SharePoint
Our PDF Editor for SharePoint lets you edit PDF text natively in SharePoint Online or on-premises. Quickly make text changes in PDF contracts without leaving SharePoint or opening a third-party plugin.
If you haven’t installed PDF Editor yet, you can get it here, on Microsoft App Source(Muhimbi is our sister company, as both Aquaforest and Muhimbi were acquired by PSPDFKit.) . If you need help with installation, check the video tutorial.
Step 1: Opening a PDF File
Go to the SharePoint library and click Upload to import a PDF from your computer, or select an existing PDF from the library.
Click Open from the dropdown menu and choose Open in PDF Editor.
Step 2: Editing Text with the Content Editor
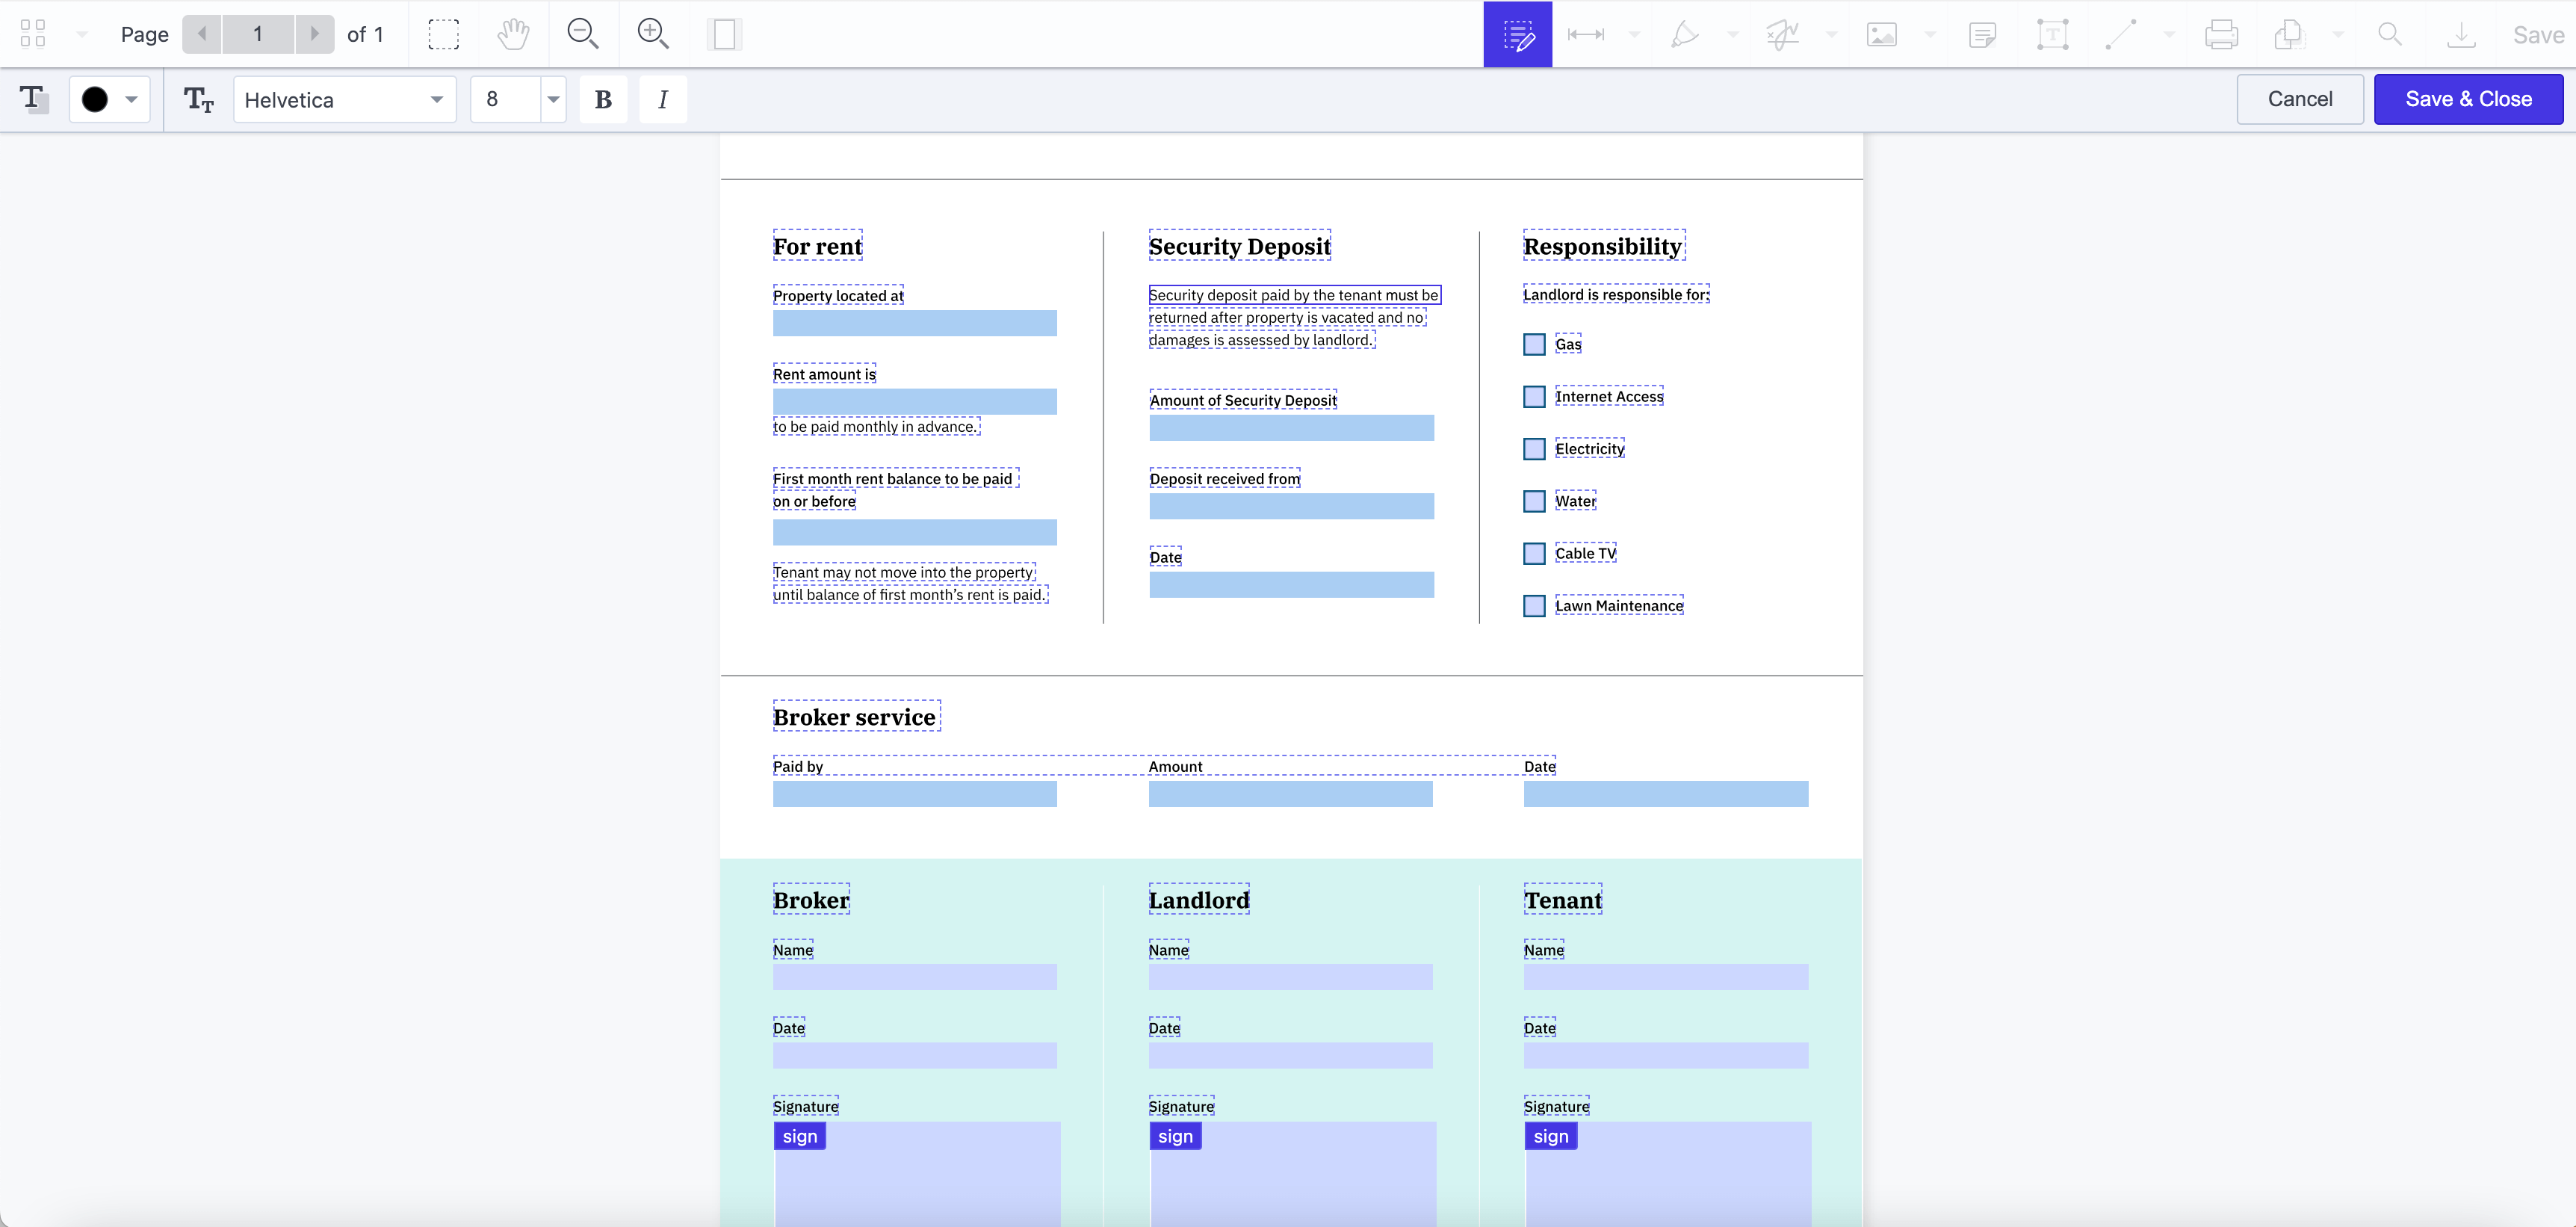
Once you open a PDF in SharePoint PDF Editor, click Content Editor, which is the first icon in the toolbar on the right, and start editing your PDF.
Use the top-left toolbar to move between pages, zoom in, or zoom out.
Click the text you want to edit and the PDF will become fully editable. Add more content, rewrite lines, delete sentences, and make any changes to your text directly on the PDF without leaving SharePoint.
Step 3: Formatting Text in PDFs
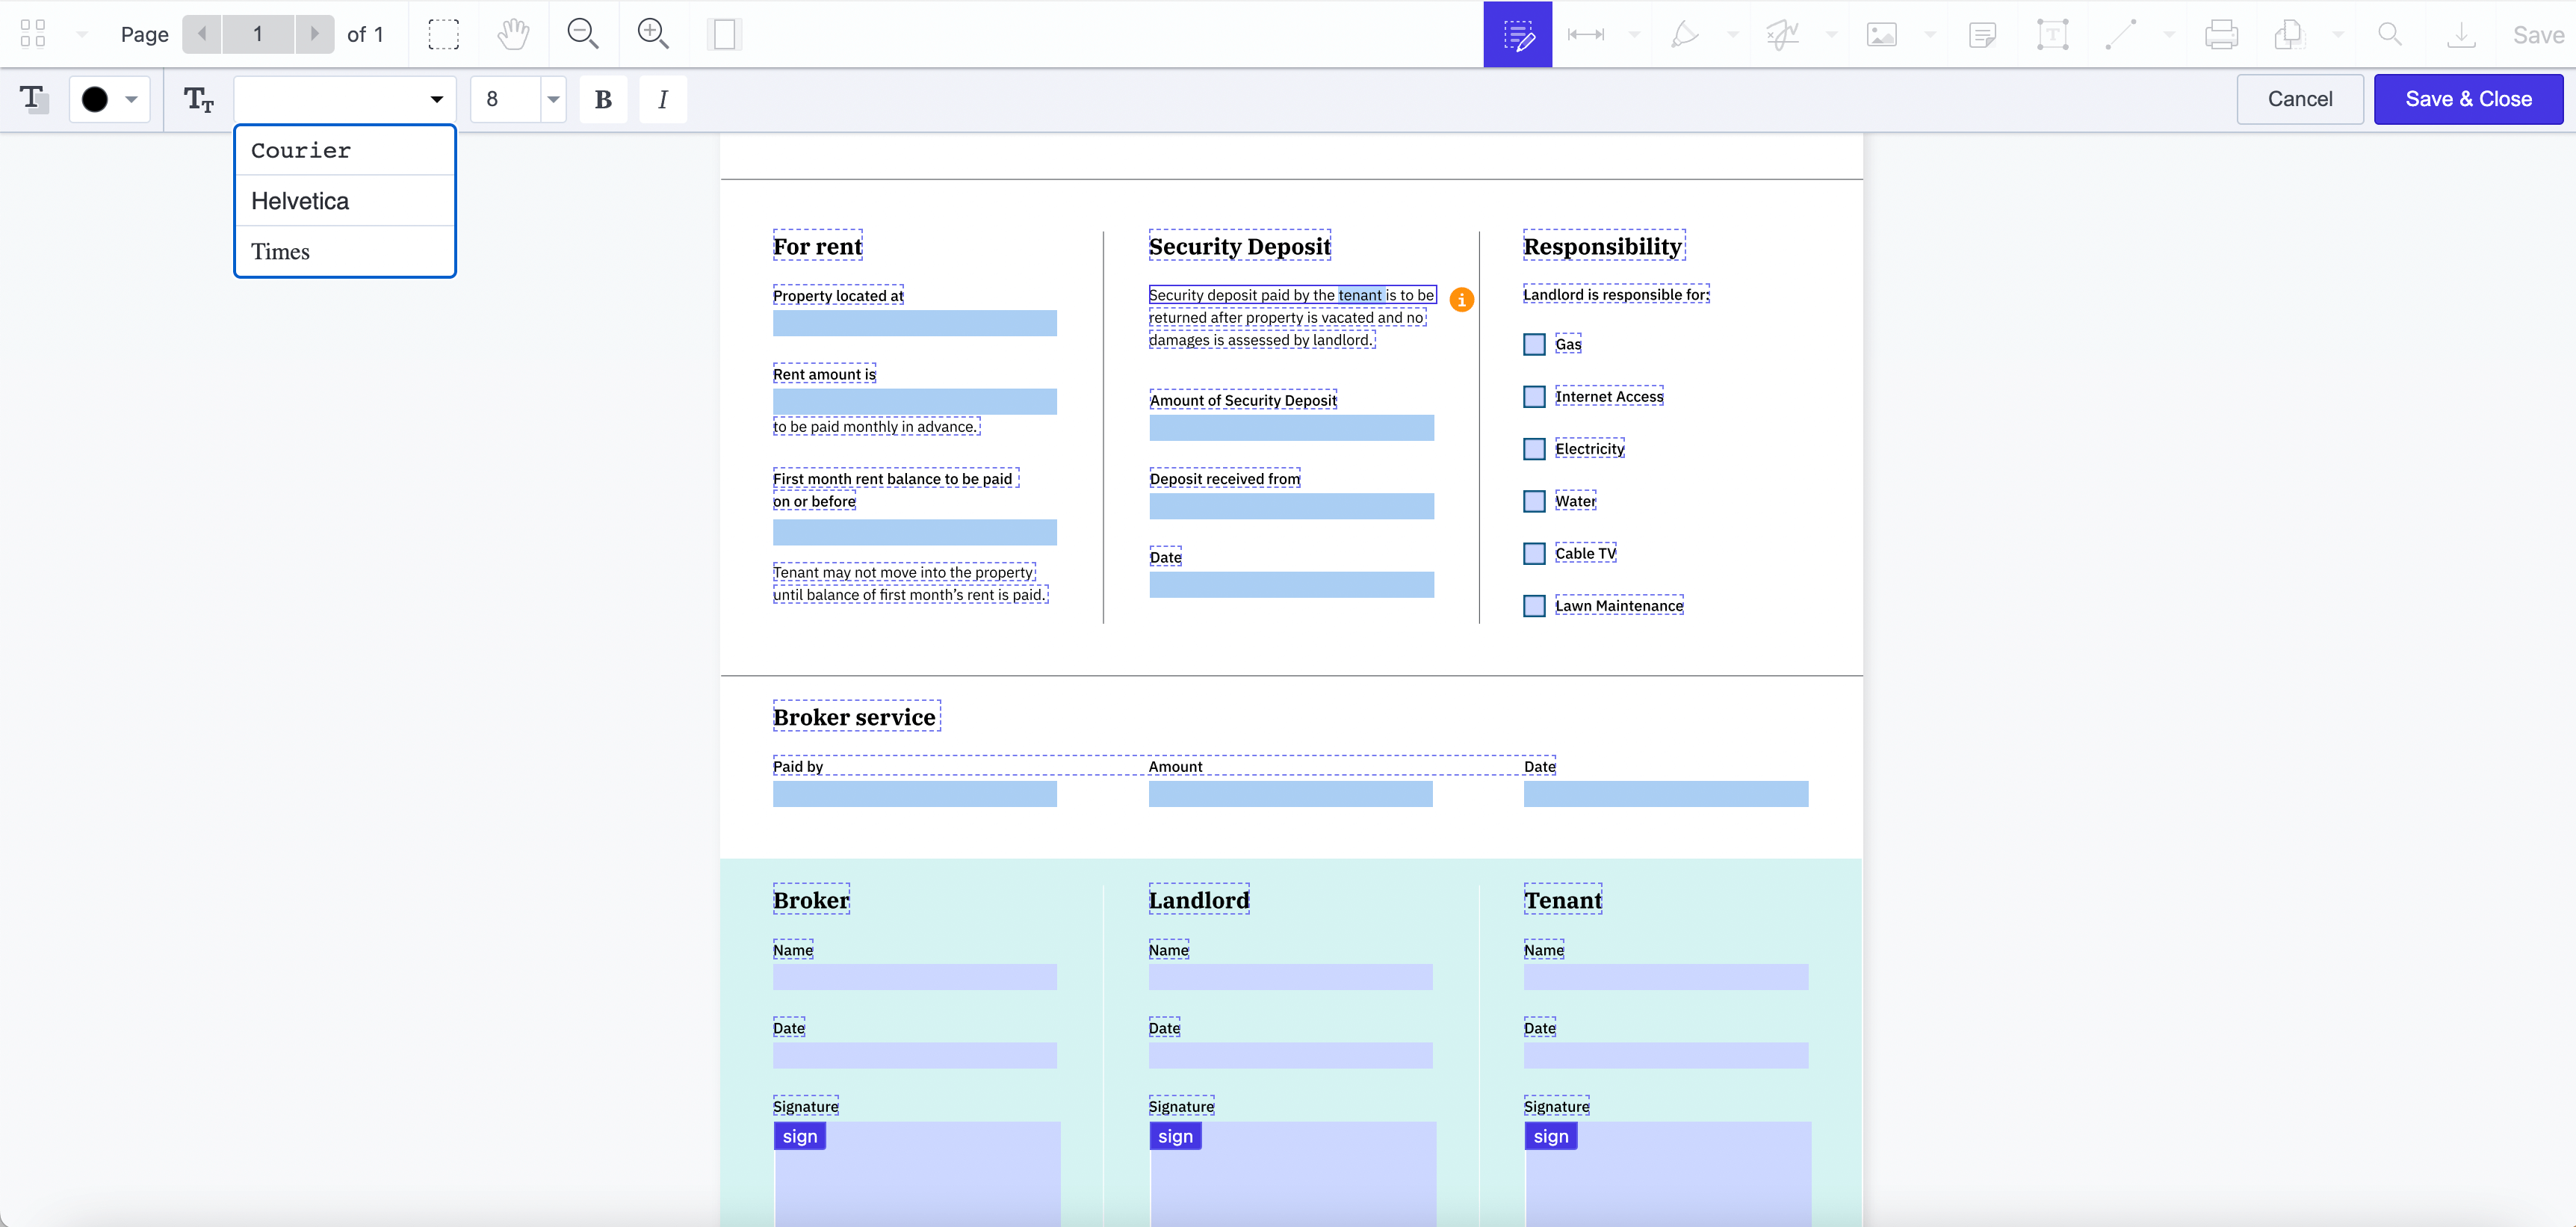
In addition to editing text directly on a PDF document, you can also change the font style, size, and color of a single word or an entire sentence. Select the text you want to format and then choose the font from the dropdown menu in the top-left corner.
Click Save & Close to save the changes to your PDF in SharePoint.
How to add annotations to PDF
Adding comments to PDF
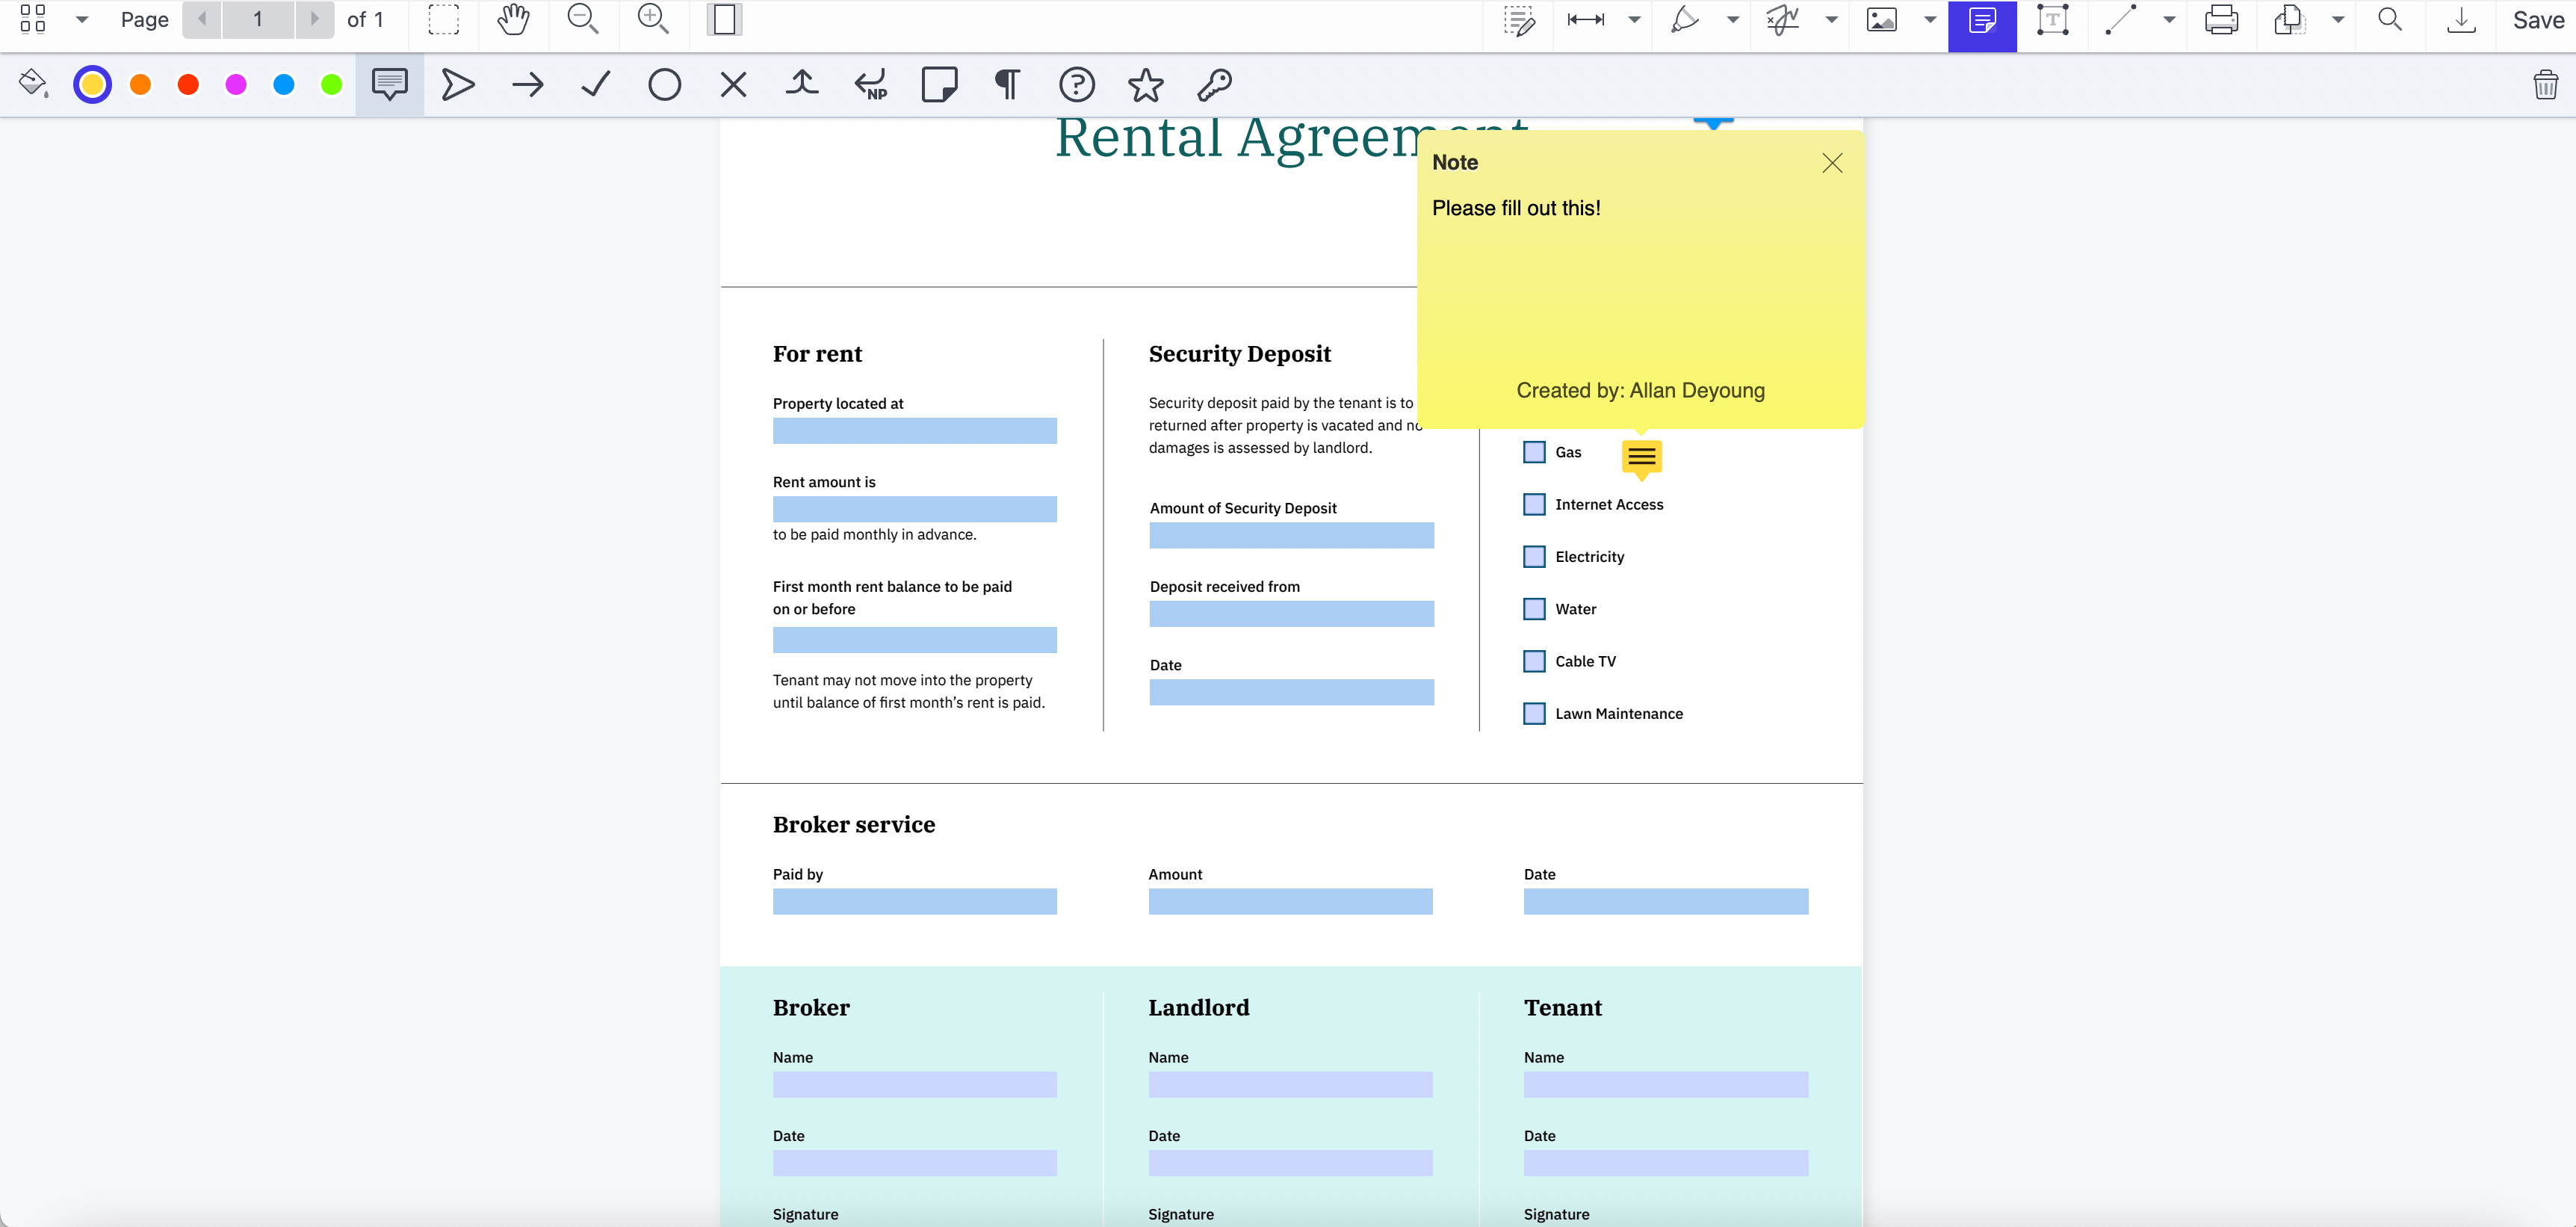
Open the PDF annotation tool by clicking the Note icon.
Select the exact area in the PDF document where you want to add comments and click to open the note field. Type the comment and close the dialog. The PDF annotation will be saved, and you can drag it to another place within the document.
In the top-left corner of the screen, there is a wide range of options to change the look of your annotations. The default color of the note field is yellow, but there are five other colors to choose from. You can also change the look of the icon of the closed annotation, depending on the type of comment added to the PDF document.
Highlighting Text in PDFs
There are two ways to highlight text in PDF.
-
Click the third icon from the left in the top-right toolbar to select one of the following actions:
-
Drawing
-
Freeform Highlight (for highlighting any type of content, whether image or text)
-
Text Highlight
-
Eraser
-
Select a word, a phrase, or a sentence and the following actions will be available:
-
Text Highlight
-
Strikethrough
-
Underline
-
Squiggle
-
Redaction
Depending on the type of annotation, some additional settings may show up in the top-left corner, where you can choose a different kind of font, size, and color. Once you perform the highlight text action, this left toolbar will show up where you can change the color of the highlight annotation.
How to Add Links to PDFs in SharePoint
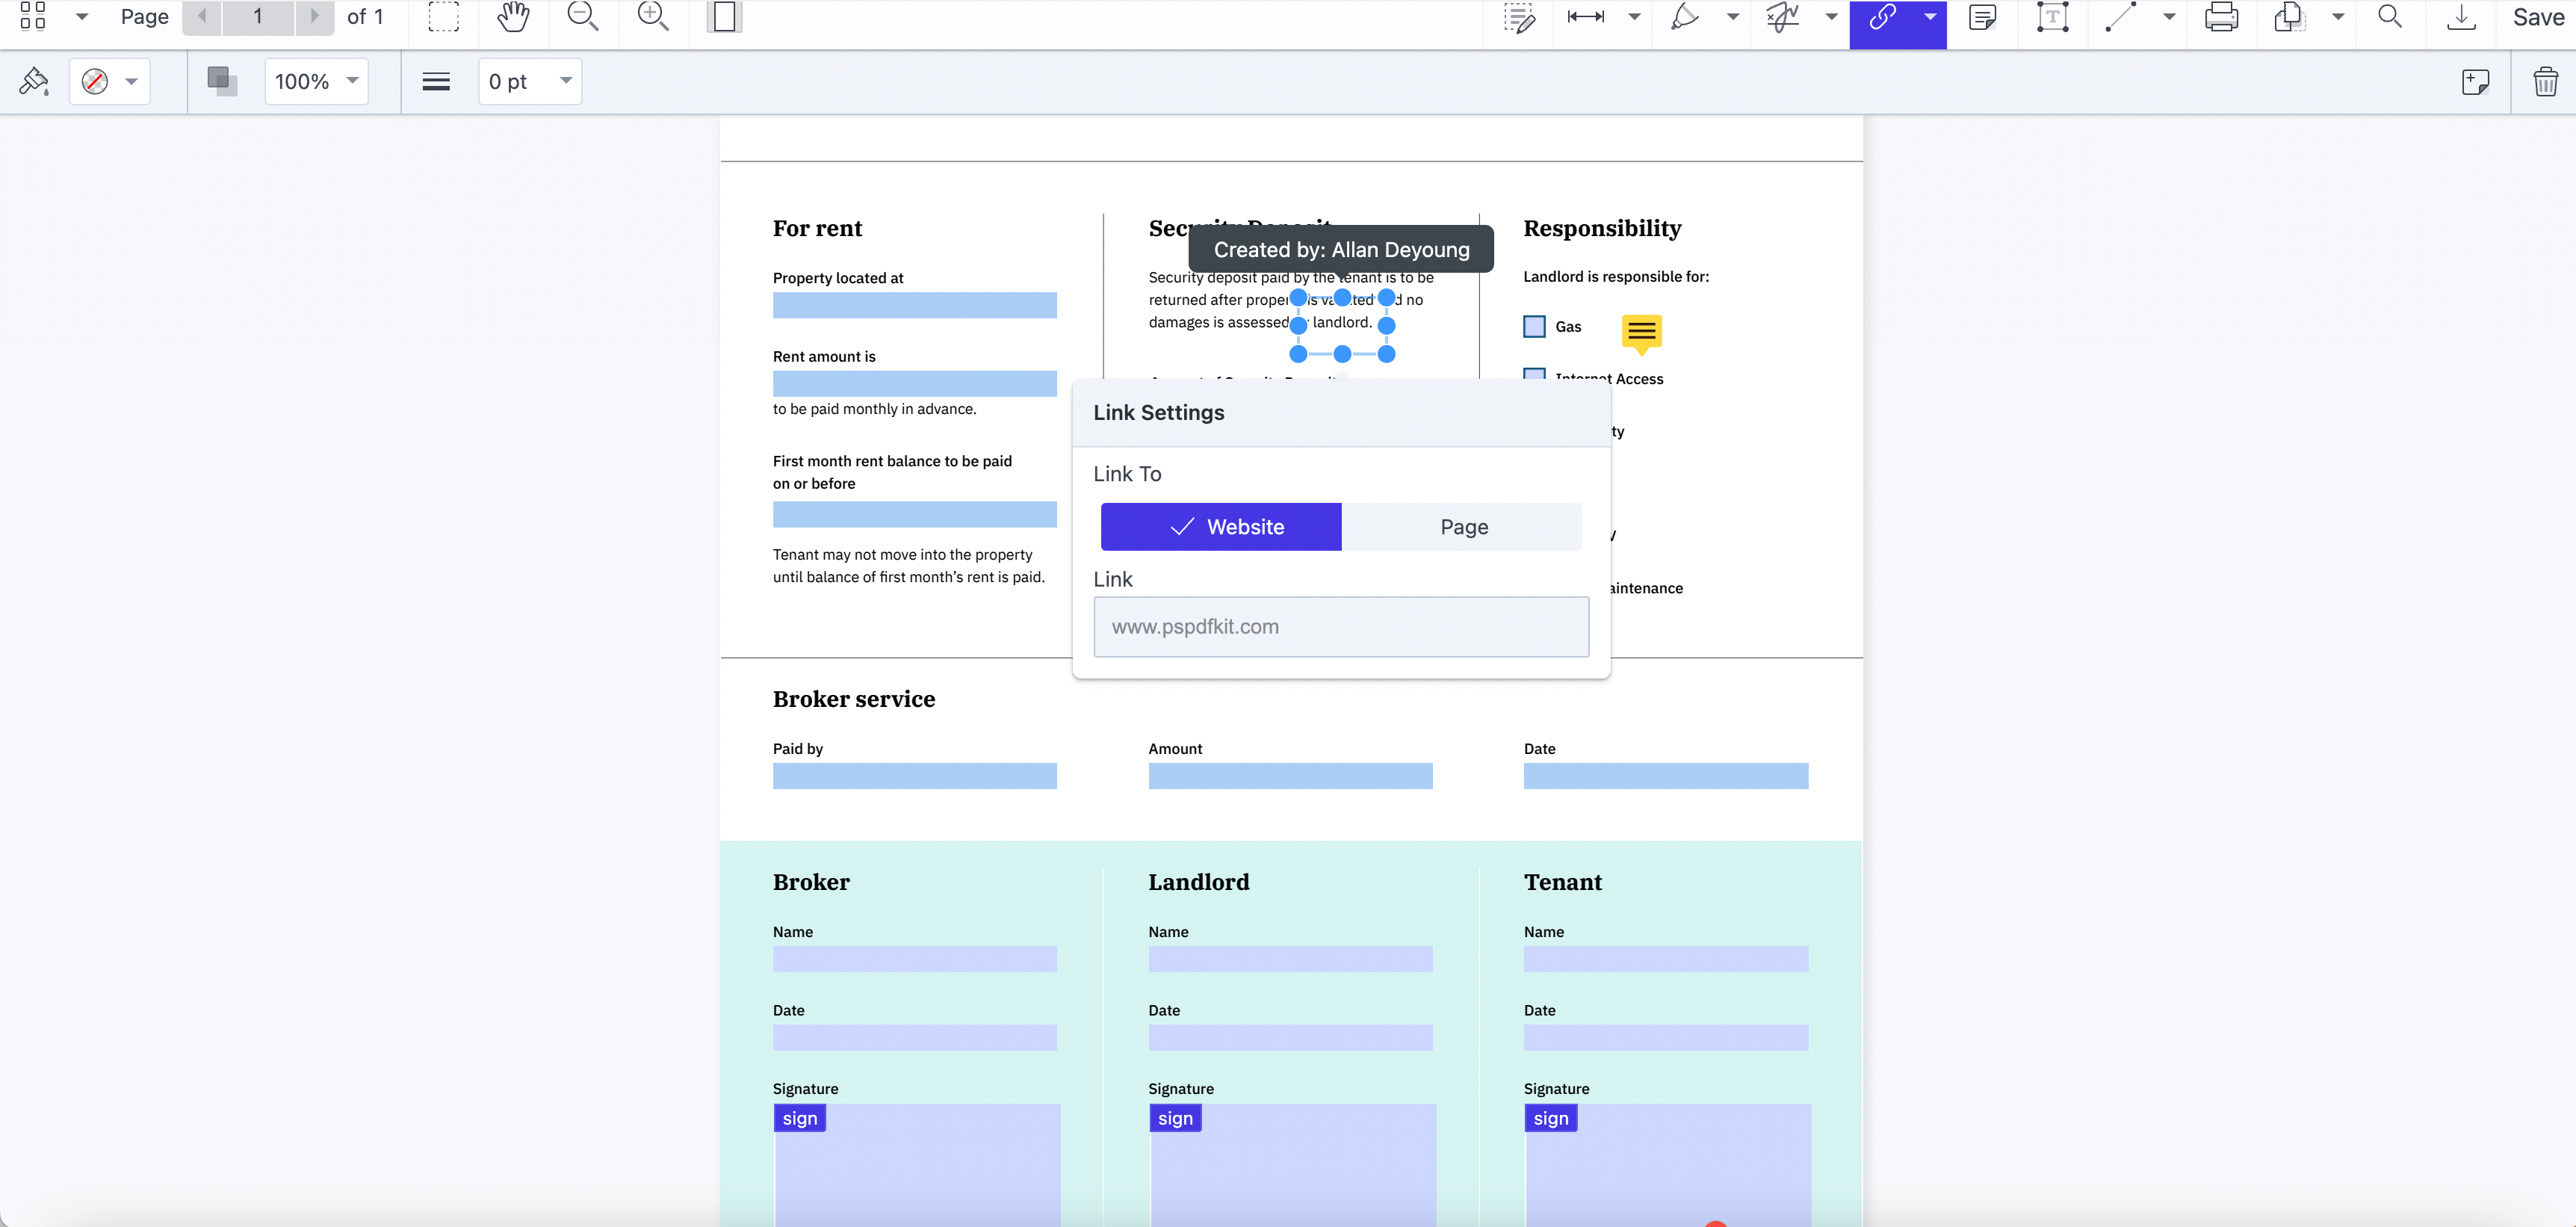
Click the arrow next to the image icon to open a dropdown menu, and choose the Link option.
Select the area in the document where you want to add a link, and hold the left mouse button to move the link annotation around.
The Link Settings window will pop up asking you to enter a website URL or a page in the document.
When the Link Settings window is open, additional settings will appear under the main toolbar. Choose a border color, the opacity percentage, and the thickness of the line. The link annotation can be a different color for better visibility.
You can move the link annotation anywhere on the page. In the top-right corner, click the recycle bin icon to delete the link from your PDF. You can also add a comment to the link by clicking the Note icon next to the recycle bin.
Finally, click Save to save the changes to your PDF document.
How to add signatures to PDF
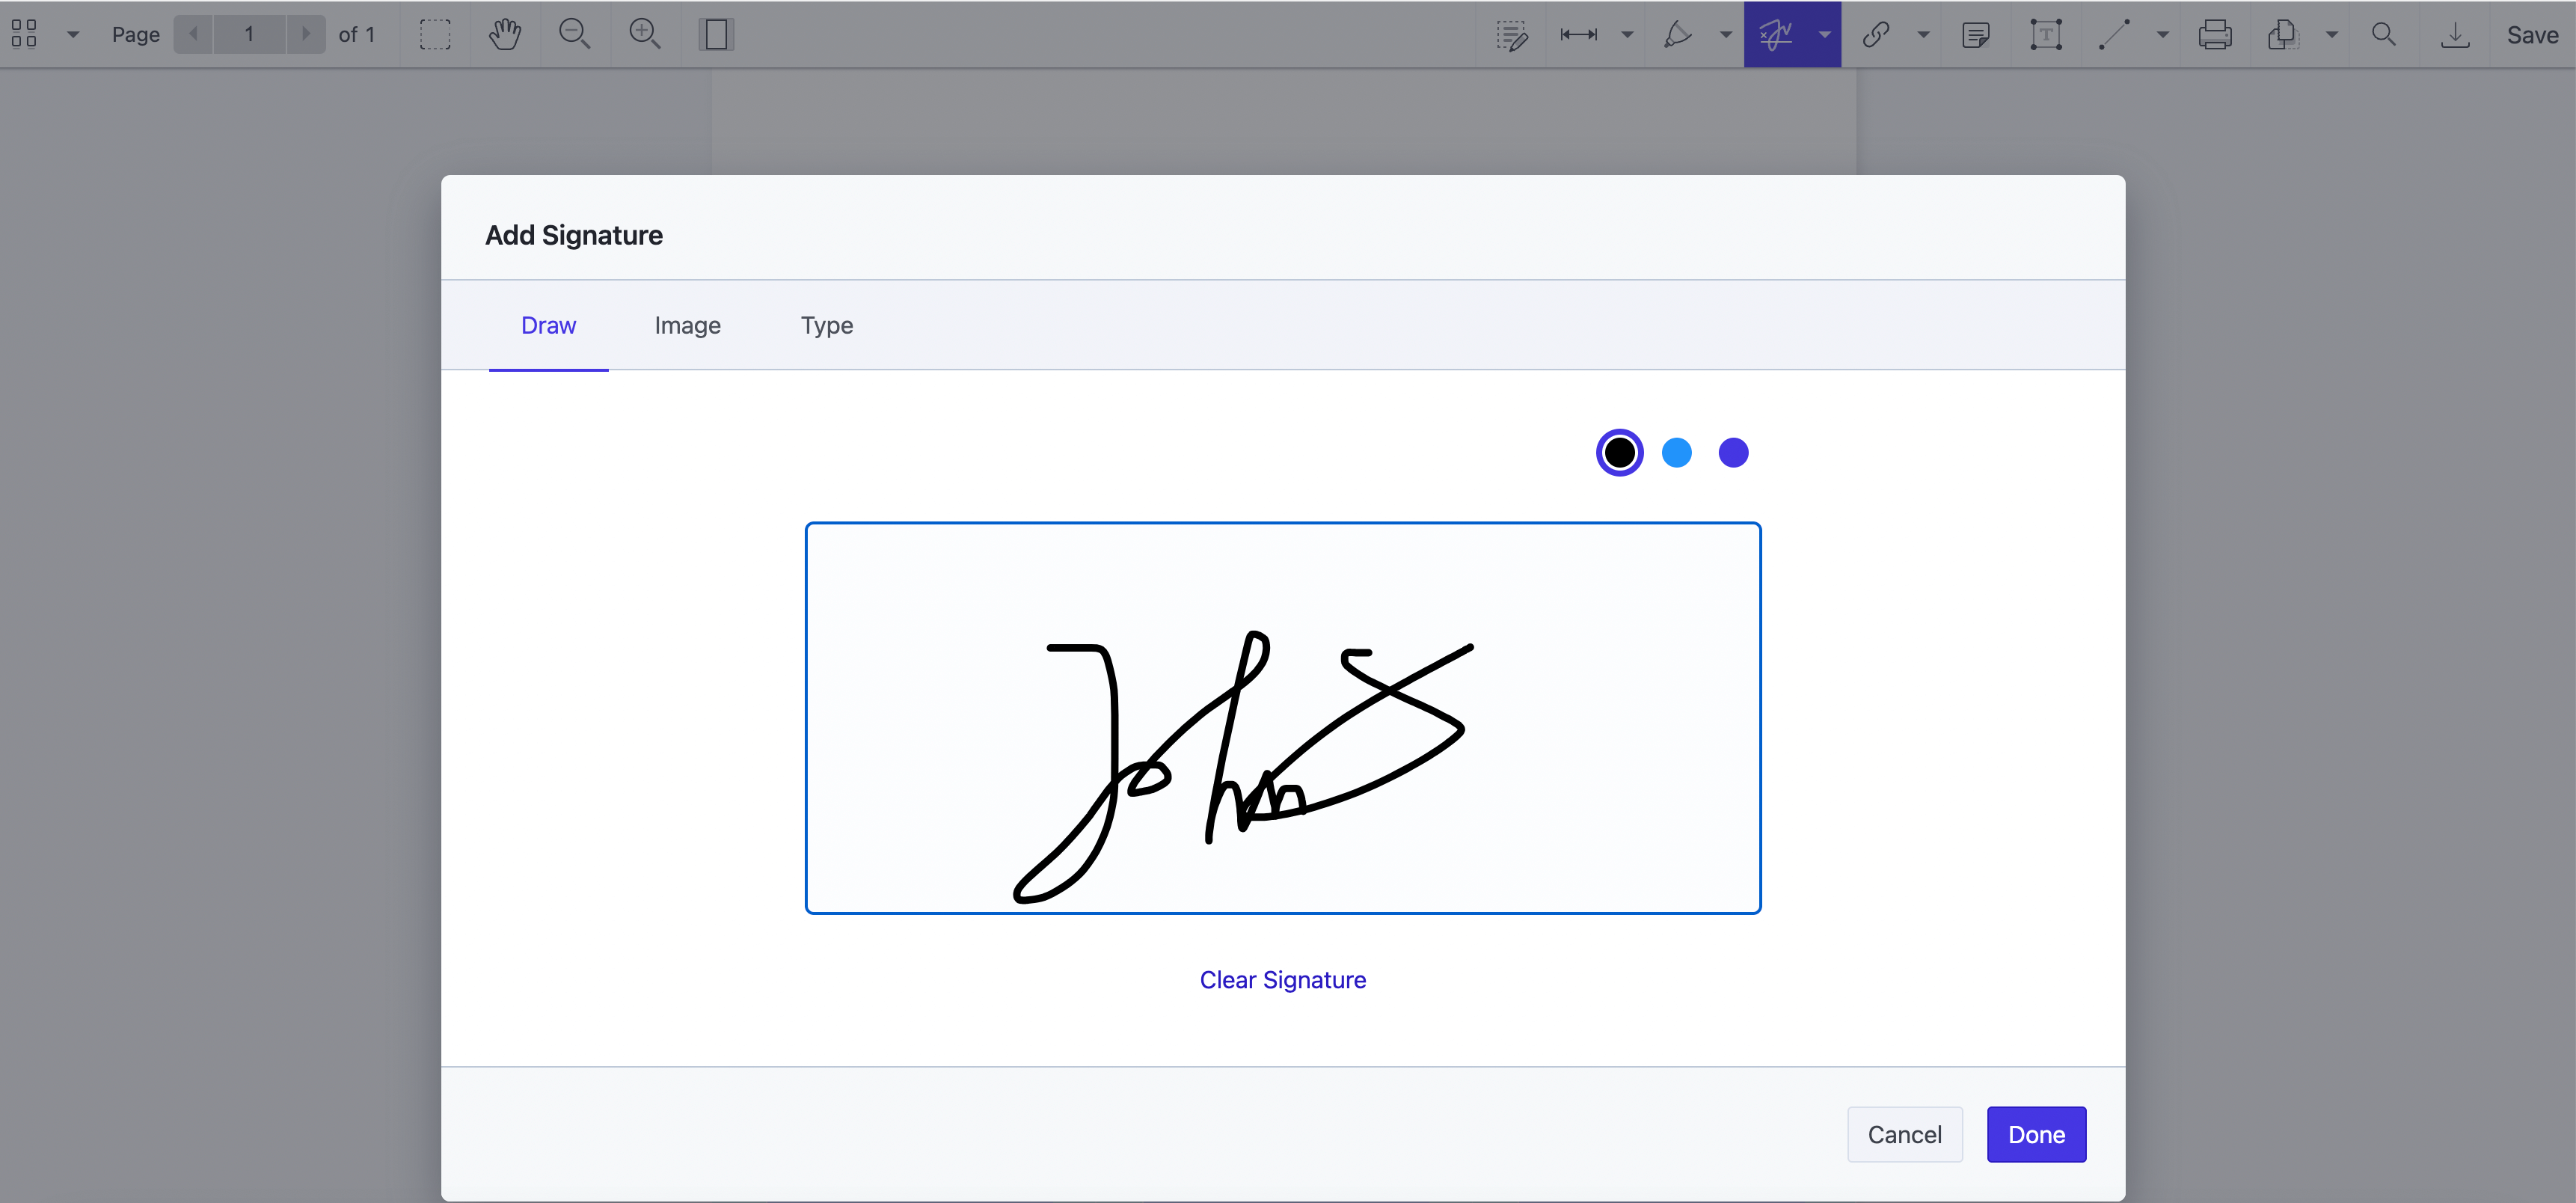
Select the Sign icon in the main toolbar of the PDF Editor to sign a PDF in SharePoint. Signing a PDF document in SharePoint with PDF Editor can be done in three different ways: by drawing a signature, typing a signature, or adding an image of an electronic signature.
Using the Draw option requires drawing your signature by pulling the cursor in the right direction.
Click Type to quickly generate a signature in a PDF. Choose the style and the color of the font, type in your name, and click Done.
To insert an image of a signature into a PDF, click Image and upload an image file from your computer. To confirm, click Done.
Conclusion
As Sarah embraced the benefits of PDF Editor, she realized that, in the world of contract management, the right tool could turn a labyrinth into a clear path. Get instant access to PDF Editor in SharePoint by downloading it directly from Microsoft AppSource. See how you can easily edit, sign, redact, and annotate PDF files in SharePoint.


