


SharePoint electronic signatures: Sign a PDF in SharePoint
Table of contents

Adding electronic signatures to PDFs in SharePoint is a key step in modernizing document workflows. This blog post will dive into SharePoint electronic signatures and provide step-by-step instructions on how you can sign a PDF in SharePoint Online using Nutrient’s SDK.
In the first part of this blog, you’ll see how to set up the Nutrient integration with SharePoint Online as a web part. Then, you’ll learn how to add electronic signatures to your PDF documents using Nutrient.
Why use SharePoint electronic signatures?
There are two types of eSigning solutions that exist for SharePoint Online. The most common type of solution is an out-of-the-box eSignature integration that provides a signing workflow. In this solution, your documents are sent from SharePoint to a third-party server where the eSignature occurs. This is the typical eSignature workflow you see on platforms like DocuSign and Adobe.
At Nutrient, we provide a customized eSigning solution that can be deployed directly in your SharePoint environment. The first step requires a direct integration of our web SDK into your SharePoint application. Once Nutrient has been integrated, you can add eSignatures to documents without ever sending them to a third-party server — the signature occurs directly in the browser. This solution can be beneficial for organizations that have strict compliance requirements.
Integrating Nutrient Web SDK into SharePoint Online as a web part
Nutrient SharePoint SDK is built on top of Nutrient Web SDK, a client-side JavaScript library for viewing and editing PDF documents in a web browser. It shares the same APIs as Nutrient Web SDK, so refer to the Web documentation for customizing your SharePoint application.
Try Our No-Code App
Requirements
- A Microsoft 365 tenant(opens in a new tab) (sign up for the Microsoft 365 Developer Program(opens in a new tab) to set up a Microsoft 365 tenant for free)
- The SharePoint Framework(opens in a new tab) (SPFx)
- A GitHub(opens in a new tab) account (for cloning the Nutrient SharePoint SDK repository)
- Node.js version 16.19.0(opens in a new tab)
Setup
- Clone the
pspdfkit-sp-online-webpart(opens in a new tab) repository from GitHub by navigating to the desired directory and entering the following command in your command line/terminal:
git clone https://github.com/PSPDFKit/pspdfkit-sp-online-webpart.gitAlternatively, download the project as a .zip file.
- Sign in to your tenant account at admin.microsoft.com(opens in a new tab).
Click Show all in the side navigation, and find Admin centers > SharePoint to access the SharePoint Admin portal.
Follow this Microsoft tutorial(opens in a new tab) to configure your SharePoint tenant and create a new team site.
- In the
pspdfkit-sp-online-webpartproject’sconfig/serve.jsonfile, replaceenter-your-SharePoint-sitewith your SharePoint site’s URL:
"initialPage": "https://enter-your-SharePoint-site/_layouts/workbench.aspx",- Set up your development environment(opens in a new tab) to build a client-side web part.
Remember to run gulp trust-dev-cert from the project’s root to trust the self-signed developer certificate.
- Change your directory to the
pspdfkit-sp-online-webpartdirectory:
cd pspdfkit-sp-online-webpart- Check your Node.js version:
node --versionEnsure you have Node.js version 16.19.0 installed. If not, switch to this version using nvm(opens in a new tab) (Node Version Manager) or asdf(opens in a new tab).
- Install the dependencies:
npm install- Serve the project:
npm run serveYour SharePoint account will open in a new browser tab.
Adding Nutrient to SharePoint
You can add Nutrient to your project as a widget using the user interface (UI) elements. Follow the video tutorial or the instructions below to integrate the Nutrient widget into your project.
- On your Home page, click Edit in the upper right-hand corner to open the editing interface.
- Hover over the desired location for the Nutrient widget and click the plus icon that appears. This opens a dialog box with the available web parts.
- Search for the Nutrient widget and select it.

- Click the pencil icon’s Edit web part button and click Select Document from the open panel.

- Choose your document and click Open. The Nutrient widget will now appear in your project.

Adding electronic signatures with Nutrient
Nutrient provides support for adding electronic signatures to your PDF documents. This allows users to sign documents digitally, streamlining the process and enhancing security. To add electronic signatures with Nutrient, follow the steps in the next section.
Using Nutrient UI
In this section, you’ll learn how to sign PDF documents using Nutrient’s user-friendly interface.
- Since you set up the Nutrient widget in the previous section, you’ll now be able to see your document in the web part.
- Click the signature icon in the toolbar to open the signature dialog box.
Or, check out the Nutrient demo and find the signature icon. Clicking this icon will open a dialog box where you can draw your signature.
Nutrient provides various options for customizing your signature. You can choose the pen color, insert an image or text as your signature, and adjust the size and position of the signature for perfect placement within the document. This flexibility allows you to create an electronic signature that accurately represents your unique signing style and securely validates your documents.
Programmatically adding signatures
In the subsequent sections, you’ll see how to programmatically add ink and image signatures to PDF documents within SharePoint using TypeScript.
Ink signatures
Nutrient provides two unique signature types that can be incorporated into PDF documents in SharePoint: ink signatures and image signatures. In this section, you’ll learn about the process of creating these signature types programmatically and including them in PDF documents.
First, there are ink signatures, which resemble conventional pen and paper signatures and can be drawn on a signature pad provided by Nutrient.
To add an ink signature programmatically within SharePoint, open the src/webparts/PSPDFKit/components/PSPDFKitViewer.tsx(opens in a new tab) file and modify the PSPDFKit.load() function(opens in a new tab) as follows:
instance = await PSPDFKit.load({  // Container where Nutrient should be mounted.  container,  // The document to open.  document: documentURL,  toolbarItems: [...PSPDFKit.defaultToolbarItems, saveItem],});
restoreBlobDownloadInterception = disableBlobDownloadInterception();
// Ink signature code. const annotation = new PSPDFKit.Annotations.InkAnnotation({   pageIndex: 0,   isSignature: true,   lines: PSPDFKit.Immutable.List([     PSPDFKit.Immutable.List([       new PSPDFKit.Geometry.DrawingPoint({ x: 5, y: 5 }),       new PSPDFKit.Geometry.DrawingPoint({ x: 95, y: 95 }),     ]),     PSPDFKit.Immutable.List([       new PSPDFKit.Geometry.DrawingPoint({ x: 95, y: 5 }),       new PSPDFKit.Geometry.DrawingPoint({ x: 5, y: 95 }),     ]),   ]),   boundingBox: new PSPDFKit.Geometry.Rect({     left: 0,     top: 0,     width: 100,     height: 100,   }), });
 instance  .create(annotation)  .then(function (newAnnotation) {    console.log('Annotation created:', newAnnotation);  })  .catch(function (error) {    console.error('Error creating annotation:', error);  });
The PSPDFKit.load() function initializes the Nutrient instance, while PSPDFKit.Annotations.InkAnnotation creates freehand drawings for ink signatures with the isSignature property set to true. The lines and boundingBox parameters remain unchanged, and PSPDFKit.Geometry.DrawingPoint inserts the ink signature, with boundingBox determining its position and size.
Now you’ll see a blue ink signature in the top-left corner of the document.
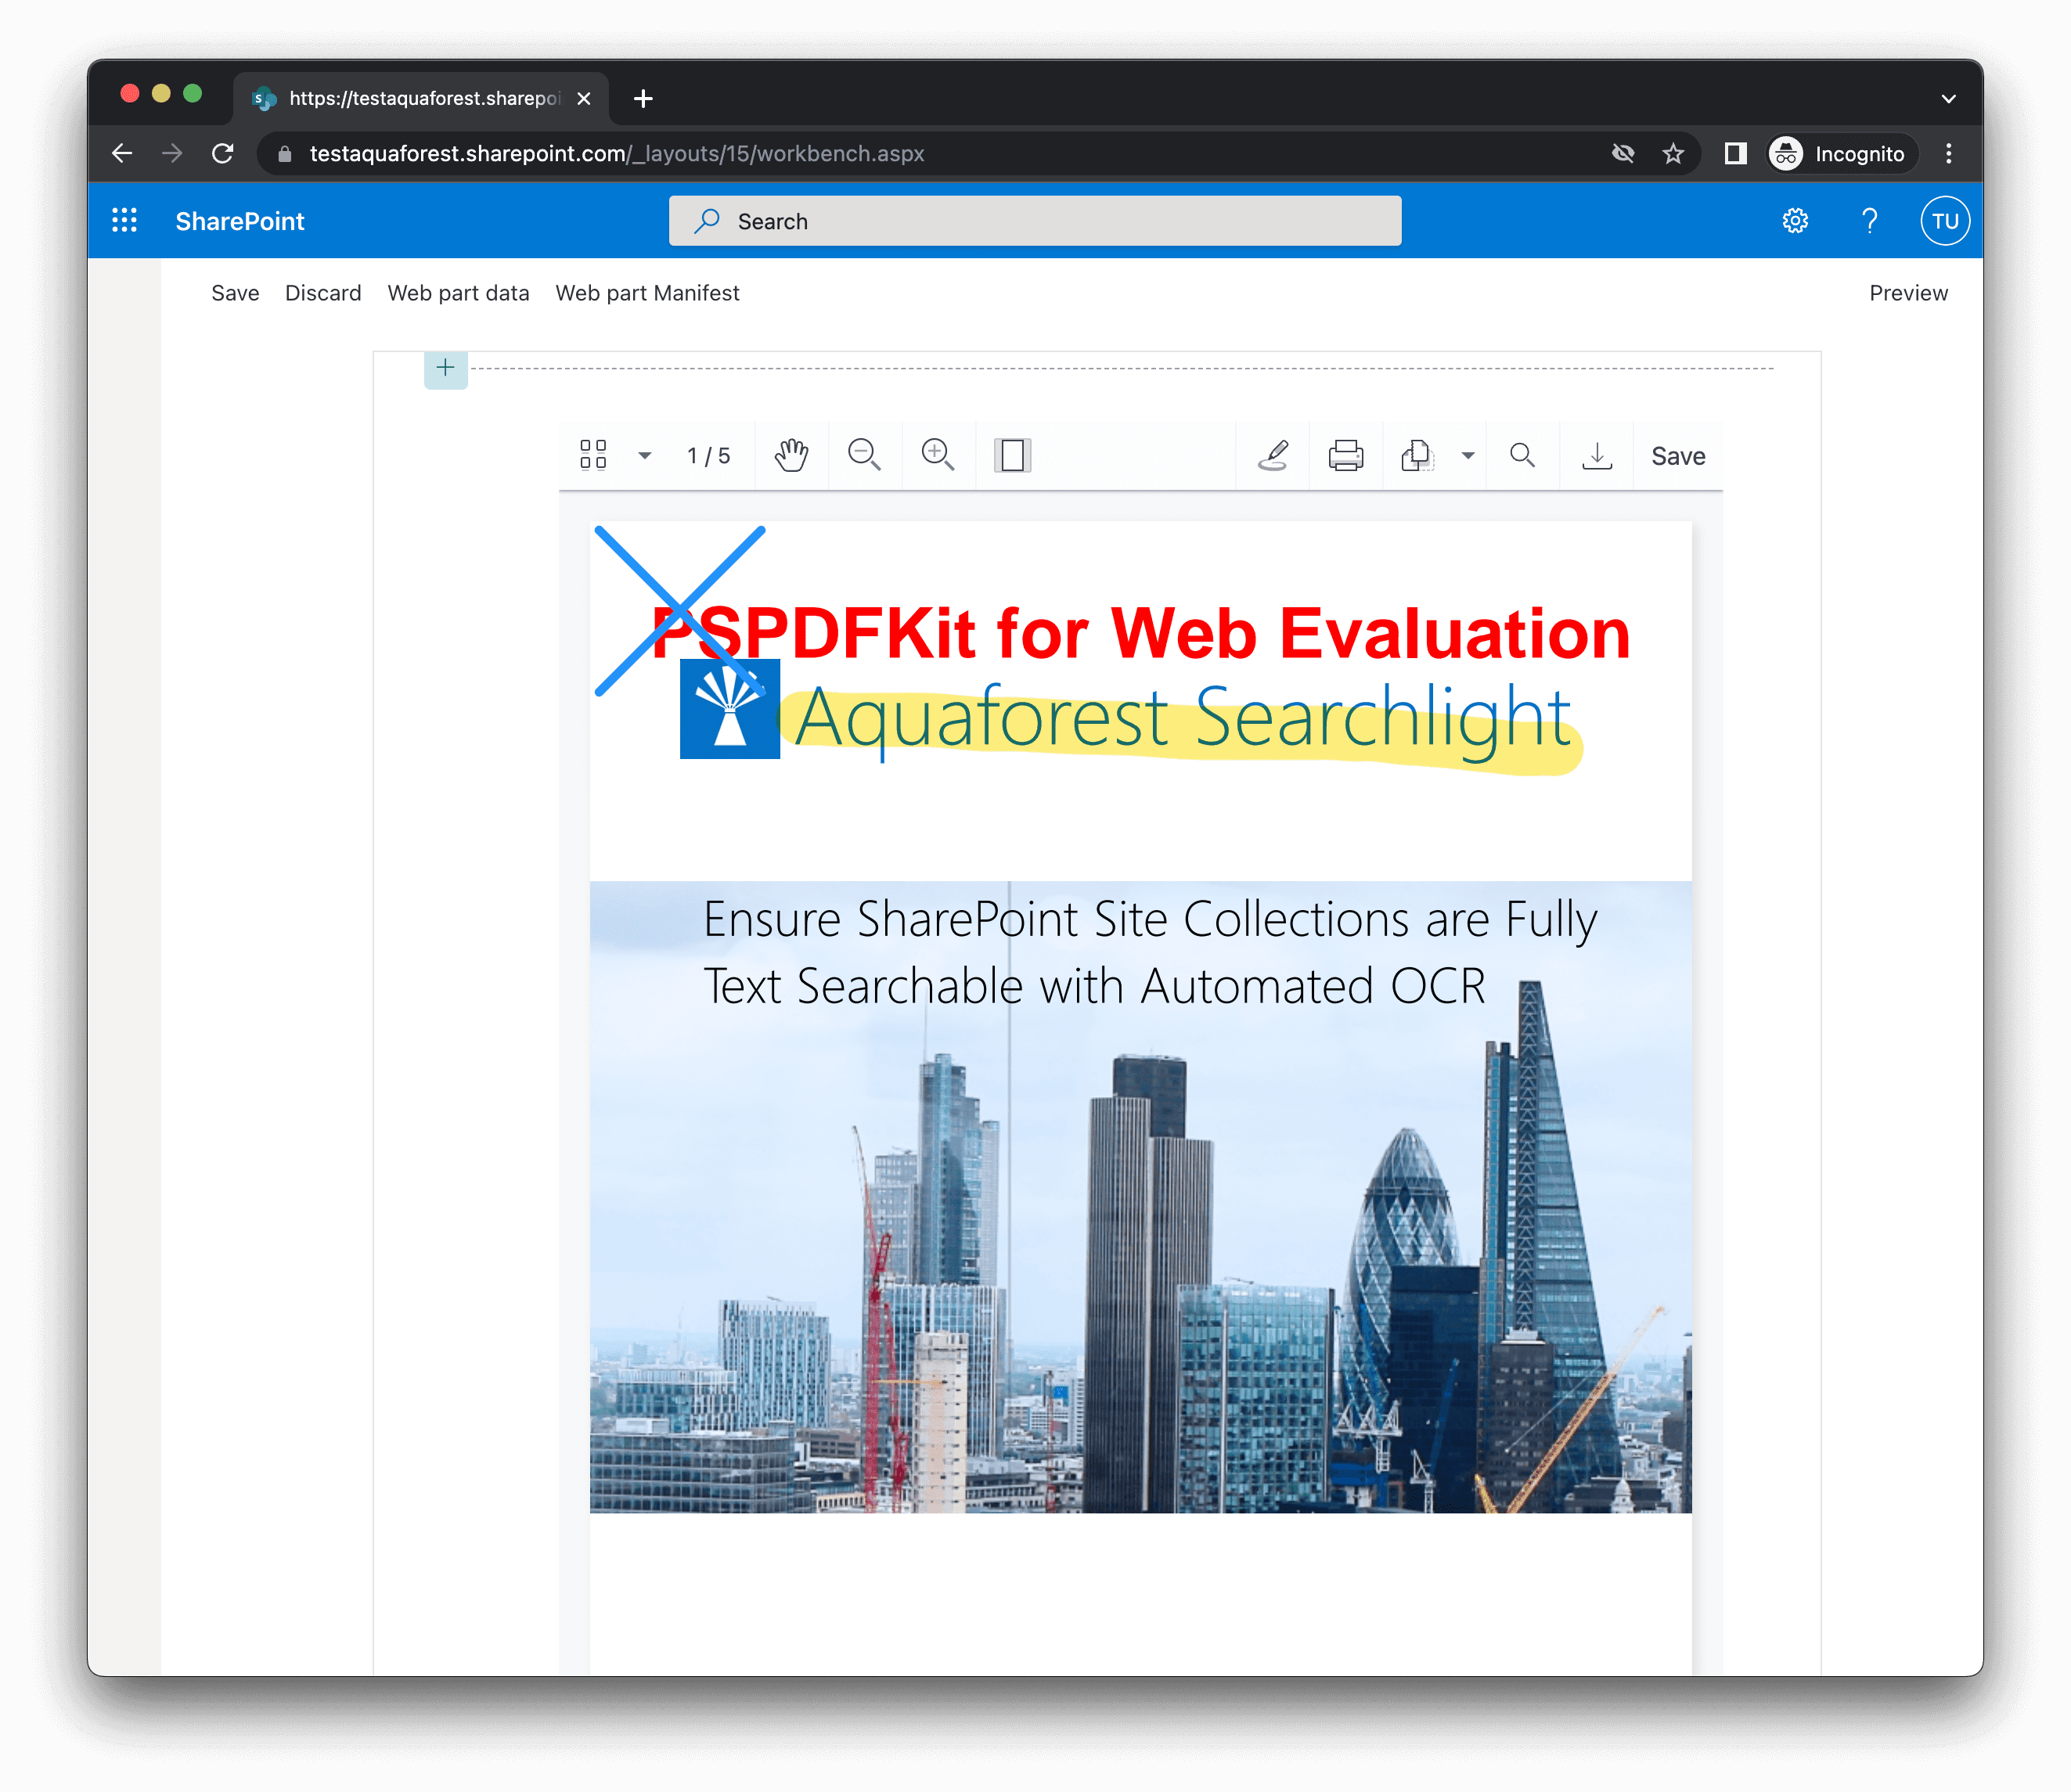
Image signatures
In this section, you’ll learn how to programmatically add image signatures to a PDF document in a SharePoint environment using Nutrient. Image annotations enable you to insert images into PDF documents from either a URL or a file on the user’s device.
Update the PSPDFKit.load() function inside the React.useEffect hook as follows:
instance = await PSPDFKit.load({ // Container where Nutrient should be mounted. container, // The document to open. document: documentURL, toolbarItems: [...PSPDFKit.defaultToolbarItems, saveItem],});
restoreBlobDownloadInterception = disableBlobDownloadInterception();
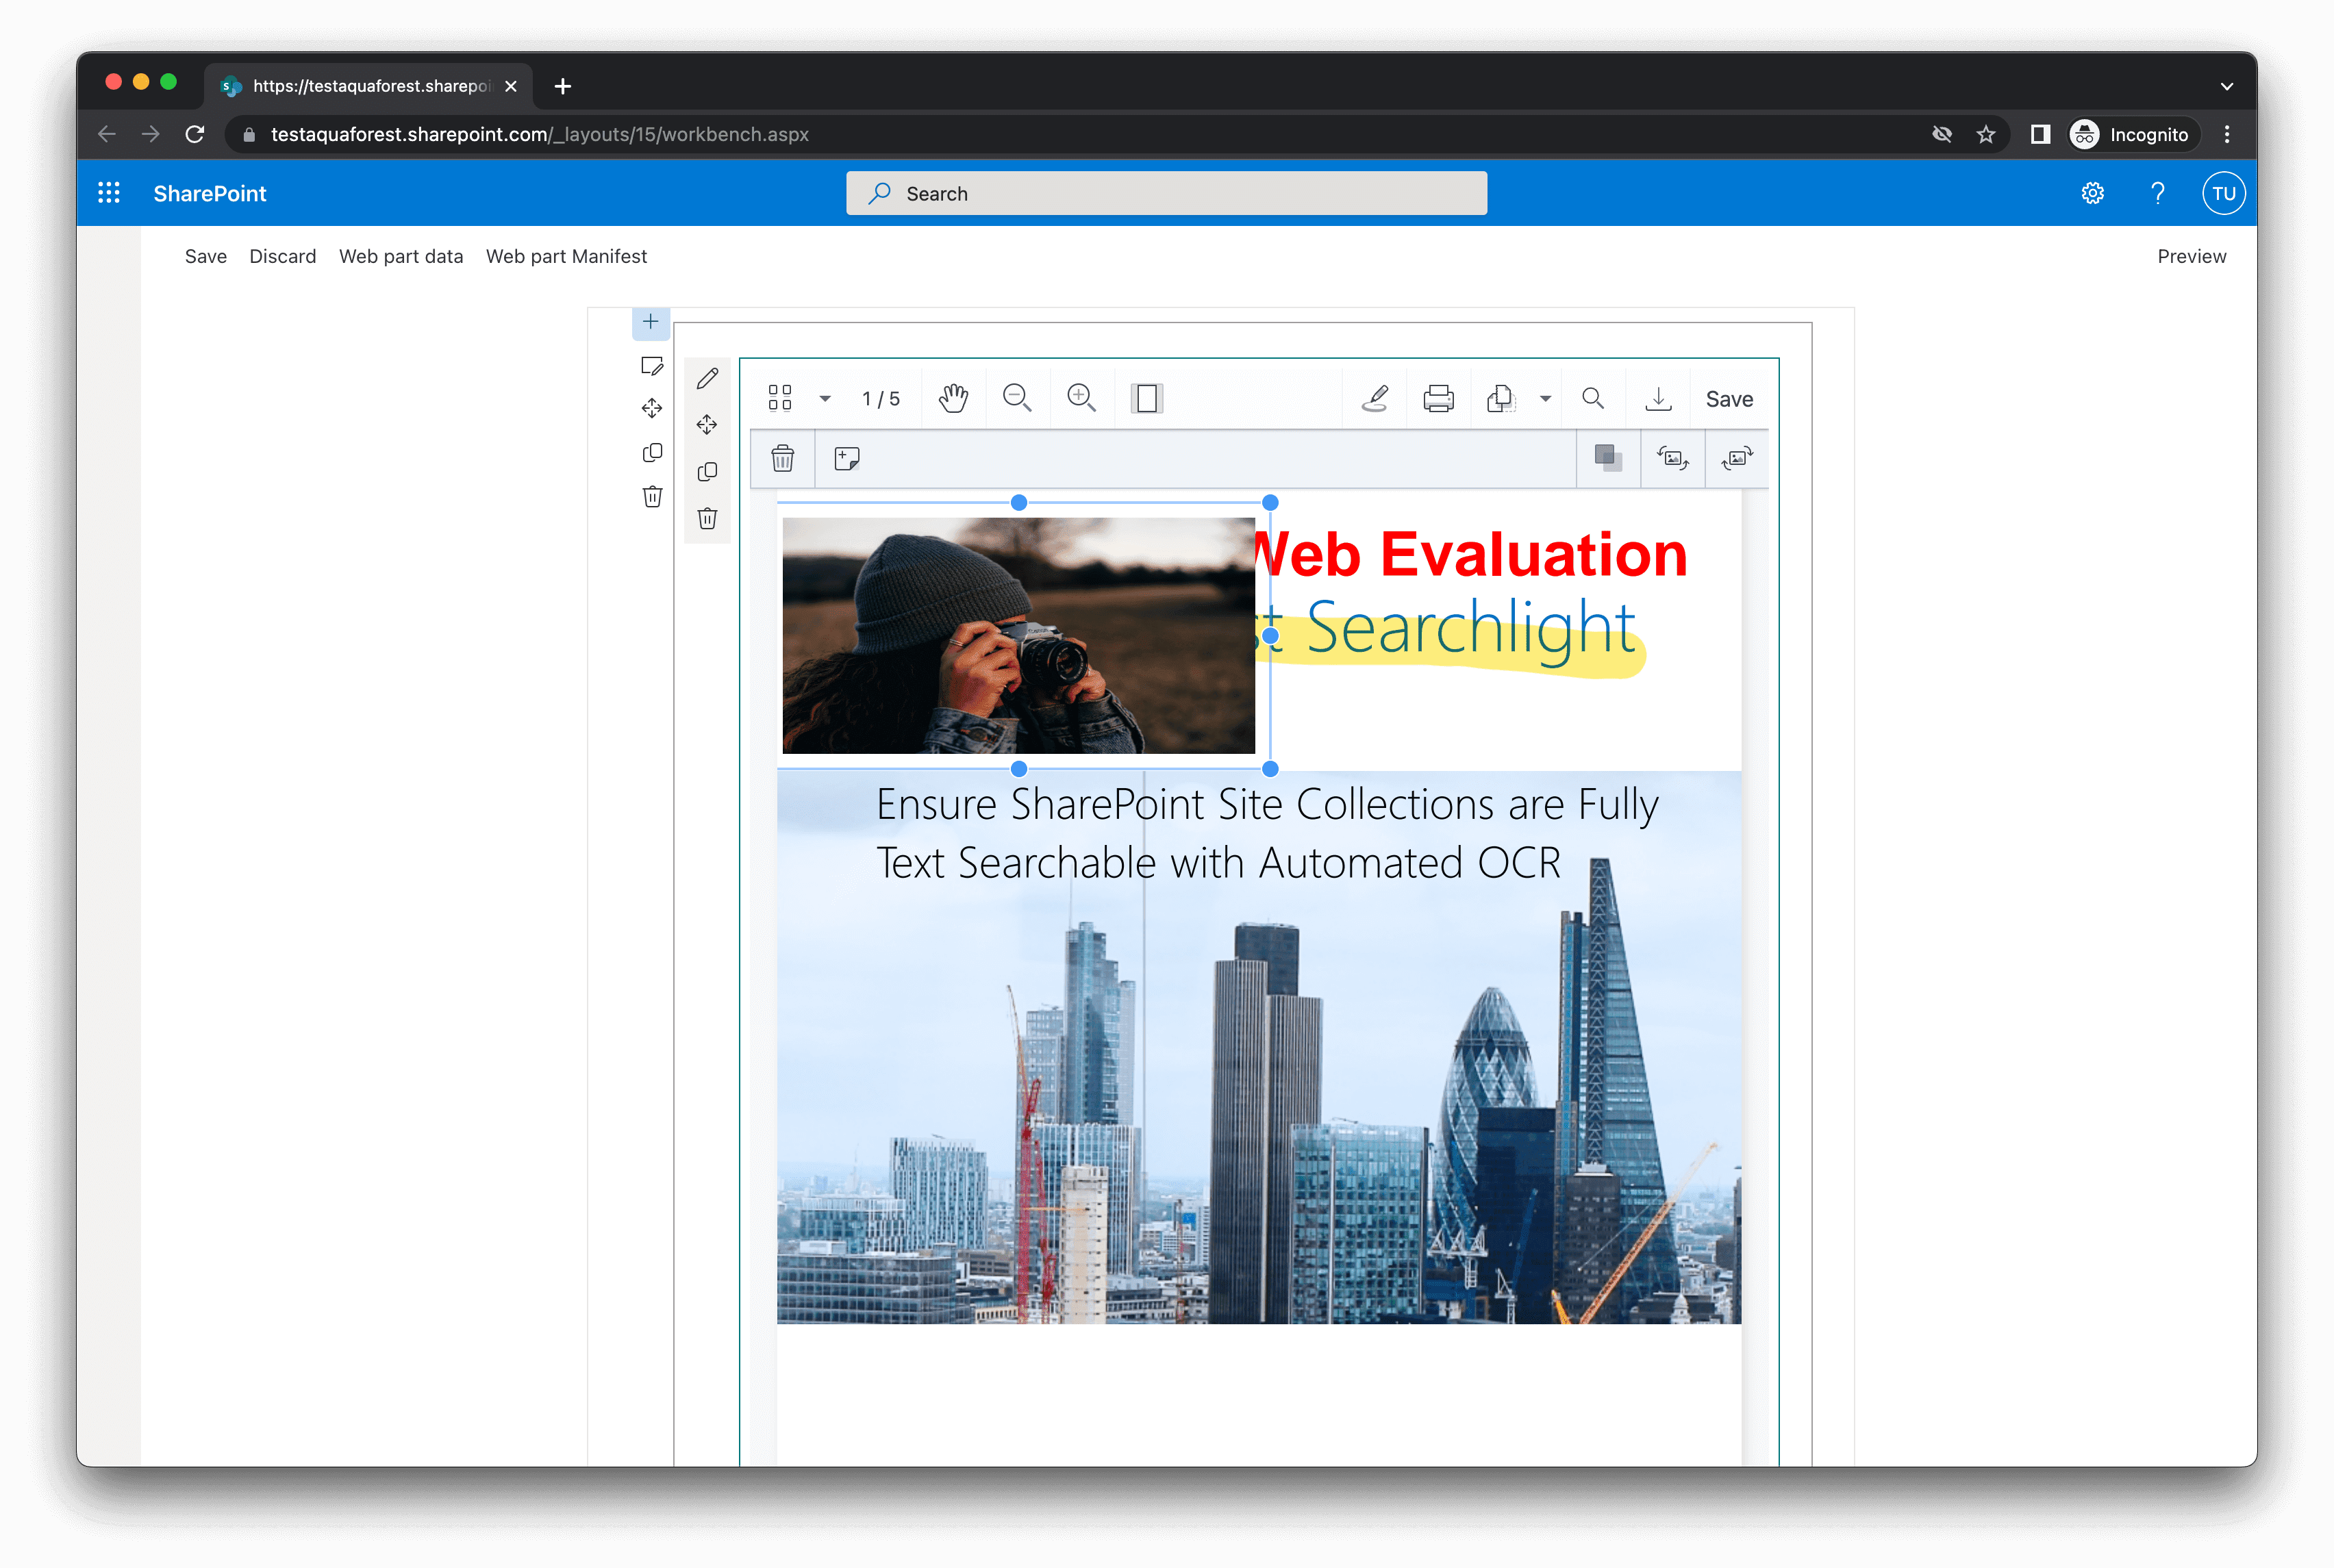
// Image signature code. try { // Fetches the image via its URL. const request = await fetch( 'https://images.unsplash.com/photo-1575936123452-b67c3203c357?ixlib=rb-4.0.3&ixid=MnwxMjA3fDB8MHxwaG90by1wYWdlfHx8fGVufDB8fHx8&auto=format&fit=crop&w=2370&q=80', );
// Converts the image to a blob. const blob = await request.blob();
const attachmentId = await instance.createAttachment(blob);
const annotation = new PSPDFKit.Annotations.ImageAnnotation({ pageIndex: 0, contentType: 'image/jpeg', imageAttachmentId: attachmentId, description: 'Image Description', boundingBox: new PSPDFKit.Geometry.Rect({ left: 30, top: 20, width: 300, height: 150, }), });
await instance.create(annotation);
console.log('Image annotation created successfully.'); } catch (error) { console.error('Error creating image annotation:', error); }In this code snippet, you create an ImageAnnotation by passing several properties, such as pageIndex, contentType, imageAttachmentId, description, and boundingBox:
pageIndexspecifies the page number on which the image annotation is added.contentTypespecifies the MIME type of the image file.imageAttachmentIdspecifies the ID of the attachment that contains the image data.descriptionis an optional property that provides a description for the image.boundingBoxspecifies the position and size of the image on the PDF document.
Once the image annotation is created, it can be added to the PDF document using the instance.create() method.
Creating signature fields in PDF documents for SharePoint
Nutrient enables you to easily create signature fields for adding signatures in your PDF documents. To accomplish this in a SharePoint environment, follow these steps to update the PSPDFKit.load() function inside the React.useEffect hook:
instance = await PSPDFKit.load({  // Container where Nutrient should be mounted.  container,  // The document to open.  document: documentURL,  toolbarItems: [...PSPDFKit.defaultToolbarItems, saveItem],});
restoreBlobDownloadInterception = disableBlobDownloadInterception();
// Signature field creation code. try {  const widget = new PSPDFKit.Annotations.WidgetAnnotation({    pageIndex: 0,    boundingBox: new PSPDFKit.Geometry.Rect({      left: 200,      top: 200,      width: 250,      height: 150,    }),    formFieldName: 'My signature form field',    id: PSPDFKit.generateInstantId(),  });
  const formField = new PSPDFKit.FormFields.SignatureFormField({    name: 'My signature form field',    annotationIds: PSPDFKit.Immutable.List([widget.id]),  });
  await instance.create([widget, formField]);
console.log('Signature form field created successfully.'); } catch (error) { console.error('Error creating signature form field:', error); }In the code snippet above, you can create a new signature field that allows users to sign within that specific field. The PSPDFKit.Annotations.WidgetAnnotation function is used to define the properties of the signature field, such as its page index, bounding box dimensions, and form field name. The PSPDFKit.FormFields.SignatureFormField function is used to specify the name and IDs of the annotations associated with the signature field. Finally, the instance.create() function is used to create the signature field and add it to the PDF document in SharePoint.
Conclusion
Adding electronic signatures to SharePoint documents with Nutrient is simple and efficient. This article provides clear instructions for integrating SharePoint electronic signatures with Nutrient Web SDK. Nutrient helps secure and manage documents within SharePoint, enhancing collaboration, and ensuring the validity of signed documents. For more information or assistance, visit our documentation.
To see a list of all web frameworks, contact our Sales team. Or, launch our demo to see our viewer in action.
FAQ
To add electronic signatures to a PDF in SharePoint Online using Nutrient, integrate the Nutrient web part into your SharePoint site, open your PDF document, and use the Nutrient interface to apply and customize the signature.
Yes, Nutrient allows you to add multiple electronic signatures to a single PDF document within SharePoint. You can position and customize each signature as needed.
No, with Nutrient, you can add electronic signatures directly within SharePoint without relying on third-party services. This ensures all signing occurs within your SharePoint environment.
Nutrient provides a secure signing process by keeping all data and signatures within your SharePoint environment. This helps comply with privacy regulations and reduces exposure to external threats.
Nutrient offers various customization options for electronic signatures, including adjusting the signature’s color, size, and position. You can also upload signature images or draw signatures directly within the SharePoint interface.

