Essential document automation server installation guide
System Requirements
| Requirement type | Requirement |
|---|---|
| Supported Operating Systems | - Windows 10(64 bit) - Windows 11 - Windows Server 2012 R2 (64 bit) - Windows Server 2016 - Windows Server 2019 - Windows Server 2022 |
| Supported Document Stores | - SharePoint 2013 - SharePoint 2016 - SharePoint 2019 - SharePoint Online (Office 365) - OneDrive for Business - Azure File Storage - Azure Blob Storage - Windows File Systems |
| Recommended Memory | Single Core License - 8 GB RAM 8 Core License - 16 GB RAM |
| Recommended CPU | Single Core License - i5 processor 8 Core License - i7 processor |
| Disk Space | 2.0 GB |
| .NET Framework | 4.7.2(opens in a new tab) |
| Visual C++ Redistributables | - Visual C++ 2017 x64(opens in a new tab) - Visual C++ 2017 x86(opens in a new tab) |
| Additional Tools | SharePoint Server Client Components SDK (x64)(opens in a new tab) |
Entering License keys
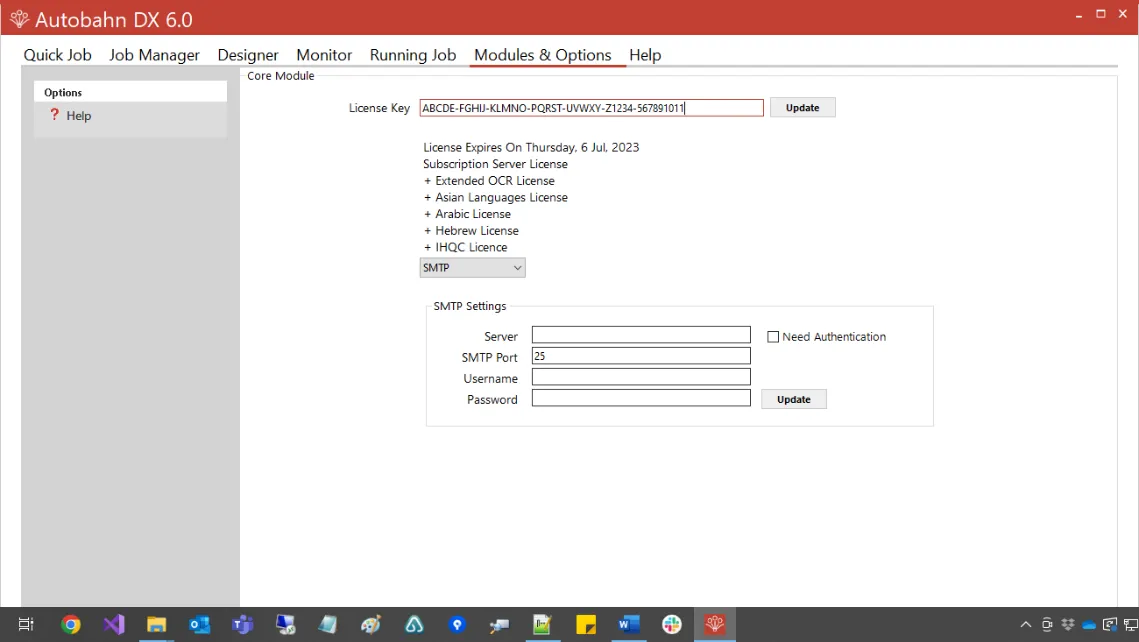
DAS cannot start without a valid license key; any time you start DAS without a valid license key, it shows you the windows below.

License keys may be entered by using the “Modules & Options” tab.

DAS Windows Service
DAS and BCL easyPDF Windows Services
These are the heart of the Server editions of the product and control the execution of both scheduled jobs and ad-hoc jobs submitted via the DAS Manager, command line or the DAS Job API.
Once you have installed DAS, you need to take a few easy steps described below to configure the Windows Service setting for both DAS and the BCL easy PDF services.
Create and initialize an DAS DX user account:
If this is the first time that DAS has been installed on the machine, then a suitable DAS service account with the required permissions is required.
- Log-on as an Administrator on the machine
- Create a new user account that will run the DAS and BCL easyPDF services. You can have two separate users or use the same one. Subject to your computer policy it is suggested that the account’s password is set to “Never Expire”.
- Assign the required permissions to the user.
Log on as the DAS Service account
YOU MUST log on as the DAS service account at least once after each installation of DAS.
This is required to initialize the account, including printer driver setting, or the easyPDF SDK service will not run properly. You will also need to open and initialize all applications used for the conversions: i.e. Word, Excel etc.
If DAS is installed again (for example as part of an upgrade), it is recommended that this step is repeated.
Upgrading from previous versions
Uninstalling the previous version
Two versions of DAS cannot be installed at the same time. To install a new version of DAS, the previous version must first be uninstalled. Before starting the uninstall, first stop the DAS service and close the UI. The ‘…Autobahn DX/jobdef’ folder contains the definitions for all jobs. We advise saving this folder in a separate location before upgrading.
Previous jobs and license keys
Certain files will be left in the DAS install location after the uninstall. Both the jobdef folder containing the descriptions for all the previous jobs and the license key file will be preserved.
Job definitions
Job definitions are now automatically upgraded to the latest version of DAS on opening the UI. This does not require any action from the user. The jobs before upgrading will be saved in the ‘…Autobahn DX/jobdef_copy’ folder.
If you are upgrading to the latest version from a version older than v5.0, we would recommend recreating your jobs instead of relying on the job upgrade.
License Key
The license key will remain from your previous version. For upgrades between minor releases, the license key should still be valid for the newly installed version.
If you are on a new major version (5.0, 5.5, 6.0), then the license key will no longer be valid. In this case, you should contact support for a new license key.
Configure Windows Service setting
- Log-on to the computer as an Administrator on the machine.
- From the Search box on the Task Bar, type Services and select the Services app.
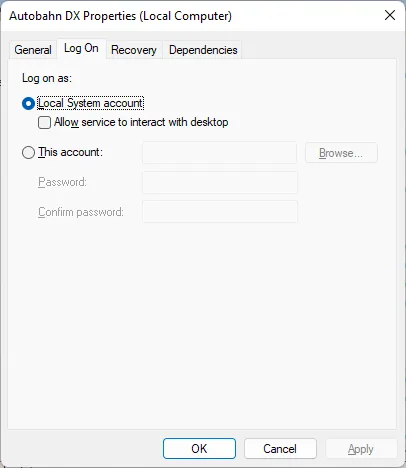
- Select and right-click on the Autobahn DX service (DAS service) and select Properties.
- Click the Log On tab.

- Select “This account” and either type the username and password for the service user or select it via the Browse button and enter the password.
- Click OK to close the property dialog box and return to the main Services window.
- Right click on the Autobahn DX service (DAS service) and select Restart. The service will restart with the new settings.
- Close the Services window.
- Repeat the above for the BCL easyPDF Service
Support for Multiple CPU Cores
Your DAS Server Edition license key will support a specific number of CPU cores.
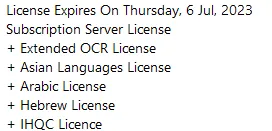
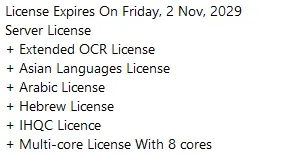
If only one core is licensed, the core count is not displayed on the Modules & Options tab.

The licensed cores are shown for multi-core licenses.

The product will limit the number of concurrent file processing operations to this number and will “throttle” jobs accordingly.
For example, if a 4-core licensed server is currently running a 2-core job and a new job starts that is configured for 4 cores the number of cores allocated to the second job will be reduced accordingly:
DAS using 2 cores out of 4 allowed.
We will reduce the number of cores in this job from 4 to 2 allowed.
As another example: if a 4-core licensed server is currently running a 4-core job and a new job starts that is configured for 2 cores then the second job will not be able to start until cores are freed up:
DAS using 4 processors out of 4 allowed.
We will attempt to start the job 18 time(s) over the next 180 seconds.
The retry interval and number of tries is determined by these two config file settings in Autobahn.config (by default this file is in C:\Aquaforest\Autobahn DX\config)
\<add key="jobqueuetimeout" value="180" /\>\<add key="jobqueueinterval" value="10"/\>When creating and scheduling jobs, it is recommended that core use is considered. Jobs that need to be run at the same time should not exceed the core count. It might be more efficient to schedule the jobs so that they run in series (at different times).