How to submit PDF forms to SharePoint library
With Muhimbi PDF Editor for SharePoint, you can create, fill out, and submit PDF forms to the SharePoint library. These features are available for both PDF Editor deployment options: SharePoint Online and SharePoint On-Premises.
If you want to create a form from scratch, check out this guide on form creation. If you already have a form, all you need is to fill it out and submit it by following the instructions below.
Step 1: Opening a PDF file
Go to the SharePoint library and click Upload to import a PDF from your computer, or select an existing PDF from the library.
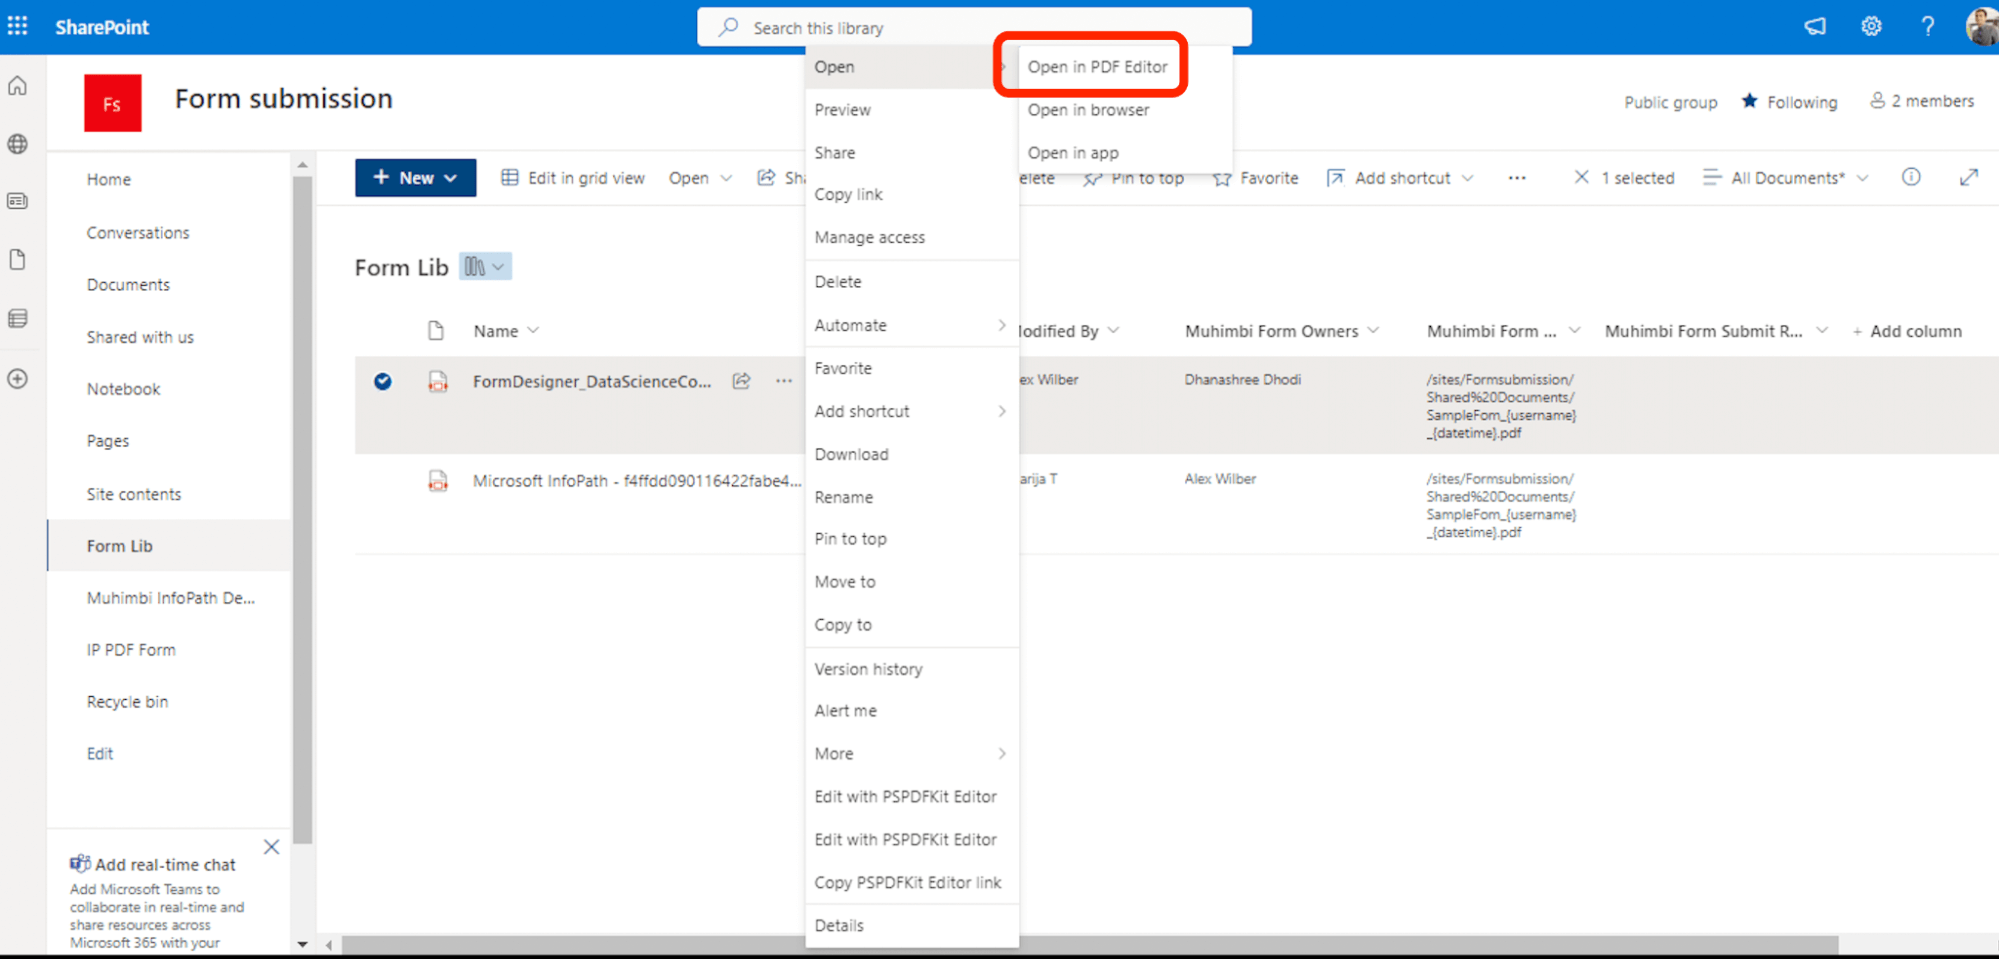
Click the three dots menu and then Open > Open in PDF Editor.
Step 2: Filling out form fields
Fill out a PDF form by clicking on the form fields and typing.
If you can’t edit a PDF form and it doesn’t seem to be fillable, that means your PDF is an XFA form. Our technology only supports AcroForms. However, there’s a workaround solution to fill XFA forms:
- Click the Sign icon and choose the Type tab.
- Type the text or numbers you want to fill in the XFA form.
- Choose the color and font style, and click Done.
- Drag the text to the proper position and resize it if needed.
- Repeat this process for each field.
Step 3: Setting up a SharePoint library
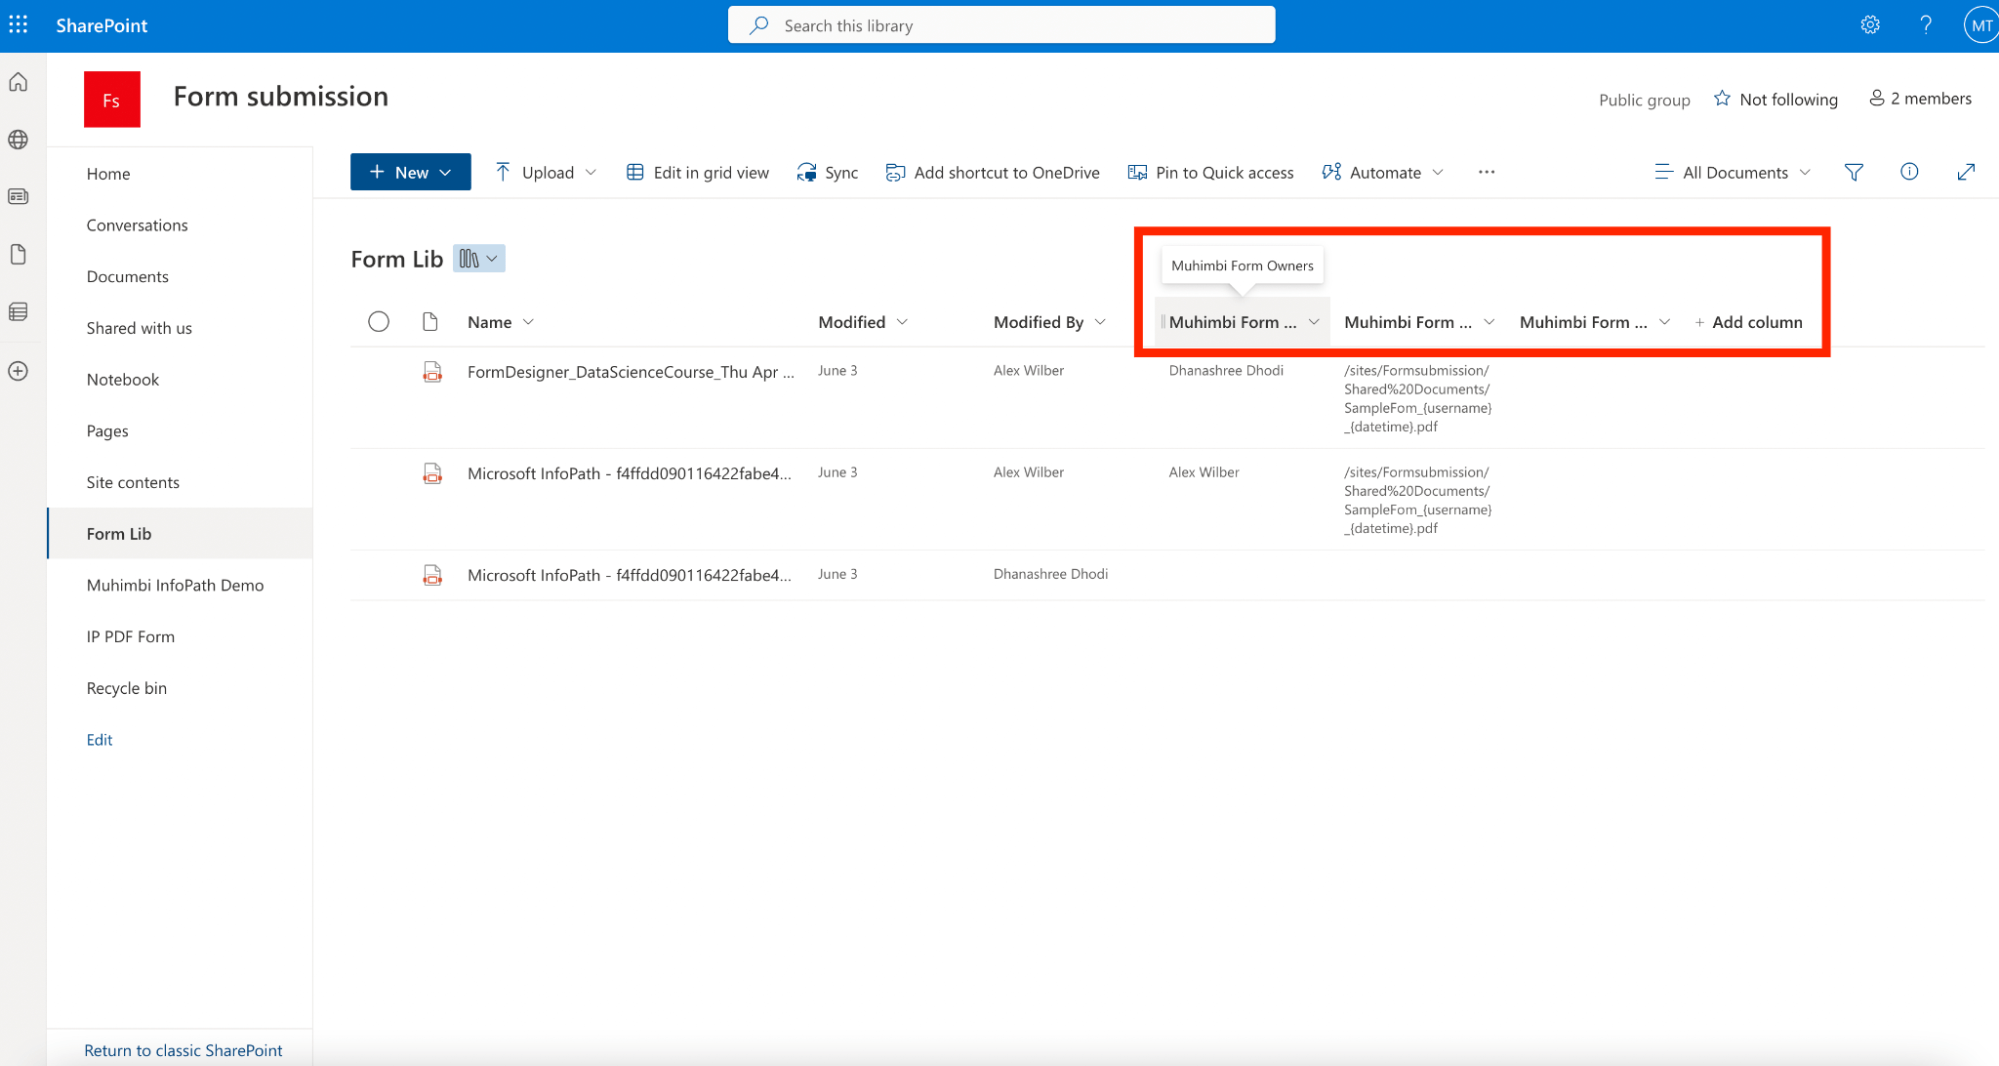
When your form is ready to use, you just need to set up a SharePoint library and create the following metadata columns for the library:
Muhimbi Form Owners — The Type field must be Person or Group. It allows multiple people to be added, but they must be added individually and not as a group. If there are owners for the form, then only the owners can edit the form. If you don’t specify the owners of the form, then anyone can edit the form. People who aren’t listed as owners cannot edit or save the form. However, they can download, print, or copy the form; interact with the form elements; and fill out and submit the form.
Muhimbi Form Submit File Path — The Type field must be Single line of text. This is a string to specify where the form should be saved after it’s submitted. It can be a file name or a file name with a full path, including wildcards. The available wildcards are {originalfilename}, {username}, {loginname}, and {datetime}. The latter can contain formatting options as well — for example, {datetime:h:mm tt}. Make sure you add a wildcard to identify a submission by the time or the user details of who submitted the form.
Here’s an example:
Filename.pdf
{originalfilename}\_{datetime}.pdf
/Shared Documents/SomeFolder/{originalfilename}_{username}_{datetime}.pdf
/sites/sitename/Shared Documents/{originalfilename}\_{username}.pdf
Important Note: If this file path isn’t specified, the submitted PDF form will be saved next to the original PDF and it’ll have a new file name, which will contain the exact time of the form submission and the username of the person who submitted the form, in addition to the original file name — for example, {originalfilename}_{datetime}_{username}.pdf.
Muhimbi Form Submit Redirect URL — The Type field must be Hyperlink, which is a URL that will tell the system where to transfer the user after the form has been submitted. If the redirect URL isn’t set, the user is transferred back to the original folder after submitting the form. If the redirection URL is set, the user is transferred to that URL after submitting the form. This can be any URL.
Step 4: Submitting the PDF form to the SharePoint library
After you set up these columns, add a PDF form in the preferred SharePoint library and start collecting PDF form data. The submitted forms will show up in the folder of your choice, and only authorized people are able to edit the forms.
The next step is to update the form owner in the Muhimbi Form Owners column (as a single user or multiple users) to include yourself.
Keep in mind that when you open a PDF form, it’ll open in editing mode, but for any other user who opens it, it’ll be in read-only mode. This means they’ll be unable to edit the form fields, but they will be able to fill out the form.
The next step is to store the submission path in the Muhimbi Form Submit File Path column — for example, site/web/Shared Documents/Submits/SampleFom*{username}*{datetime}.pdf.
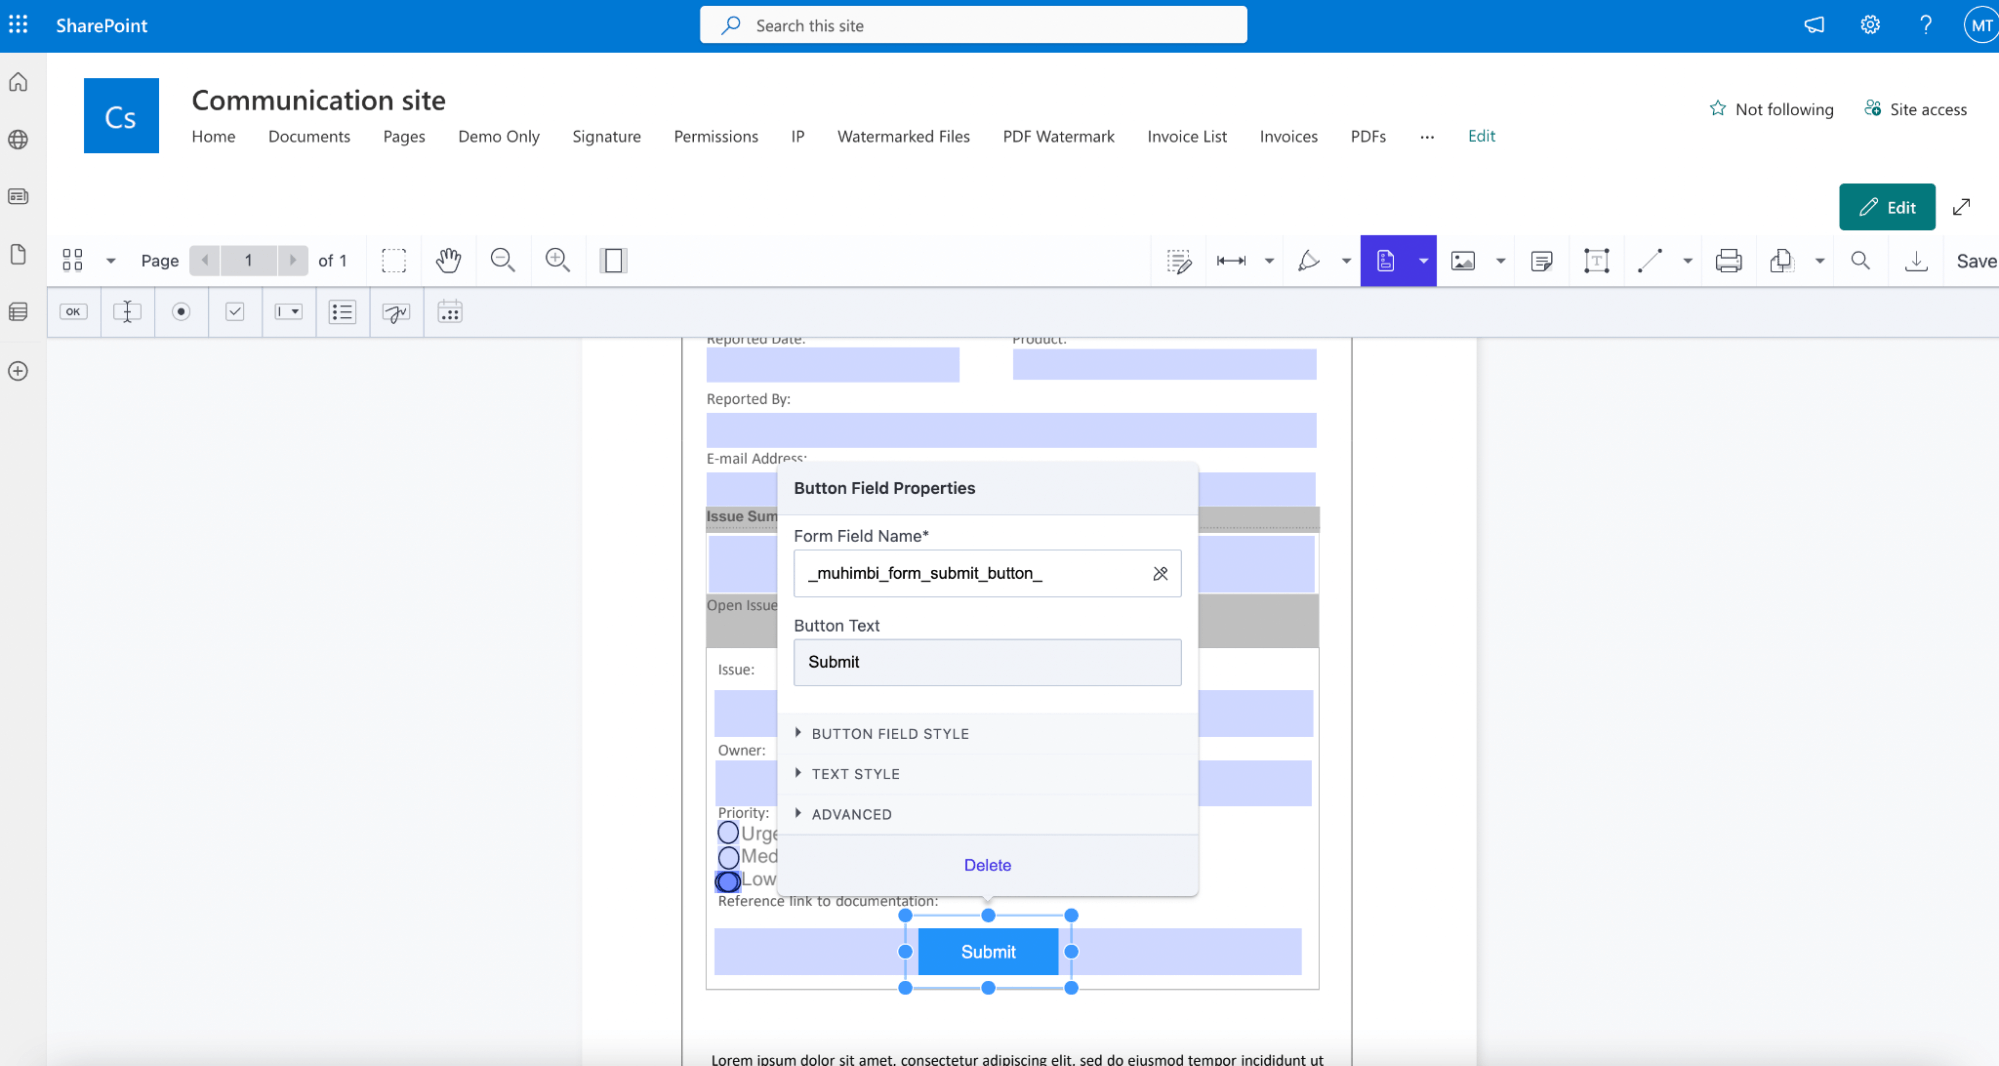
Add the Submit button to the PDF form with a special ID of _muhimbi_form_submit_button_. This must be the field name and not the display name. This step can also be done during the form creation process if you created a form from scratch.
Muhimbi PDF Editor will catch the click of the button and save the filled PDF using the submission path.
After the user submits, a popup message will appear saying “Your form has been submitted.”
By default, users will be redirected to where they came from, but you can also add the Muhimbi Form Submit Redirect URL column for a custom redirect path after submission.
Trying Document Editor for SharePoint
Try PDF Editor for SharePoint Online free for 14 days by downloading the app directly from Microsoft App Source(opens in a new tab). This is a full trial version, without watermarks, but it’s limited in time. There’s an unlimited trial version, but all the files are watermarked, and you can choose between three different installations: file handler, web part, or online extension. Refer to the table [on the free trial pagetrial page to learn more.
PDF Editor for SharePoint On-Premises covers all different license types and SharePoint editions (2013–2019 and SE). The detailed installation guide is included in the download. During the free trial, all your documents will be watermarked.