How to effectively manage requests in workflows
Administrators can define themselves or a group of other users with the ability to manage a process. If you’re given this capability, it means you can manage all requests for the process. This includes reassigning or restarting any previously started or completed task in the process.
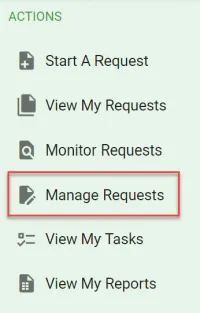
For example, if there’s an approval task and the recipient has ignored their open task, the user with managing permissions can restart and reassign the task to someone else for completion, and the reassignment will be captured in the request’s task history. To do this, select Manage Requests in the navigation pane.
Select Search to filter requests you manage.
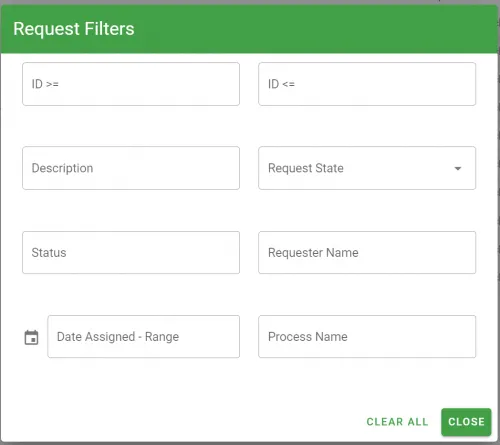
If you’d like to search for a number in the name or description, place % at the beginning of the search.
After locating the request(s) you want to manage, there are two options:
- Delete the request(s)
- Manage the request(s)
Delete requests
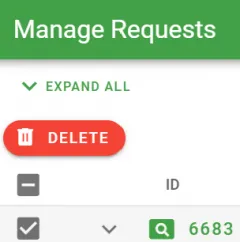
To delete a request, select a checkbox for the request you want to delete and then press Delete. This will perform a soft delete, which removes the request from the user’s reports and cancels open tasks, but doesn’t remove the request at the database level.
Manage requests
To reset or reassign tasks, click the request ID number, or select the magnifying glass icon next to the request you want to reset or reassign tasks for.
There are two choices to manage a reset or reassign tasks:
- Select the Request Management - Flow tab
- Select the Request Management - List tab
This will only display the completed and in progress tasks.
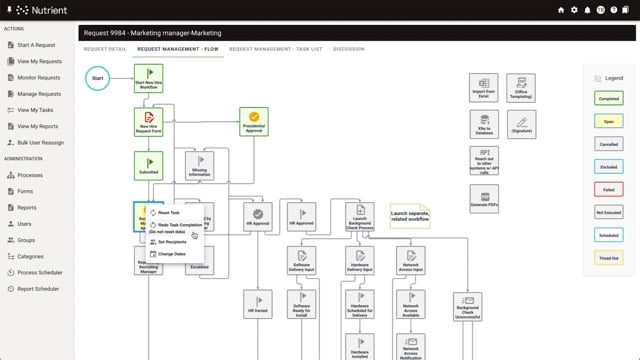
When selecting the Request Management - Flow tab, you’ll be presented with the task flow view for the request. You can now hover over any of the tasks within a process, and you’ll be given the option to reset the task or redo the task completion.
If you select Reset Task, you’ll set the status of the task to initialized, which will lose any previous data that was completed for the task. Additionally, if there were recipients of the task, they’ll receive that open task again.
If you select Redo Task, the task status will still be captured as completed, and the data from that task will remain. Use this option if you don’t want to lose the previously captured data of the task but you want to retrigger the subsequent tasks that start based on that task being completed.
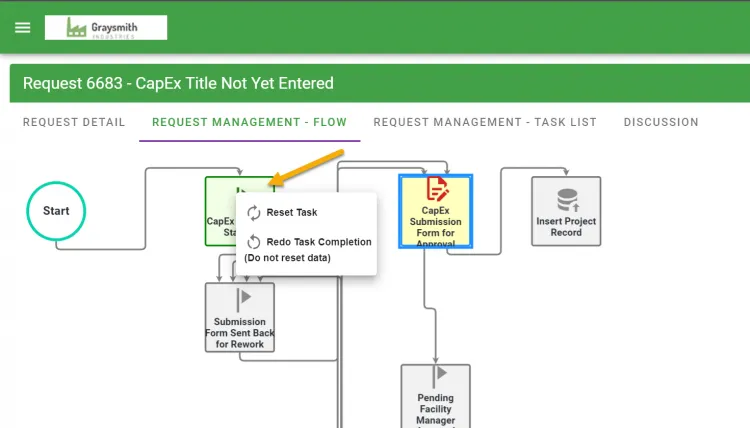
If you hover over a completed task (a task icon in green), as shown in the image above, you’ll be presented with the following options:
- Reset Task
- Redo Task Completion (Do not reset data)
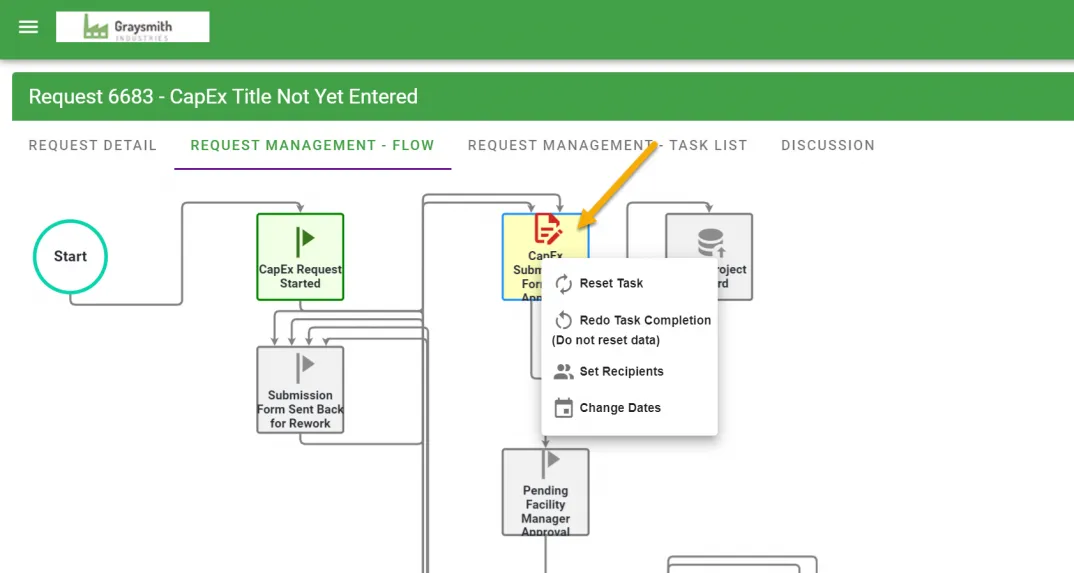
If you hover over a task that’s open or in progress (a task icon in yellow), as shown in the image below, you’ll be presented with the following options:
- Reset Task
- Redo Task Completion (Do not reset data)
- Set Recipients
- Change Dates
Reassign — After selecting Set Recipients, you’ll be presented with a window like the one shown in the image below. From here, you can search for the users you want to be recipients of the task — note that you can add multiple recipients. Type the first two letters of a name to search for someone specific, or select the search icon to see all users. To add or remove a recipient, click the plus button on the left to add someone, and the minus button on the right to remove someone. Then, select Close to save your changes.

You can also choose to manage a request by selecting the Request Management - List tab for the request.
This will only display the completed and in progress tasks.
If you do this, you’ll be presented with a screen like the one shown below.
From this list view, you can choose from the same management options as described above using the icons to the left of the request.

