Enhance your processes with general notifications
General Notifications in Integrify
The General Notification Task is used to send notifications via an email to any user, group, or role of individual(s) within Integrify while a process is executing. By sending the user notifications, you are not giving them a task to do within the process but simply sending information and ultimately access to the request that is executing:
In the above example, a General Notification task has been added to the process to execute after the Accepted milestone is submitted. In a scenario like this, it is simply notifying the requester that the contract was accepted.
In addition to the communication via email, once a person has been notified with a General Notification task, it also grants them access to the Request Details of that request as it is executing without assigning them a task to complete.
General Notification Usage
A General Notification task may be added anywhere in your process just like any other task. Also, like any other task in Integrify, the transition condition(s) by which the General Notification task starts may be dependent on task data, task status, the requester, etc. It is possible to start the task under specific conditions based on the state of the request as it is executing.
Aside from conditions on how a General Notification task starts, the only other items you will need to configure are:
- Notification Settings\
- Recipients
These are discussed below.
Notification Settings
Since the primary purpose of this task is to notify individuals, it is most common to manipulate the email message that is to be sent to the recipient(s) of the General Notification.
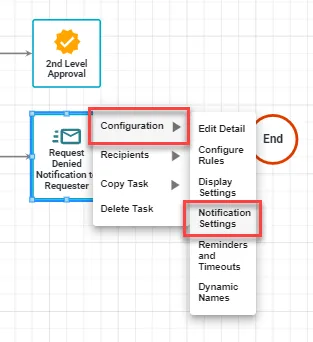
To alter the email message content for a General Notification task, click on the task and select Notification Settings.
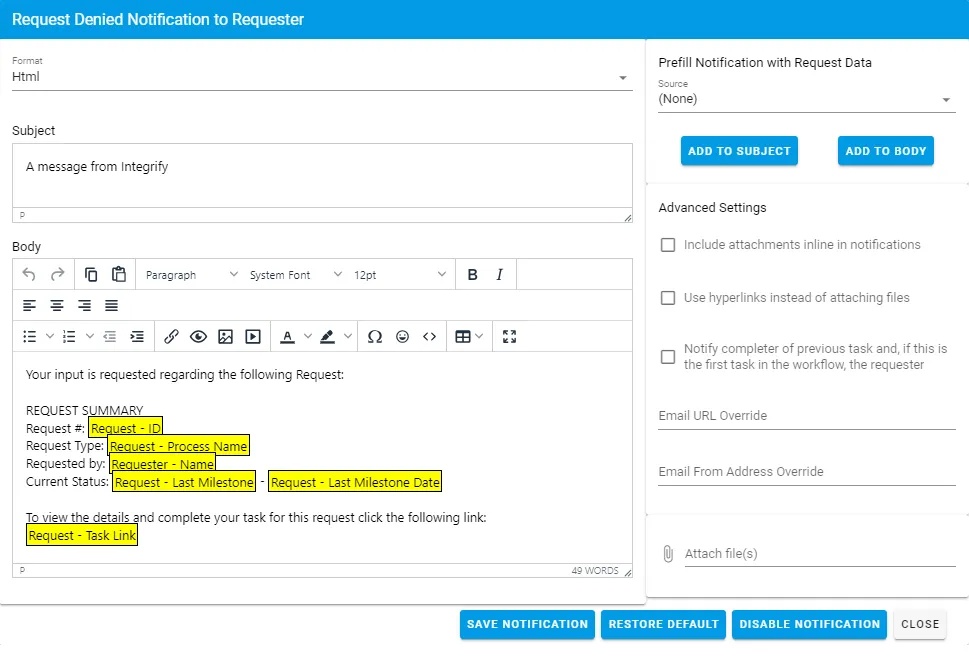
When you do so you will be presented with the following:
You can then change the Format (HTML or Plain Text), the Subject and the Body of the email message that will be sent.
When you first configure the General Notification task, you are presented with a text template for both the Subject and Body of an email. These may (and probably should) be changed to fit your needs. To alter the Subject or the Body of the email, simply change the text like any other text editor.
Any item you see highlighted in a yellow box indicates a special token that Integrify will use when email is generated as the task is executing. By default, you will see boxes such as Request – ID or Request – Process Name. These individual boxes will be replaced with the appropriate information based on the context of the request as it is executing.
For example, if the unique request id for the request is 123, then anywhere the yellow box that contains Request – ID will be replaced with 123.
Add Request Data to Email
In addition to the default template and items in the email, it is possible to customize the Subject and Body of the email with Data from your process.
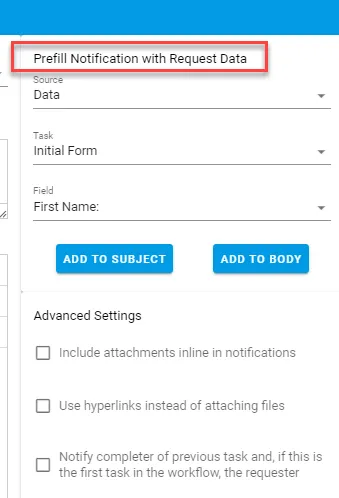
To insert a custom item, start by selecting your Source value from the Prefill Notification with Request Data area on the upper right-hand side of the Notification Settings screen:
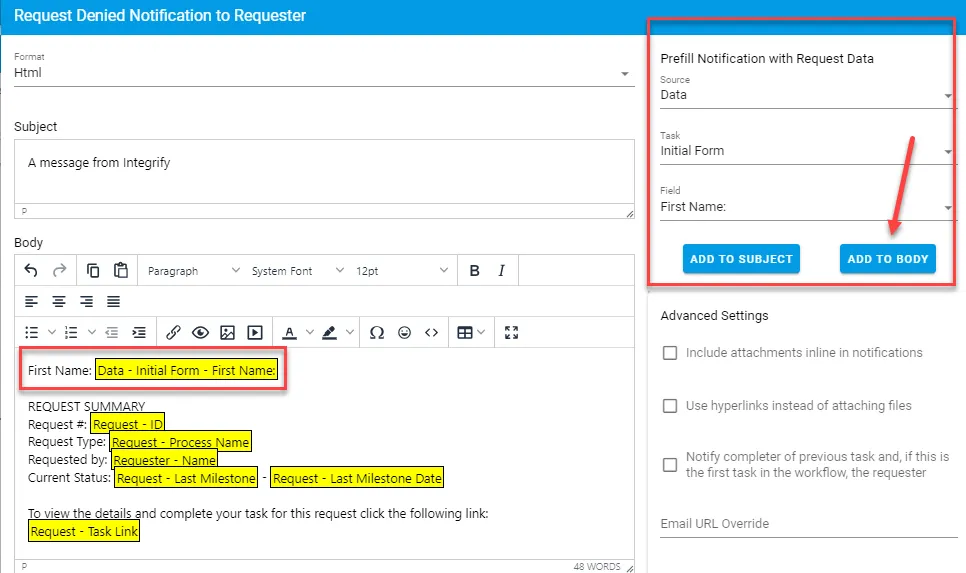
In the example above we have chosen to retrieve data from the Initial Form, which is the first task in the process. The Field list will display all available questions on that form that may be selected for the email. Once you have made the selections, press Add to Body and new token will be added to the Body of the email:
In this example, we have elected to add the First Name field to be included from the form on the notification.
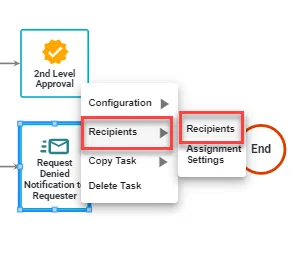
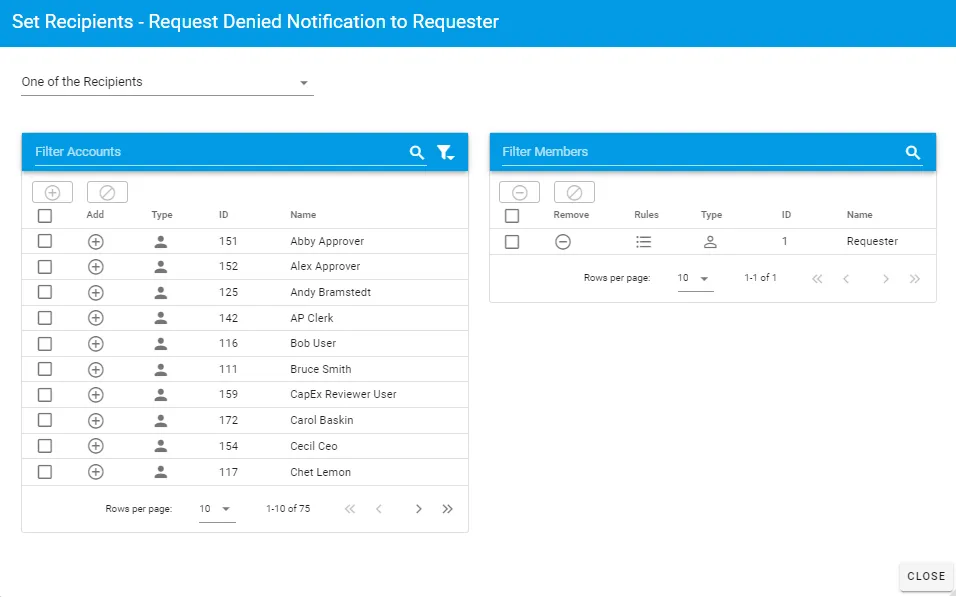
Defining Recipients
Like any other non-system task in Integrify, you will need to define a recipient or recipients for the General Notification Task.
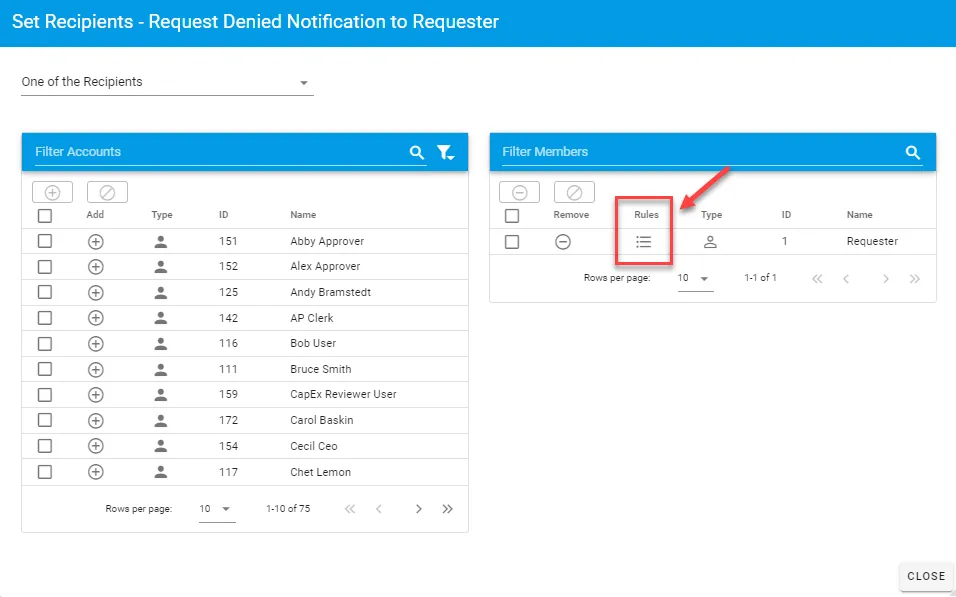
The recipient may be a user, group, role, or a dynamic recipient. You may select more than one user and you may also apply Recipient Rules to conditionally select whether a user should receive an email when the General Notification Task executes.

