Enhance document searchability with metadata extraction

Select how you want to extract metadata from the documents. You can select one or more of the available methods:
NLP Settings (Entity Extraction)
The following settings deal with automated entity extraction using Natural Language Processing (NLP). It is beneficial to read section 5.1 on Entity Extraction before going through the settings.
These settings are located in Job > Metadata > NLP Settings tab.
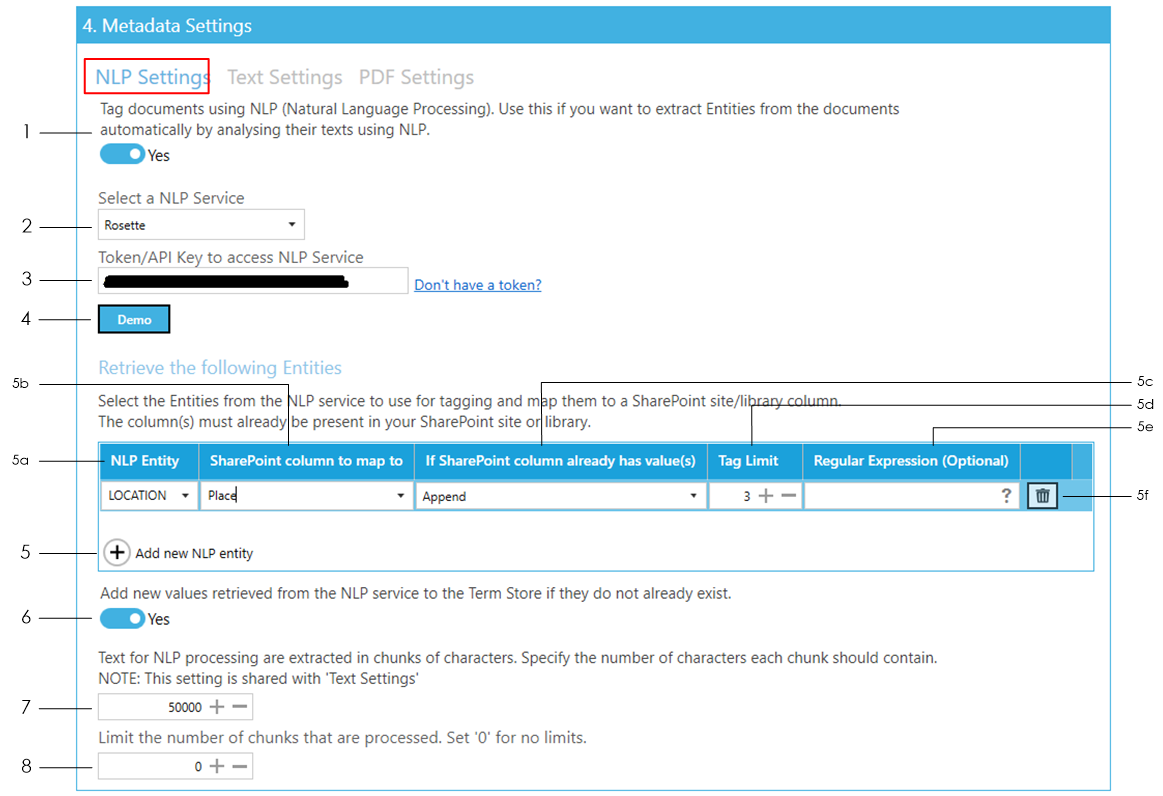
Enable tagging by NLP
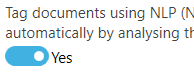
Select the NLP Service to use for extracting entities.
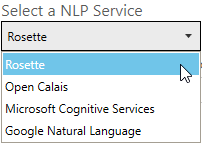
Enter the API key for the selected NLP service.
If you don’t have one, click on the Don’t have a token? link to sign up to the selected NLP service.

You can demo the selected service by clicking the Demo button. See section 5.1.3 to see how to use the Demo.

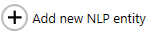
To add an NLP entity to extract, click on Add new NLP entity button:
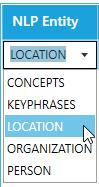
- Select an NLP entity to extract. Each NLP service has its own NLP entities. If you know other NLP entities for a particular NLP service that is not available in the drop-down menu, just type it in.
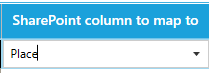
- Select or type in the name of the SharePoint column to add the extracted entity to.
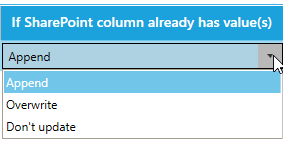
- Select what to do if the SharePoint column you want to add the extracted entities to already has values:
- Append – the extracted entities will be appended to the existing values of the SharePoint column
- Overwrite – the existing values of the of the SharePoint column will be deleted and replaced with the new extracted entities
- Don’t update – if the SharePoint column already has values, entity extraction for this column will be skipped
- Enter a Tag Limit. This restricts the number of entities that will be added (tagged) to this SharePoint column. For instance, with the settings displayed in the image above, if 10 ‘LOCATION’ entities are extracted from a document by the selected NLP service, only 3 of them will be added to the SharePoint column.
Set ‘0’ for no limits.
See section 5.5 for more information on tag limits.
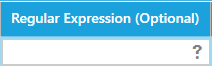
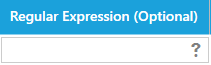
- Optionally, you can specify a regular expression to ensure that the entities returned by the NLP service are the ones you are looking for. For example, you can specify that the Location starts with a particular word or set of words. To find out more about regular expressions click on the icon.
- Click on the Delete button to delete any unwanted rows or to start over.
Repeat the above steps to add more entities.


If any of the SharePoint columns added in step 5 is a Managed Metadata column, it will be associated with an existing Term Set in the Term Store.
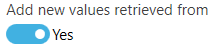
Set this option to ‘Yes’ if you want to add entities extracted from the NLP service that are not currently present in the Term Set to the Term Store. Otherwise, the entities cannot be tagged and will be skipped.
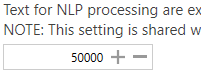
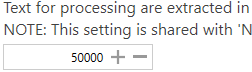
In order to send a document to an NLP service, its contents (text) has to be chunked because all NLP services have a limit on the number of characters it can process at any one time, especially if you are using the free option. Normally, the current setting of 50,000 characters should be suitable but if you switch to the premium service of a NLP service, you may be able to increase this value. See section 5.1 for more information. |
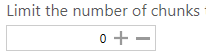
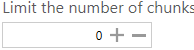
Set this to only process the first ‘x’ number of chunks. This can be useful if you are processing very large documents and the entities can be extracted on the first few pages.
Set ‘0’ to send the whole document to the NLP service.
Taxonomy matching settings
The following settings is used for taxonomy matching. These settings are located in Job > Metadata > Taxonomy Matching Settings tab.
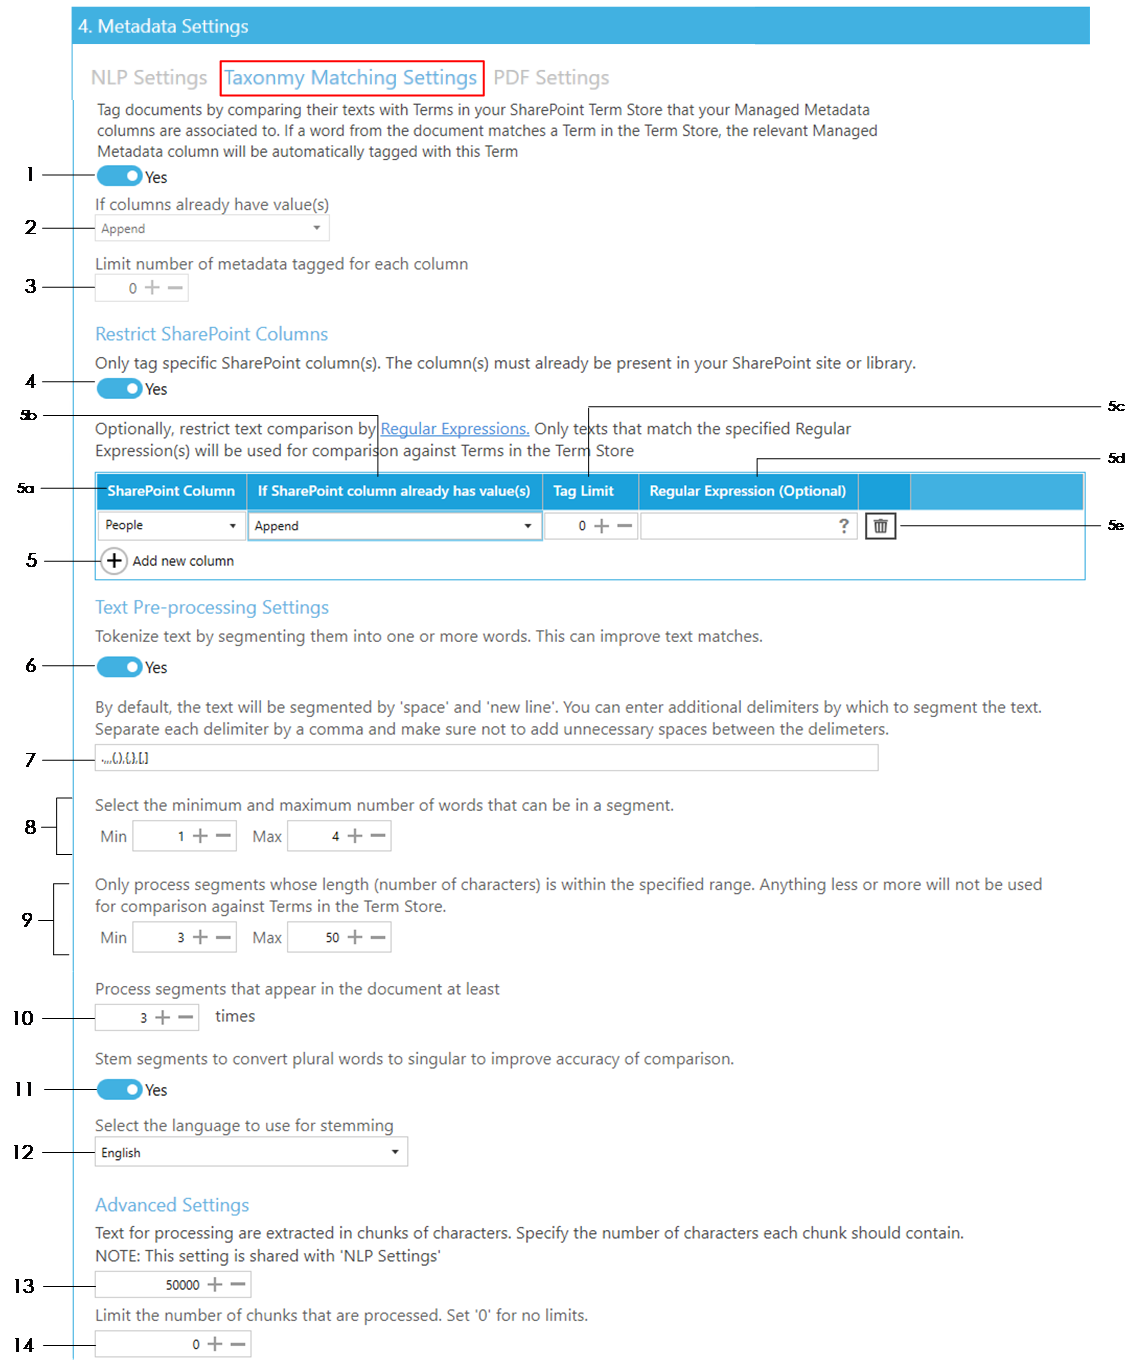
Enable tagging by comparing Terms in the Term Store
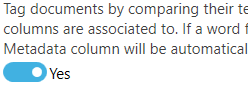
Select what to do if the managed metadata SharePoint column already has value(s):
- Append – the identified terms will be appended to the existing values of the SharePoint column
- Overwrite – the existing values of the of the SharePoint column will be deleted and replaced with the new identified terms
- Don’t update – if the SharePoint column already has values, text comparison for the column will be skipped
Enter a Tag Limit. This restricts the number of term matches that will be added (tagged) to this SharePoint column. For instance, if this is set to 2 and 5 terms are identified from the Term Store, only 2 values will be added to the SharePoint column.
Set ‘0’ for no limits.
See section 5.5 for more information on tag limits.

Set this to ‘Yes’ to manually specify which column’s Term Set to use for comparison. Once this is set to ‘Yes’, steps 2 and 3 above are overwritten by step 5 below.
If this is set to ‘No’, Tagging will identify all the Managed Metadata columns in the specified locations and for each column, it will identify the Term Set associated with it and use those Term Sets for comparison.

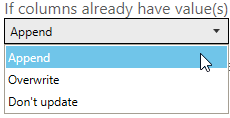
To add a Managed Metadata column, click on Add new column button:
- Select or type in the name of the SharePoint Managed Metadata column to add the text match to.
- Select what to do if the SharePoint column you want to add the text matches to already has values:
- Append – the identified terms will be appended to the existing values of the SharePoint column
- Overwrite – the existing values of the of the SharePoint column will be deleted and replaced with the new identified terms
- Don’t update – if the SharePoint column already has values, comparison for the column will be skipped
- Enter a Tag Limit. This defines the number of term matches that will be added (tagged) to this SharePoint column.
Set ‘0’ for no limits.
See Running Document Searchability Tagging with OCR for more information on tag limits.
- Optionally, you can specify a regular expression so that only text that match the specified regular expression is used for comparison against the Terms in the Term Store. To find out more about regular expressions click on the icon.
- Click on the Delete button to delete any unwanted rows or to start over.


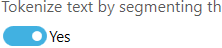
Set this to ‘Yes’ to tokenize the documents’ text. This can improve the comparison accuracy. See section 5.2 for more information about Tokenization.
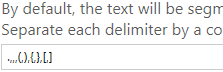
Set any additional delimiters by separating each one with a comma. The default values should be adequate for most situation.
Set the number of words that can be in each token.

Set the number of characters that each token must have in order to be used for comparison against Terms. This is useful to avoid comparing words like ‘a’, ‘is’, ‘to’ etc.

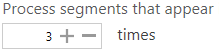
Set the minimum frequency a token must appear in a document for it to be used for comparison.
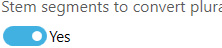
Enable stemming to convert plural words to singular to improve comparison accuracy further.
Set the language to use for stemming. Different languages have different rules for converting plural to singular.

Each document’s text is processed in chunks of 50,000 characters by default. Since this setting is shared with the equivalent NLP setting, make sure it does not interfere with it if you change the default value.
Set this to only process the first ‘x’ number of chunks. This can be useful if you are processing very large documents and the text you want to use for comparison are on the first few pages.
Set ‘0’ to process the whole document.
PDF metadata
This section is used to extract metadata from PDF documents. To access it go to Job > Metadata > PDF Settings > PDF Metadata tab.
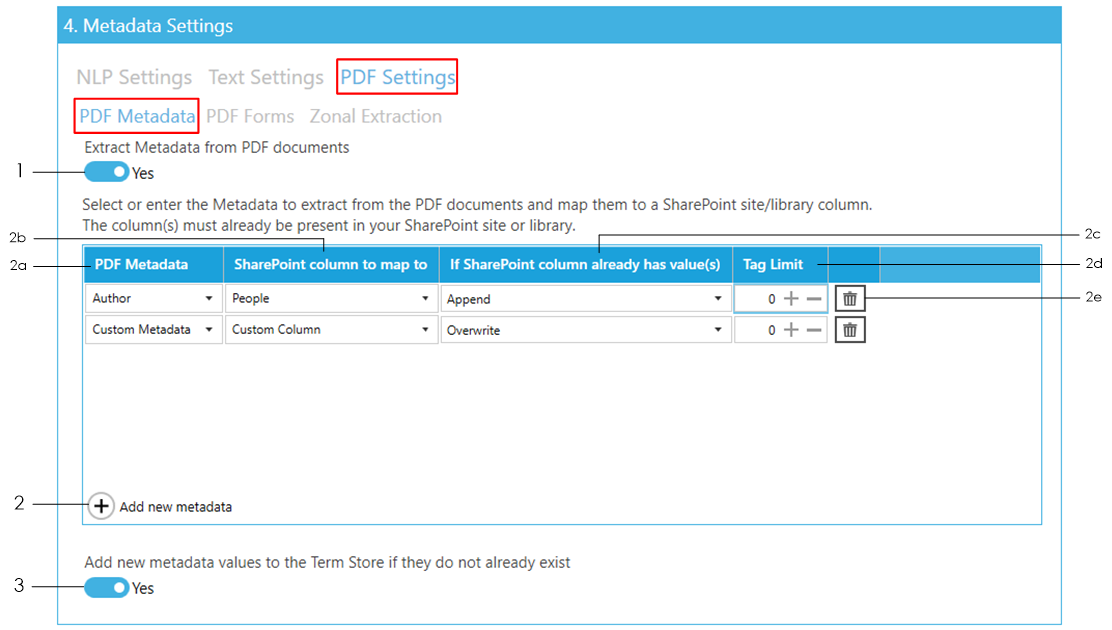
Set Extract Metadata from PDF documents to ‘Yes’.

To add a PDF Metadata to extract, click on Add new metadata button:
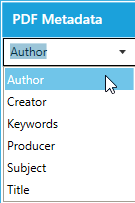
- Select or type in the name of the PDF metadata to extract. The drop down menu contains a list of common PDF metadata such as ‘Title’, ‘Author’, etc. However, you can also add custom metadata by typing them in.
- Select or type in the name of the SharePoint column to add the PDF metadata to. This can be either a Managed Metadata column or a non-Managed Metadata column.
- Select what to do if the SharePoint column you want to add the metadata to already has values:
- Append – the metadata will be appended to the existing values of the SharePoint column
- Overwrite – the existing values of the of the SharePoint column will be deleted and replaced with the new metadata
- Don’t update – if the SharePoint column already has values, PDF metadata extraction for this column will be skipped
- Enter a Tag Limit. This restricts the number of extracted metadata that will be added (tagged) to this SharePoint column.
Set ‘0’ for no limits.
See section 5.5 for more information on tag limits.
Click on the Delete button to delete any unwanted rows or to start over.
If any of the SharePoint columns added in step 2b above is a Managed Metadata column, it will be associated with an existing Term Set in the Term Store.
Set this option to ‘Yes’ if you want to add metadata extracted from the PDF that are not currently present in the Term Set to the Term Store. Otherwise, the metadata cannot be tagged and will be skipped.

PDF forms
The following settings enables the extraction of PDF Form Field data from PDF documents so that they can be added to specific SharePoint columns. To access these settings go to Job > Metadata > PDF Settings > PDF Forms tab.
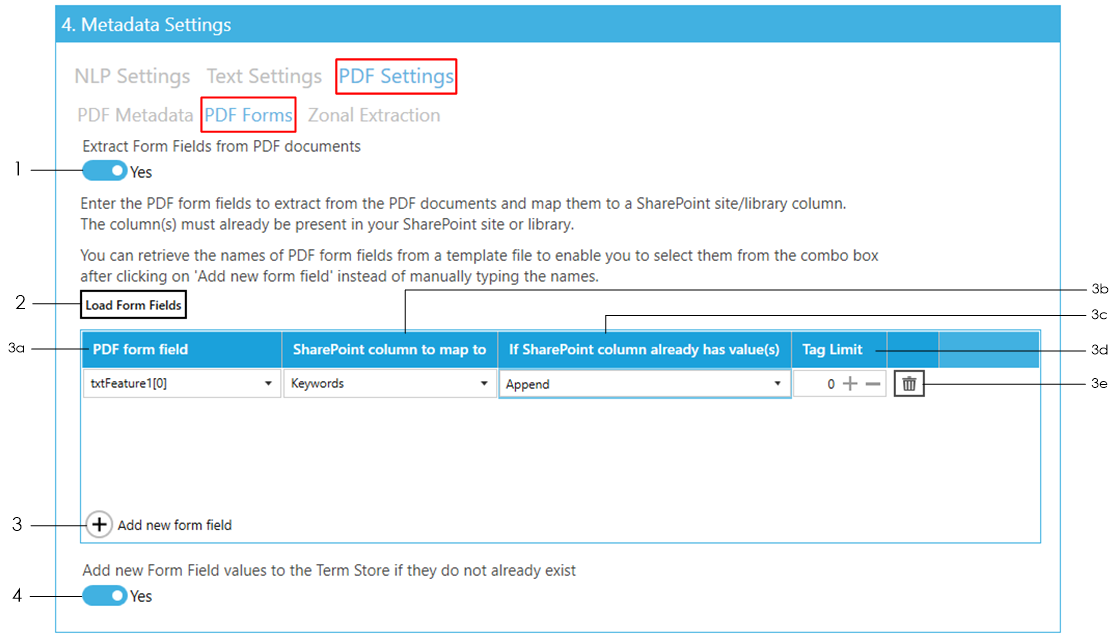
Set Extract Form Fields from PDF documents to ‘Yes’.

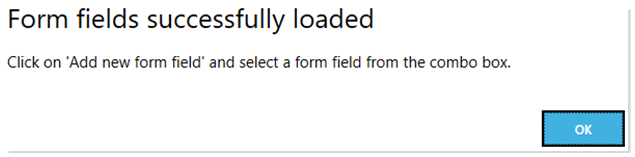
Click on the Load Form Fields button and select a template PDF file (sample file) containing the Form Field(s) you want to extract. This will load all the Form Fields from the selected PDF file which will be used in the next step.
If the selected file contains Form Fields, you should see the following message:

To add a PDF Form Field data to extract, click on Add new form field button:
- Select or type in the name of the PDF Form Field to extract data from. The drop down menu should contain all the Form Fields loaded in step 2. However, you can skip step 2 and type in the name of the Form Field if you already know it.
- Select or type in the name of the SharePoint column to add the PDF Form Field data to. This can be either a Managed Metadata column or a non-Managed Metadata column.
- Select what to do if the SharePoint column you want to add the Form Field data to already has values:
- Append – the Form Field data will be appended to the existing values of the SharePoint column
- Overwrite – the existing values of the of the SharePoint column will be deleted and replaced with the new Form Field data
- Don’t update – if the SharePoint column already has values, Form Field extraction for this column will be skipped
- Enter a Tag Limit. This restricts the number of extracted Form Field data that will be added (tagged) to this SharePoint column.
Set ‘0’ for no limits.
See section 5.5 for more information on tag limits.
Click on the Delete button to delete any unwanted rows or to start over.
If any of the SharePoint columns added in step 3b above is a Managed Metadata column, it will be associated with an existing Term Set in the Term Store.
Set this option to ‘Yes’ if you want to add metadata extracted from the PDF that are not currently present in the Term Set to the Term Store. Otherwise, the metadata cannot be tagged and will be skipped.

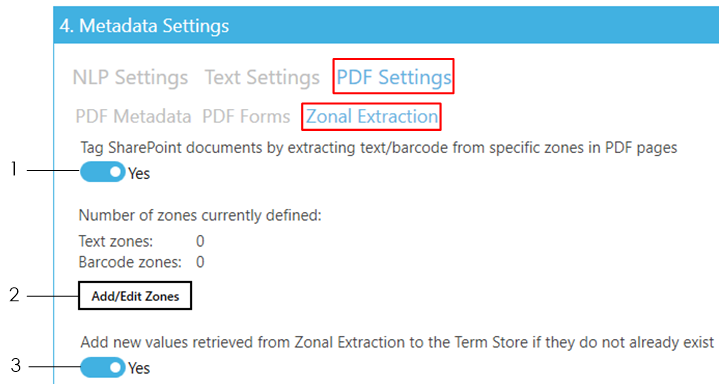
Zonal extraction
To extract text or barcode from specific zones from PDF files and add them to specific SharePoint columns, click on the Metadata > PDF Settings > Zonal Extraction tab.
Zone definer
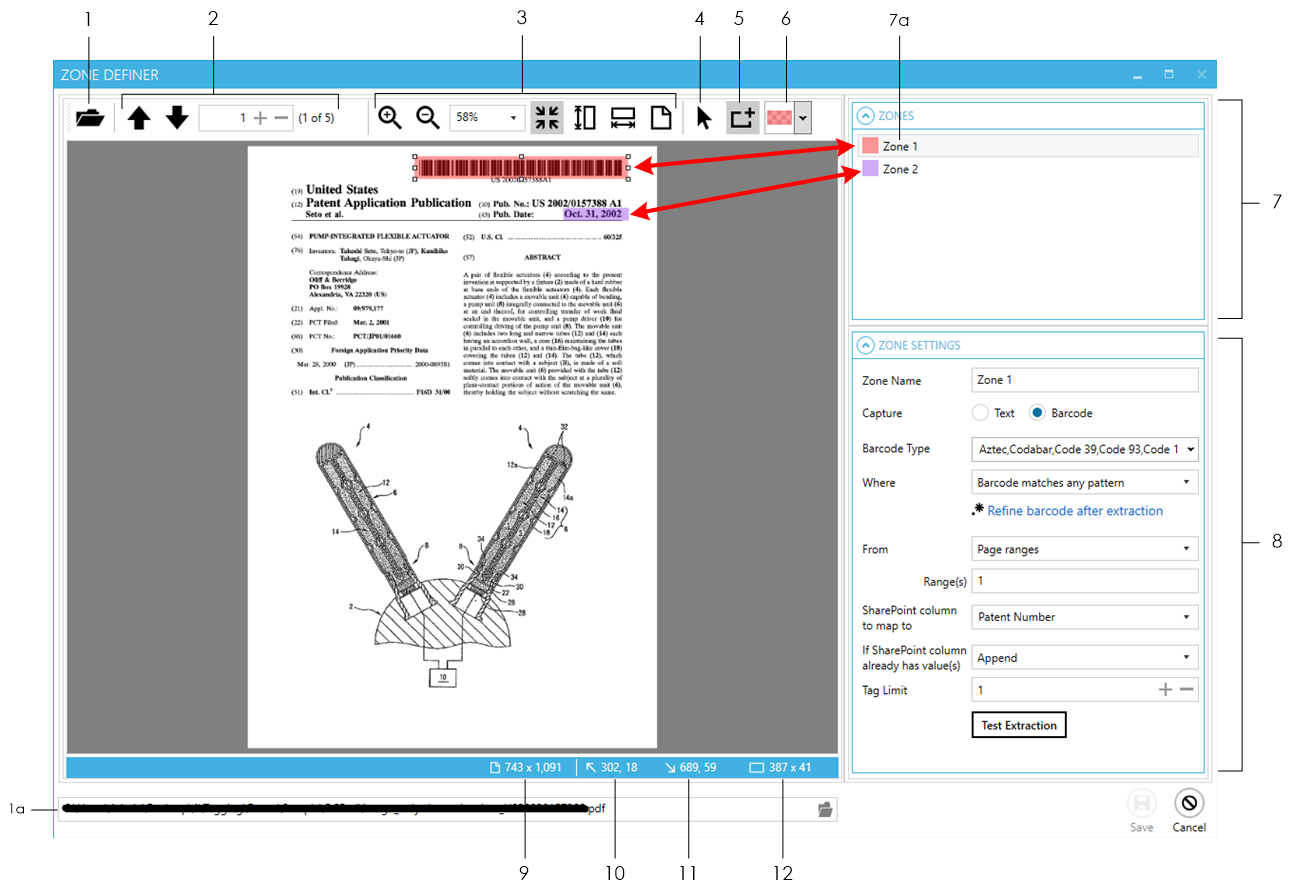
- Use this to open the file to use as a template for creating zones. Alternatively, use the control at the bottom to perform the same task.
- Navigate to pages in a multipage document.

- Navigates to the previous page

- Navigates to the next page

- Navigates to a specific page by specifying the page number in the text box
Clicking ![]() or
or ![]() will have the same effect as clicking
will have the same effect as clicking ![]() or
or ![]() respectively.
respectively.
![]()
- Use these for zooming pages to the desired size.
Zoom in to increase magnification of the current page

Zoom out to decrease magnification of the current page

Set custom zoom by selecting from the pre-defined zoom levels in the drop-down menu
Fits the current page to the current size of the Zone Definer window |

Fits the height of the current page to the height of the Zone Definer window

Fits the width of the current page to the width of the Zone Definer window |

Zooms to the actual size of the page (100%)

- Use this to select a zone (that has already been created) from the page
- Use this to define a new zone
- Changes the colour of the selected zone. If no zone is currently selected, changing this will affect the colour of the next zone that is created.
- The ZONES panel shows all the zones currently defined. Shows the zone currently selected. Another way to identify which zone is currently selected is to look which zone has the resize controls as indicated by the red arrows below:
- The ZONE SETTINGS panel shows the settings of the zone currently selected
- Shows the actual size of the current page
- The top-left co-ordinates of the selected zone.
- The bottom-right co-ordinates of the selected zone
- The dimension of the selected zone.
Zonal barcode extraction
- On the Zone Definer window, open a PDF file to use as a template for defining the zone to extract the barcode from.
- Navigate to the page where you want to extract the barcode from.
- From the toolbar at the top, select the Define a zone
 tool. The cursor should change to a crosshair
  . Click and drag on the page to define a zone where the barcode is. You can resize or move the zone after defining it to adjust the size and location as needed.

You can also change the colour of the zone if you want to. This can helpful to differentiate between zones when you have multiple zones defined.
With the zone selected, go to the ZONE SETTINGS panel to configure its settings
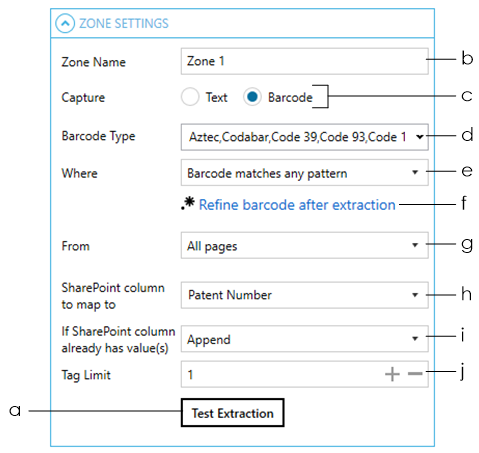
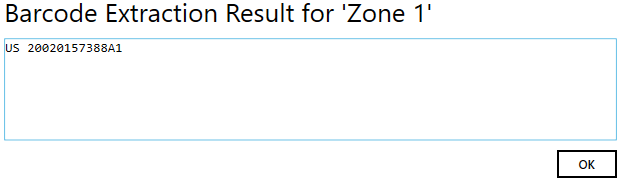
Click on the Test Extraction button to make sure that the zone currently defined is the correct size and in the correct location.
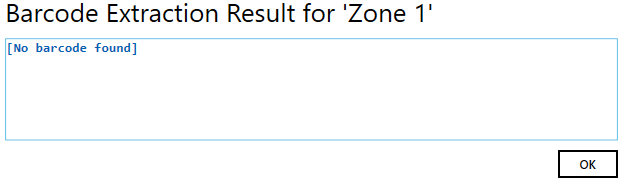
If it is the correct size and in the correct location, it will display the value of the barcode as shown below:
If it is not the correct size or in the wrong location, it will display
‘[No barcode found]’:
Change the default name of the zone if needed
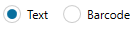
Choose Barcode as the ‘Capture’ type

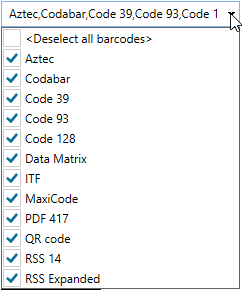
Select the Barcode Type that the SharePoint documents you want to extract barcodes from have. Select all if you do not know the barcode type(s).
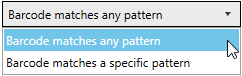
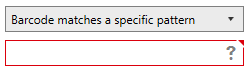
Select whether you want the extracted barcode to match a specific pattern or not
If you select “Barcode matches a specific pattern”, a textbox will appear at the bottom for you to specify the pattern (regular expression).
See Post Extraction Settings for explanation of this feature.

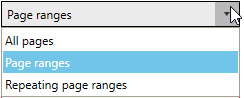
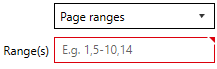
Choose which page(s) to extract the barcode from.
- All Pages – Tagging will attempt to extract barcode from all pages at the specified zone
- Page Ranges – Tagging will attempt to extract barcode only from the specified page ranges. If you select this option, a textbox will appear at the bottom for you to specify the page(s). Pages and page ranges must be separated by a comma.
Example:
| 1 | Page 1 only |
|---|---|
| 3-6 | Pages 3,4,5,6 |
| 1,3-6,14 | Pages 1,3,4,5,6,14 |
- Repeating page ranges – Similar to Page Ranges but with a different method of specifying the pages to extract the barcode from.
With this option selected, you will be provided with 2 additional textboxes to fill.
- The Range(s) textbox is same as described above in ii.
- The Repeat Every value specifies the interval to re-apply the page range specified.
E.g. if Range(s) is set to 3-6 and Repeat Every is set to 5, the range is re-applied every 5 pages from the starting page “3”, hence resulting in the following pages:
3,4,5,6 then 8,9,10,11 then 13,14,15,16 and so on.
- Select or type in the name of the SharePoint column to add the extracted barcode to. This can be either a Managed Metadata column or a non-Managed Metadata column.

Select what to do if the SharePoint column you want to add the barcode to already has values:
- Append – the barcode will be appended to the existing values of the SharePoint column
- Overwrite – the existing values of the of the SharePoint column will be deleted and replaced with the new barcode
- Don’t update – if the SharePoint column already has values, the barcode extraction for this column will be skipped
 Tag Limit. This restricts the number of extracted barcodes that will be added (tagged) to this SharePoint column. Set ‘0’ for no limits. See section 5.5 for more information on tag limits.
3. Click Save at the bottom of the Zone Definer if you don’t have any more zones to define. Otherwise repeat from step 2 above to create another zone to extract barcode or go to the next section for steps in defining zones to extract text.
Zonal text extraction
- On the Zone Definer window, open a PDF file to use as a template for defining the zone to extract the text from. |

- Navigate to the page where you want to extract the text from. |

- From the toolbar at the top, select the Define a zone tool. The cursor should change to a crosshair . Click and drag on the page to define a zone where the text you want to extract is. You can resize or move the zone after defining it to adjust the size and location as needed.
![]()
You can also change the colour of the zone if you want to. This can helpful to differentiate between zones when you have multiple zones defined.
With the zone selected, go to the ZONE SETTINGS panel to configure its settings.
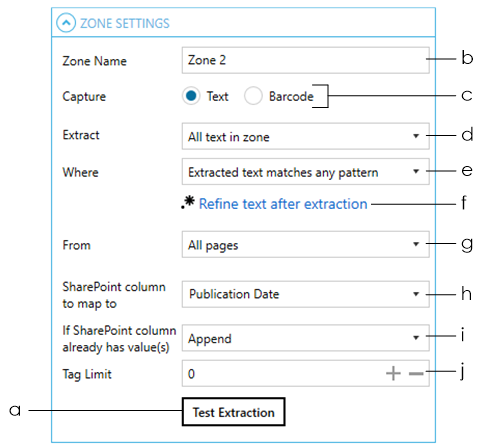
Click on the Test Extraction button to make sure that the zone currently defined is the correct size and in the correct location.
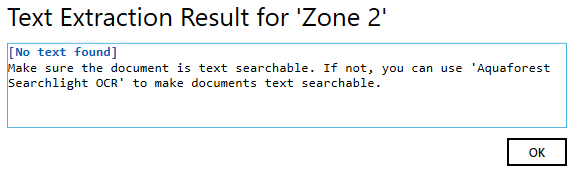
If it is the correct size and in the correct location, it will display the value of the text as shown below: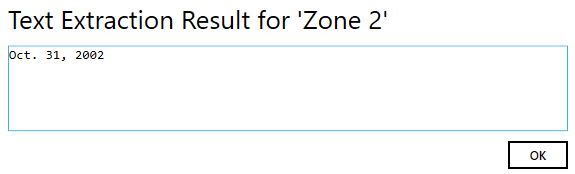
If it is not the correct size or in the wrong location, it will display.
‘[No text found]’:
Change the default name of the zone if needed
Choose Text as the ‘Capture’ type |
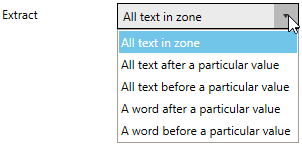
Select how you want to extract the text from the specified zone. The following options are available:
- All text in zone – this is useful if all documents are exactly the same in terms of page size and content structure such that the zone will always point to the same location in all documents.
- All text after a particular value
- All text before a particular value
- A word after a particular value
- A word before a particular value
Options ii, iii, iv and v are useful if the documents may not have the same size pages or its content structure may be different but the text you want to extract always comes before or after a particular value such as a field name like “Invoice no.”.
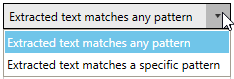
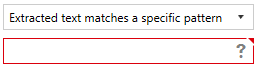
Select whether you want the extracted text to match a specific pattern or not
If you select “Extracted text matches a specific pattern”, a textbox will appear at the bottom for you to specify the pattern (regular expression).
See Post Extraction Settings for explanation of this feature. |

Choose which page(s) to extract the barcode from.
- All Pages – Tagging will attempt to extract text from all pages at the specified zone
- Page Ranges – Tagging will attempt to extract text only from the specified page ranges.
If you select this option, a textbox will appear at the bottom for you to specify the page(s). Pages and page ranges must be separated by a comma.
Example:
| 1 | Page 1 only |
|---|---|
| 3-6 | Pages 3,4,5,6 |
| 1,3-6,14 | Pages 1,3,4,5,6,14 |
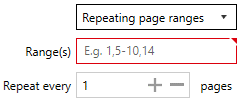
Repeating page ranges – Similar to Page Ranges but with a different method of specifying the pages to extract the text from.
With this option selected, you will be provided with 2 additional textboxes to fill.
- The Range(s) textbox is same as described above in ii.
- The Repeat Every value specifies the interval to re-apply the page range specified.
E.g. if Range(s) is set to 3-6 and Repeat Every is set to 5, the range is re-applied every 5 pages from the starting page “3”, hence resulting in the following pages:
3,4,5,6 then 8,9,10,11 then 13,14,15,16 and so on.
- Select or type in the name of the SharePoint column to add the extracted barcode to. This can be either a Managed Metadata column or a non-Managed Metadata column.
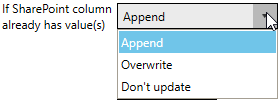
Select what to do if the SharePoint column you want to add the barcode to already has values:
- Append – the barcode will be appended to the existing values of the SharePoint column
- Overwrite – the existing values of the of the SharePoint column will be deleted and replaced with the new barcode
- Don’t update – if the SharePoint column already has values, the barcode extraction for this column will be skipped
Enter a Tag Limit. This restricts the number of extracted barcodes that will be added (tagged) to this SharePoint column.
Set ‘0’ for no limits.
See section 5.5 for more information on tag limits.
![]()
5. Click Save at the bottom of the Zone Definer if you don’t have any more zones to define. Otherwise repeat from step 2 above to create another zone to extract text or go to the previous section for steps in defining zones to extract barcode. ![]()
Post extraction settings
Post Extraction Settings enables you to refine text or barcode further after they have been extracted. It allows removing and/or replacing specific characters, words, numbers, etc. from the extracted text/barcode.
You can access the post extraction settings by clicking the Refine text after extraction or the Refine barcode after extraction link in the Zone Settings panel in the Zone Definer window.
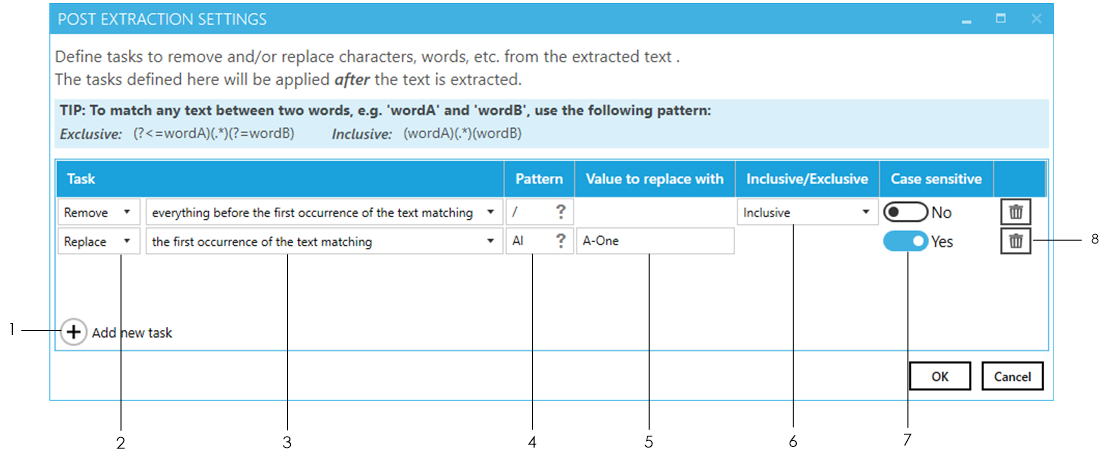
To create a Remove or Replace task, follow the following steps:
- Click on the Add new task button

- Select whether you want to Remove or Replace a particular text from the extracted text or barcode

- Select the method you want to use to identify the text to be removed or replaced

- Specify a pattern (regular expression) to search the text, character, etc. you want.

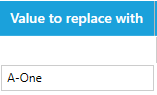
Specify the value you want to replace the text identified above with. This option is only available if you are create a Replace task.
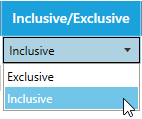
Specify whether you want the pattern specified in step 4 to be part of the removal/replacement process or not.
- Exclusive – the pattern will not be removed or replaced
- Inclusive – the pattern will be removed or replaced
This option is only available for methods (step 3 above) that contain the word “before” or “after”.
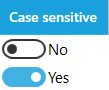
Specify whether the pattern matching should be case-sensitive or not.
Click on the Delete button to delete any unwanted rows or to start over.
Repeat these steps to create more tasks and once finished, click on the Save button at the bottom.
To check if the tasks achieve what they are supposed to do, click on the Test Extraction button in the Zone Settings panel in the Zone Definer window.
You should see something similar to the following image where it shows step-by-step the text after extraction and the result of applying the post extraction tasks to the extracted text.
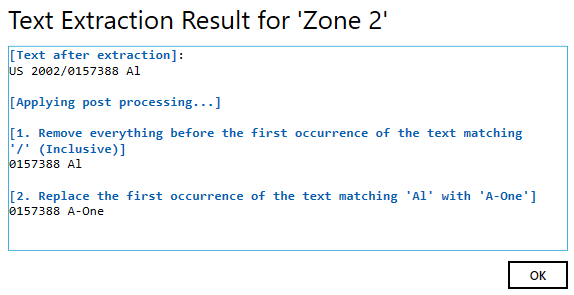
The above Post Extraction tasks were applied to the following zone:
