How to build a PDF viewer with Remix and Nutrient
Table of contents

What is Remix?
Remix is a full-stack web framework built on React and React Router. It supports server-side rendering, data fetching, and improved performance over traditional client-side frameworks. Many developers compare Remix to Next.js due to the two having similar capabilities.
Why use Nutrient for a Remix PDF viewer?
- Efficient PDF rendering — Fast and reliable viewing experience.
- Annotation support — Users can highlight, comment, and mark up PDFs.
- Cross-browser compatibility — Works across major web browsers.
- Robust API — Allows for customization and integration with various data sources.
Creating the Remix PDF viewer
This section will walk you through creating your Remix PDF viewer.
Prerequisites
First, you need to install:
- Node.js(opens in a new tab) version 14 or higher.
- npm(opens in a new tab) version 7 or greater.
When you install Node.js, npm is installed by default.
Creating a new Remix project
If you’re integrating Nutrient into an existing Remix app, feel free to skip to the next section.
To create a new Remix project, open a terminal of your choice and run:
npx create-remix@latestDuring the project creation process, you’ll be presented with several options:
- Setting the project location and name
- A choice for the type of app you want to create
- Deployment target choice
- Language choice (TypeScript or JavaScript)
- Whether or not you want the tool to run
npm install
Keep reading to learn more about these choices.
The first time you run the create-remix package, you’ll be asked if you want to install it. Type y (for yes) to proceed.
Start by setting the name and location of the project, i.e. pspdfkit-remix.
For the sake of simplicity, you’ll create a project with the basic options. So, when prompted for the type of Remix app you want to create, select the option for Just the basics. If you want to learn more about Remix app types, take a look at the Remix documentation(opens in a new tab).
Next, choose Remix App Server for the deployment target. This can be changed at a later stage.
This tutorial uses JavaScript as the language and lets Remix run npm install for you.
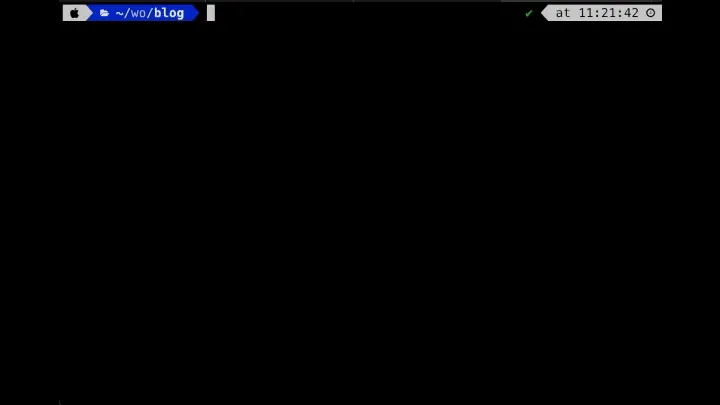
Your installation process will look something like what’s shown below.

Adding Nutrient to your Remix project
If everything went fine, you’ll have successfully set up the Remix project and you can add Nutrient and start building the viewer. This consists of three steps, outlined below.
- Change your directory to the path specified when creating an app:
cd pspdfkit-remix- Install
pspdfkitas a dependency withnpm:
npm install pspdfkit- After installation, copy the Nutrient library assets to the assets folder, which, by default, is named
public:
cp -R ./node_modules/pspdfkit/dist/pspdfkit-lib public/pspdfkit-libOr better yet, you can automate this so that it’s automatically done for you every time you install your packages. To do this, go to your package.json file and modify the postinstall script:
... "scripts": { "build": "remix build", "dev": "remix dev", "postinstall": "remix setup node", "postinstall": "cp -R ./node_modules/pspdfkit/dist/pspdfkit-lib ./public/pspdfkit-lib && remix setup node", "start": "remix-serve build" }...Displaying the PDF
Now, for the fun part: displaying the PDF. Feel free to use our demo document for testing. Create an assets folder inside the public folder and place the desired PDF there.
Next, change the index page so that it displays your PDF viewer:
import { useEffect, useRef } from 'react';
export default function Index() {  const containerRef = useRef(null);
  useEffect(() => {    const container = containerRef.current;    let instance, PSPDFKit;    (async function () {      PSPDFKit = (await import('pspdfkit')).default;      instance = await PSPDFKit.load({        container,        document: 'assets/pspdfkit-web-demo.pdf',        baseUrl: `${window.location.protocol}//${window.location.host}/`,        licenseKey: 'YOUR_LICENSE_KEY_GOES_HERE',      });    })();
    return () => PSPDFKit && PSPDFKit.unload(container);  }, []);
  return (    <div>      <div>        Hello from Remix! Look at this pretty PDF we've got for you:      </div>      <div        ref={containerRef}        style={{ width: '100%', height: '100vh' }}      />    </div>  );}
The viewer container needs to have height explicitly set. Otherwise, you may get an error.
Now, take a closer look at the changes above. You created a containerRef reference to the element you’re going to mount Nutrient to, and then you lazily loaded the pspdfkit package inside the React useEffect hook. This enables you to load the document with the desired configuration.
For the most basic use case of displaying a PDF, there are only a few things you need to specify:
container— A CSS selector, or the actual HTML element where you want to display the PDF (hencecontainerRef)document— The relative path to the document you want to display, or anArrayBufferlicenseKey— Your license keybaseUrl— The URL of your assets. By default, Nutrient assumes the assets folder is present in the same folder of your application module, but in this tutorial, you kept it inside the public folder, so you’ll have to pass abaseUrloption while initializing Nutrient.
You can read more about the available configuration options in our API docs.
Lastly, start the app to see the viewer. Run the command below and open http://localhost:3000 in your favorite web browser:
npm run devYou’ve successfully added the Nutrient viewer to a Remix app!
Dynamically loading PDFs
Simply displaying a static PDF doesn’t provide much flexibility. What if you want to load a PDF from an API or some other data source?
This is where Remix comes in handy with its loader functions(opens in a new tab). Go ahead and write a loader function that first makes an API call to fetch the PDF and then forwards it to the index page as a buffer:
import { useLoaderData } from 'remix';
export const loader = async () => {  try {    const response = await fetch(      'https://www,nutrient.io/example.pdf',    );
    return await response.buffer();  } catch (e) {    return { error: e.message };  }};
Now, take that buffer and display it using Nutrient. Remember reading above that the Nutrient SDK accepts an ArrayBuffer for a document? Well, this is exactly the type of situation where it’d come in handy. Now, your entire index page will look like this:
import { useEffect, useRef } from "react"; import { useLoaderData } from 'remix'
 export const loader = async () => {     try {        const response = await fetch('https://www,nutrient.io/example.pdf')
        return await response.buffer()    } catch (e) {        return { error: e.message }    }};
export default function Index() {    const containerRef = useRef(null);    const { data, error } = useLoaderData();
    useEffect(() => {    useEffect(async () => {        if (!error) {            const document = new ArrayBuffer(data.length);            const view = new Uint8Array(document);
             for (let i = 0; i < data.length; ++i) {                view[i] = data[i];            }
            const container = containerRef.current;            let instance, PSPDFKit;            (async function () {                PSPDFKit = (await import("pspdfkit")).default;                instance = await PSPDFKit.load({                    container,                    document: 'assets/pspdfkit-web-demo.pdf',                    document,                    baseUrl: `${window.location.protocol}//${window.location.host}/`,                    licenseKey: "YOUR_LICENSE_KEY_GOES_HERE",                });            })();
            return () => PSPDFKit && PSPDFKit.unload(container);        }    }, []);
    return (        <div>            <div>Hello from Remix! Look at this pretty PDF we've got for you:</div>            <div ref={containerRef} style={{ width: "100%", height: "100vh" }} />        </div>    );}
And voilà, you’ve configured the viewer to load a PDF on the server by making an API call and then serving it as part of the page! 🎉
Pros and cons of alternative PDF libraries
| Library | Pros | Cons |
|---|---|---|
| PDFKit | Generates PDFs programmatically | No built-in viewer, limited interactivity |
| Puppeteer | Excellent for automated PDF generation | Heavy, not ideal for in-browser viewing |
| pdf.js | Lightweight, great for viewing PDFs | Lacks advanced features like annotation |
| Nutrient | Powerful features, customizable, great UI | Paid licensing required |
Adding even more capabilities
Once you’ve built your viewer, you can start customizing it to meet your specific requirements or easily add more capabilities. To help you get started, here are some of our most popular Remix guides:
- Real-time collaboration
- UI customization
- Client-side PDF, MS Office, and image viewing
Conclusion
You should now have our Remix PDF viewer up and running in your web application. If you hit any snags, don’t hesitate to reach out to our Support team for help.
You can also deploy our vanilla JavaScript PDF viewer or use one of our many web framework deployment options like Vue.js, React.js, and jQuery. To see a list of all web frameworks, start your free trial. Or, launch our demo to see our viewer in action.
FAQ
Remix is a React-based web framework that supports server-side rendering, making it ideal for rendering and managing PDFs dynamically.
Nutrient offers annotations, editing, and better rendering performance, whereas pdf.js is primarily for viewing.
Puppeteer is mainly for automating browser tasks and generating PDFs, and not for in-browser viewing.
You can use Remix’s loader function to fetch PDFs from an API and pass them as an array buffer:
export const loader = async () => { const response = await fetch('https://example.com/sample.pdf'); return await response.arrayBuffer();};


