How to Extract Tables from PDFs and Images in C#

In this tutorial, you’ll learn how to extract tables from PDFs and images in C# using our data extraction SDK. You’ll also learn some useful tricks to convert the extracted tables into JSON and Markdown formats.
Prerequisites
This tutorial uses Visual Studio 2022 with .NET 6. You can follow this guide(opens in a new tab) from Microsoft to install Visual Studio and set up the .NET 6 SDK.
Make sure you follow this tutorial on a Windows machine, as it’s currently only possible to develop applications using GdPicture.NET on Windows. However, this limitation is only for developing the application; the final binary can be deployed on multiple different platforms (including Mac and Linux).
If you don’t have a sample PDF or an image of a table, you can use these sample files.
Installing GdPicture.NET SDK
Once you have Visual Studio 2022 and .NET 6 set up, you need to install GdPicture.NET from our website(opens in a new tab). You’ll be setting up GdPicture.NET in your project via NuGet. This website-based installation step is required not only to get a trial license key via the License Manager that only ships as part of the website-based installation, but also to get access to the OCR resource files.
Make sure you install the GdPicture.NET SDK in an easily findable path like C:\GdPicture 14, and once the SDK is installed, run the LicenseManager.exe file from the installation directory.
From there, click Request a trial key.
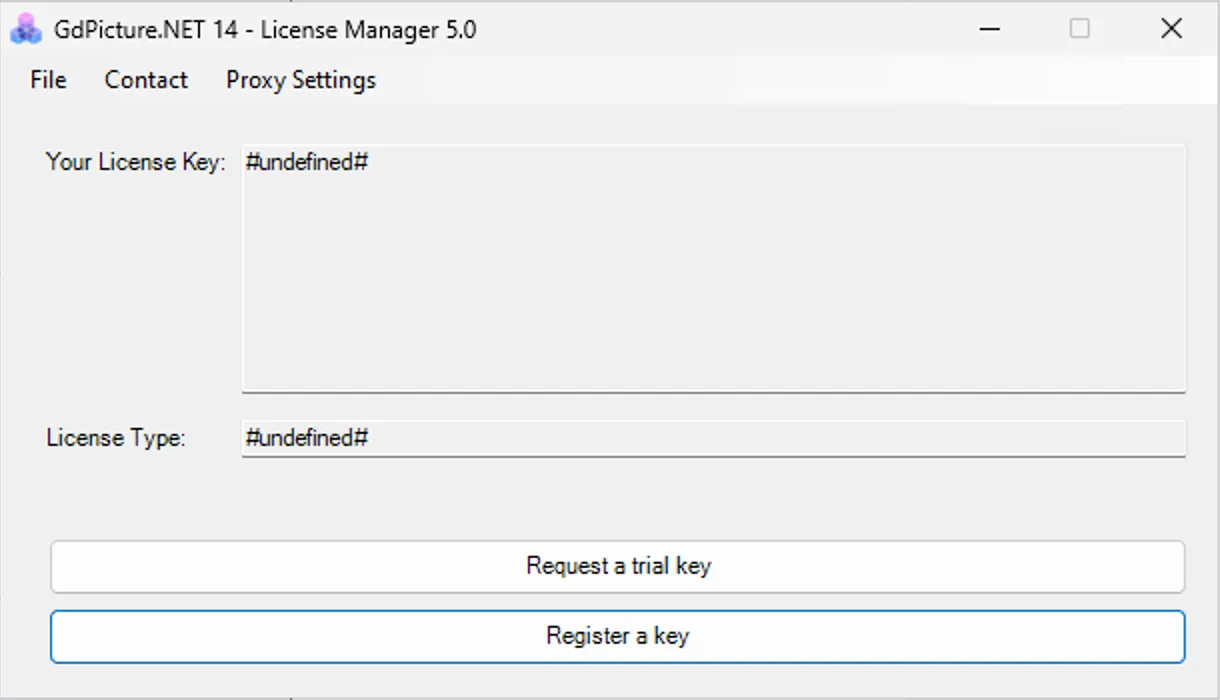
Fill out the form that opens and click Send Request.
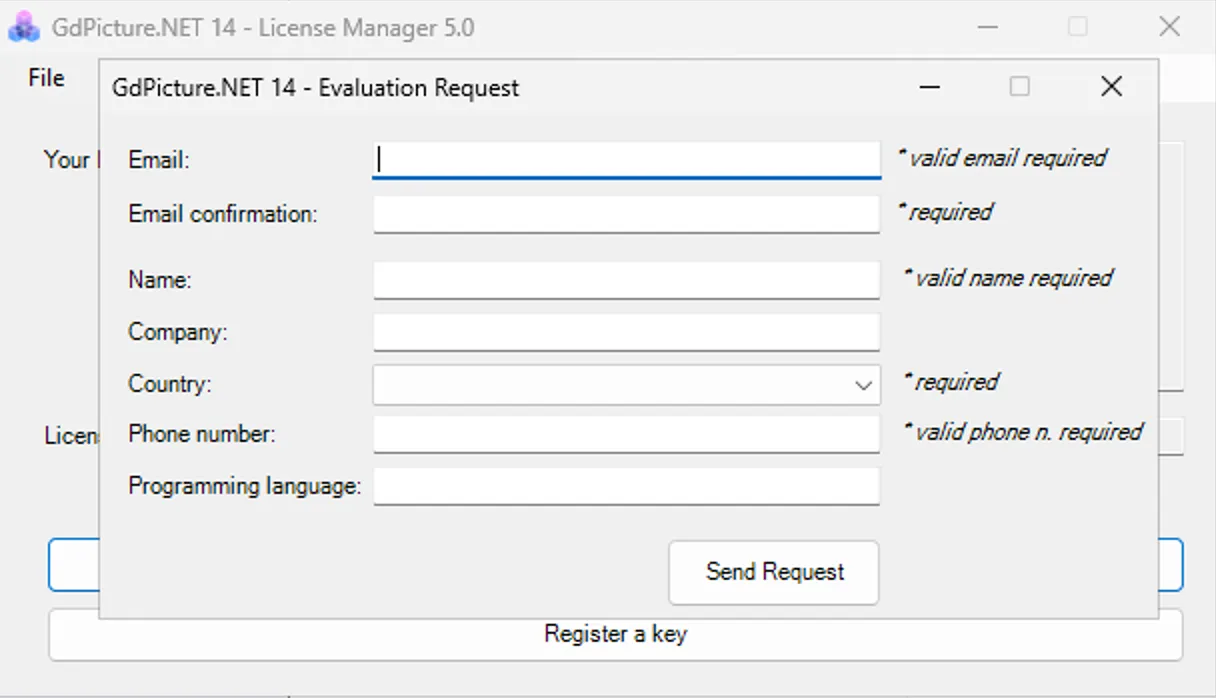
You’ll receive an email with a trial license key. Save this key in a safe location, as you’ll need it later.
Creating a New .NET 6 Project
Open Visual Studio and create a new Console App project.

You can name it whatever you want. Click Next.
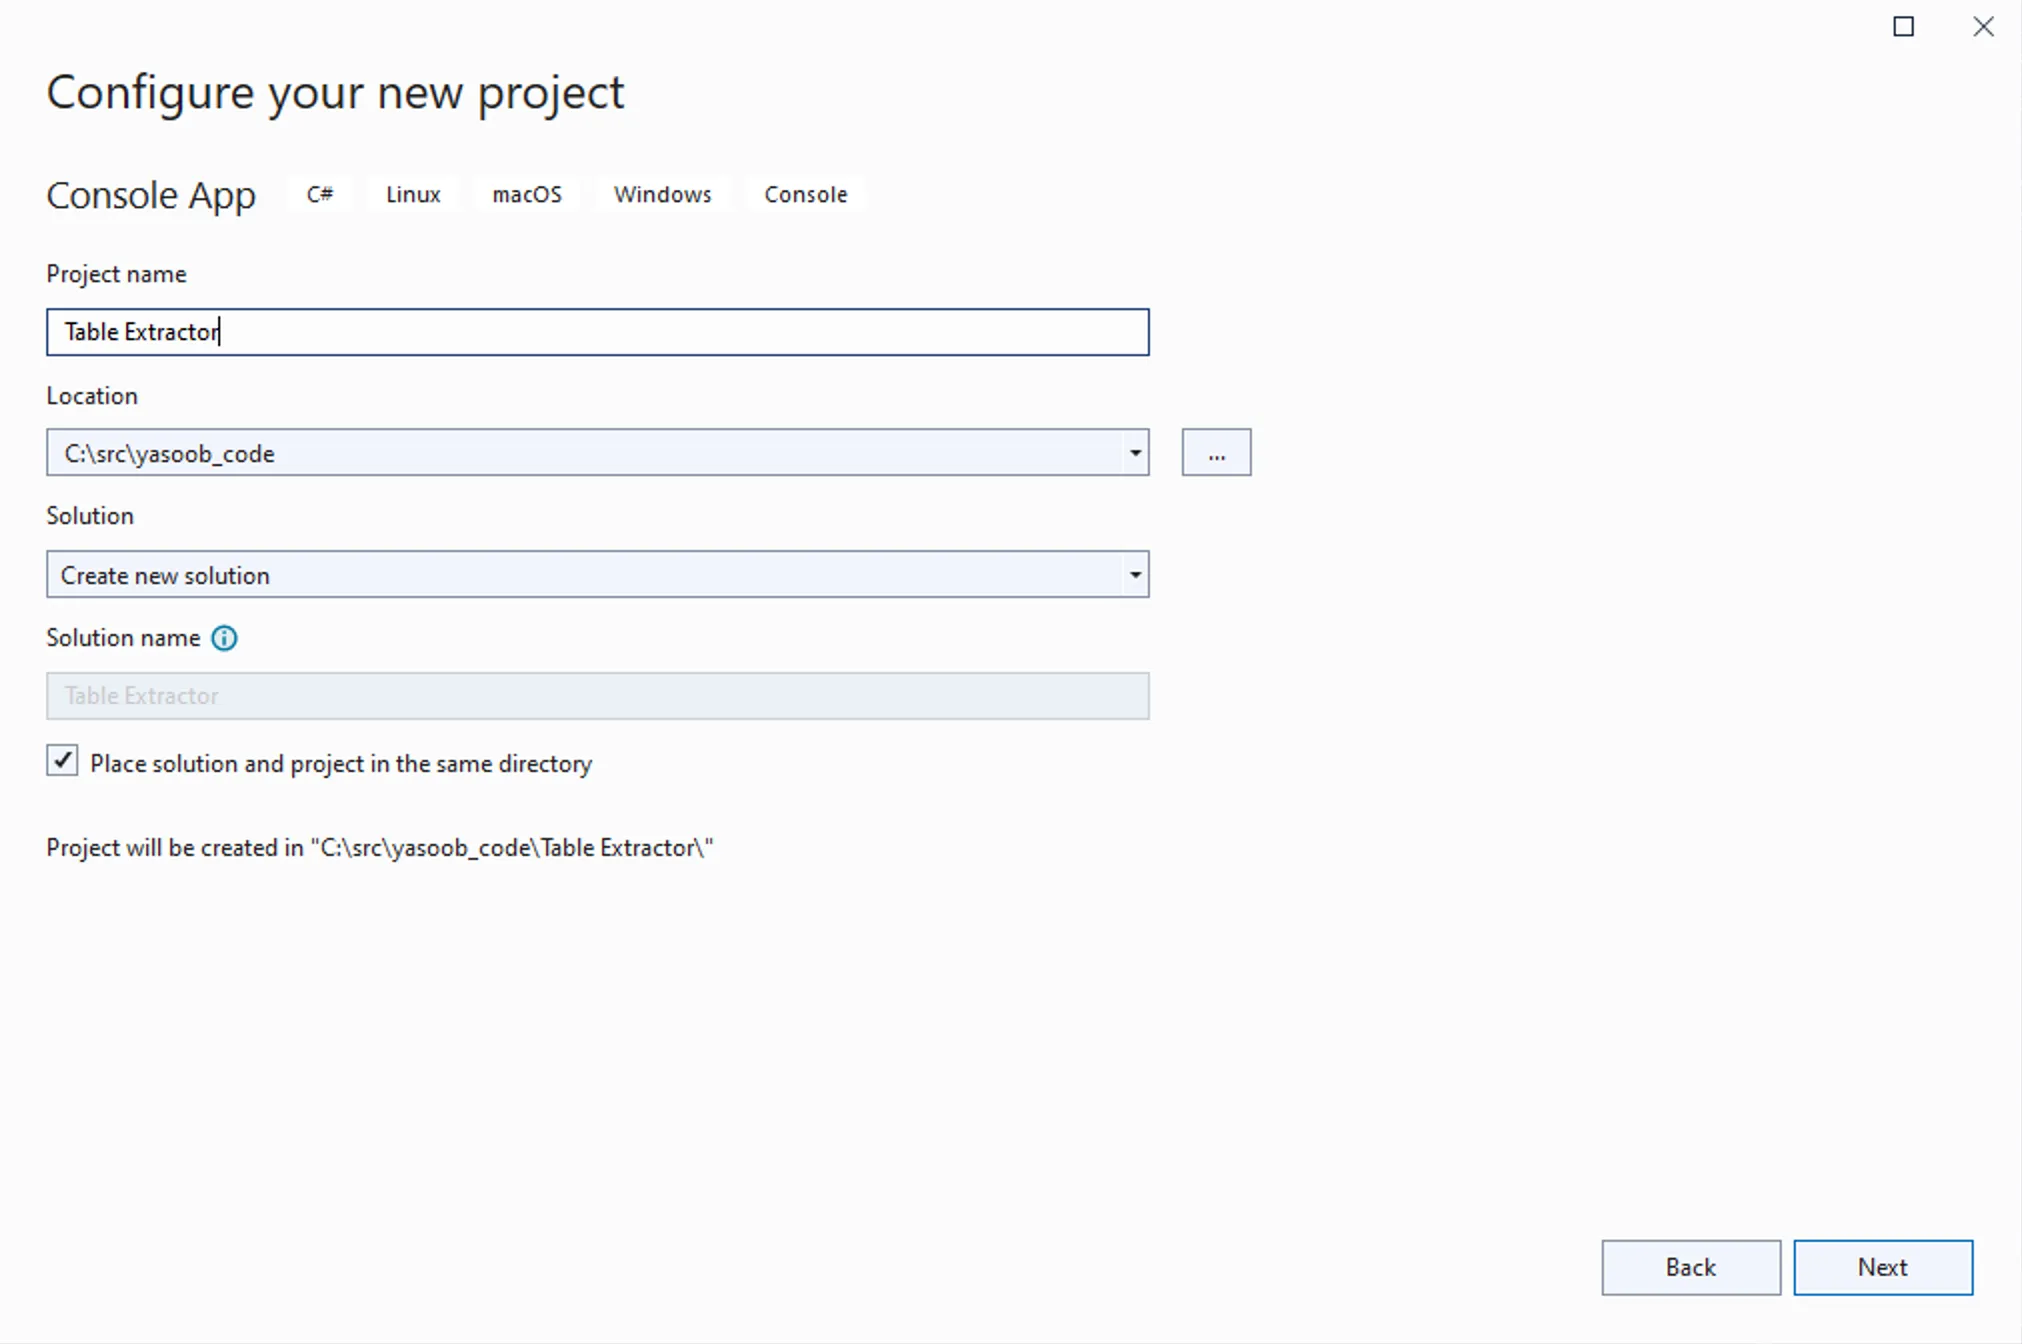
On the next screen of the wizard, select .NET 6.

Once you click Create, you’ll be greeted by a brand-new .NET 6 project.
Setting up GdPicture.NET as a Dependency
Before you can use GdPicture.NET in your .NET project, you need to install and reference the NuGet package for GdPicture.
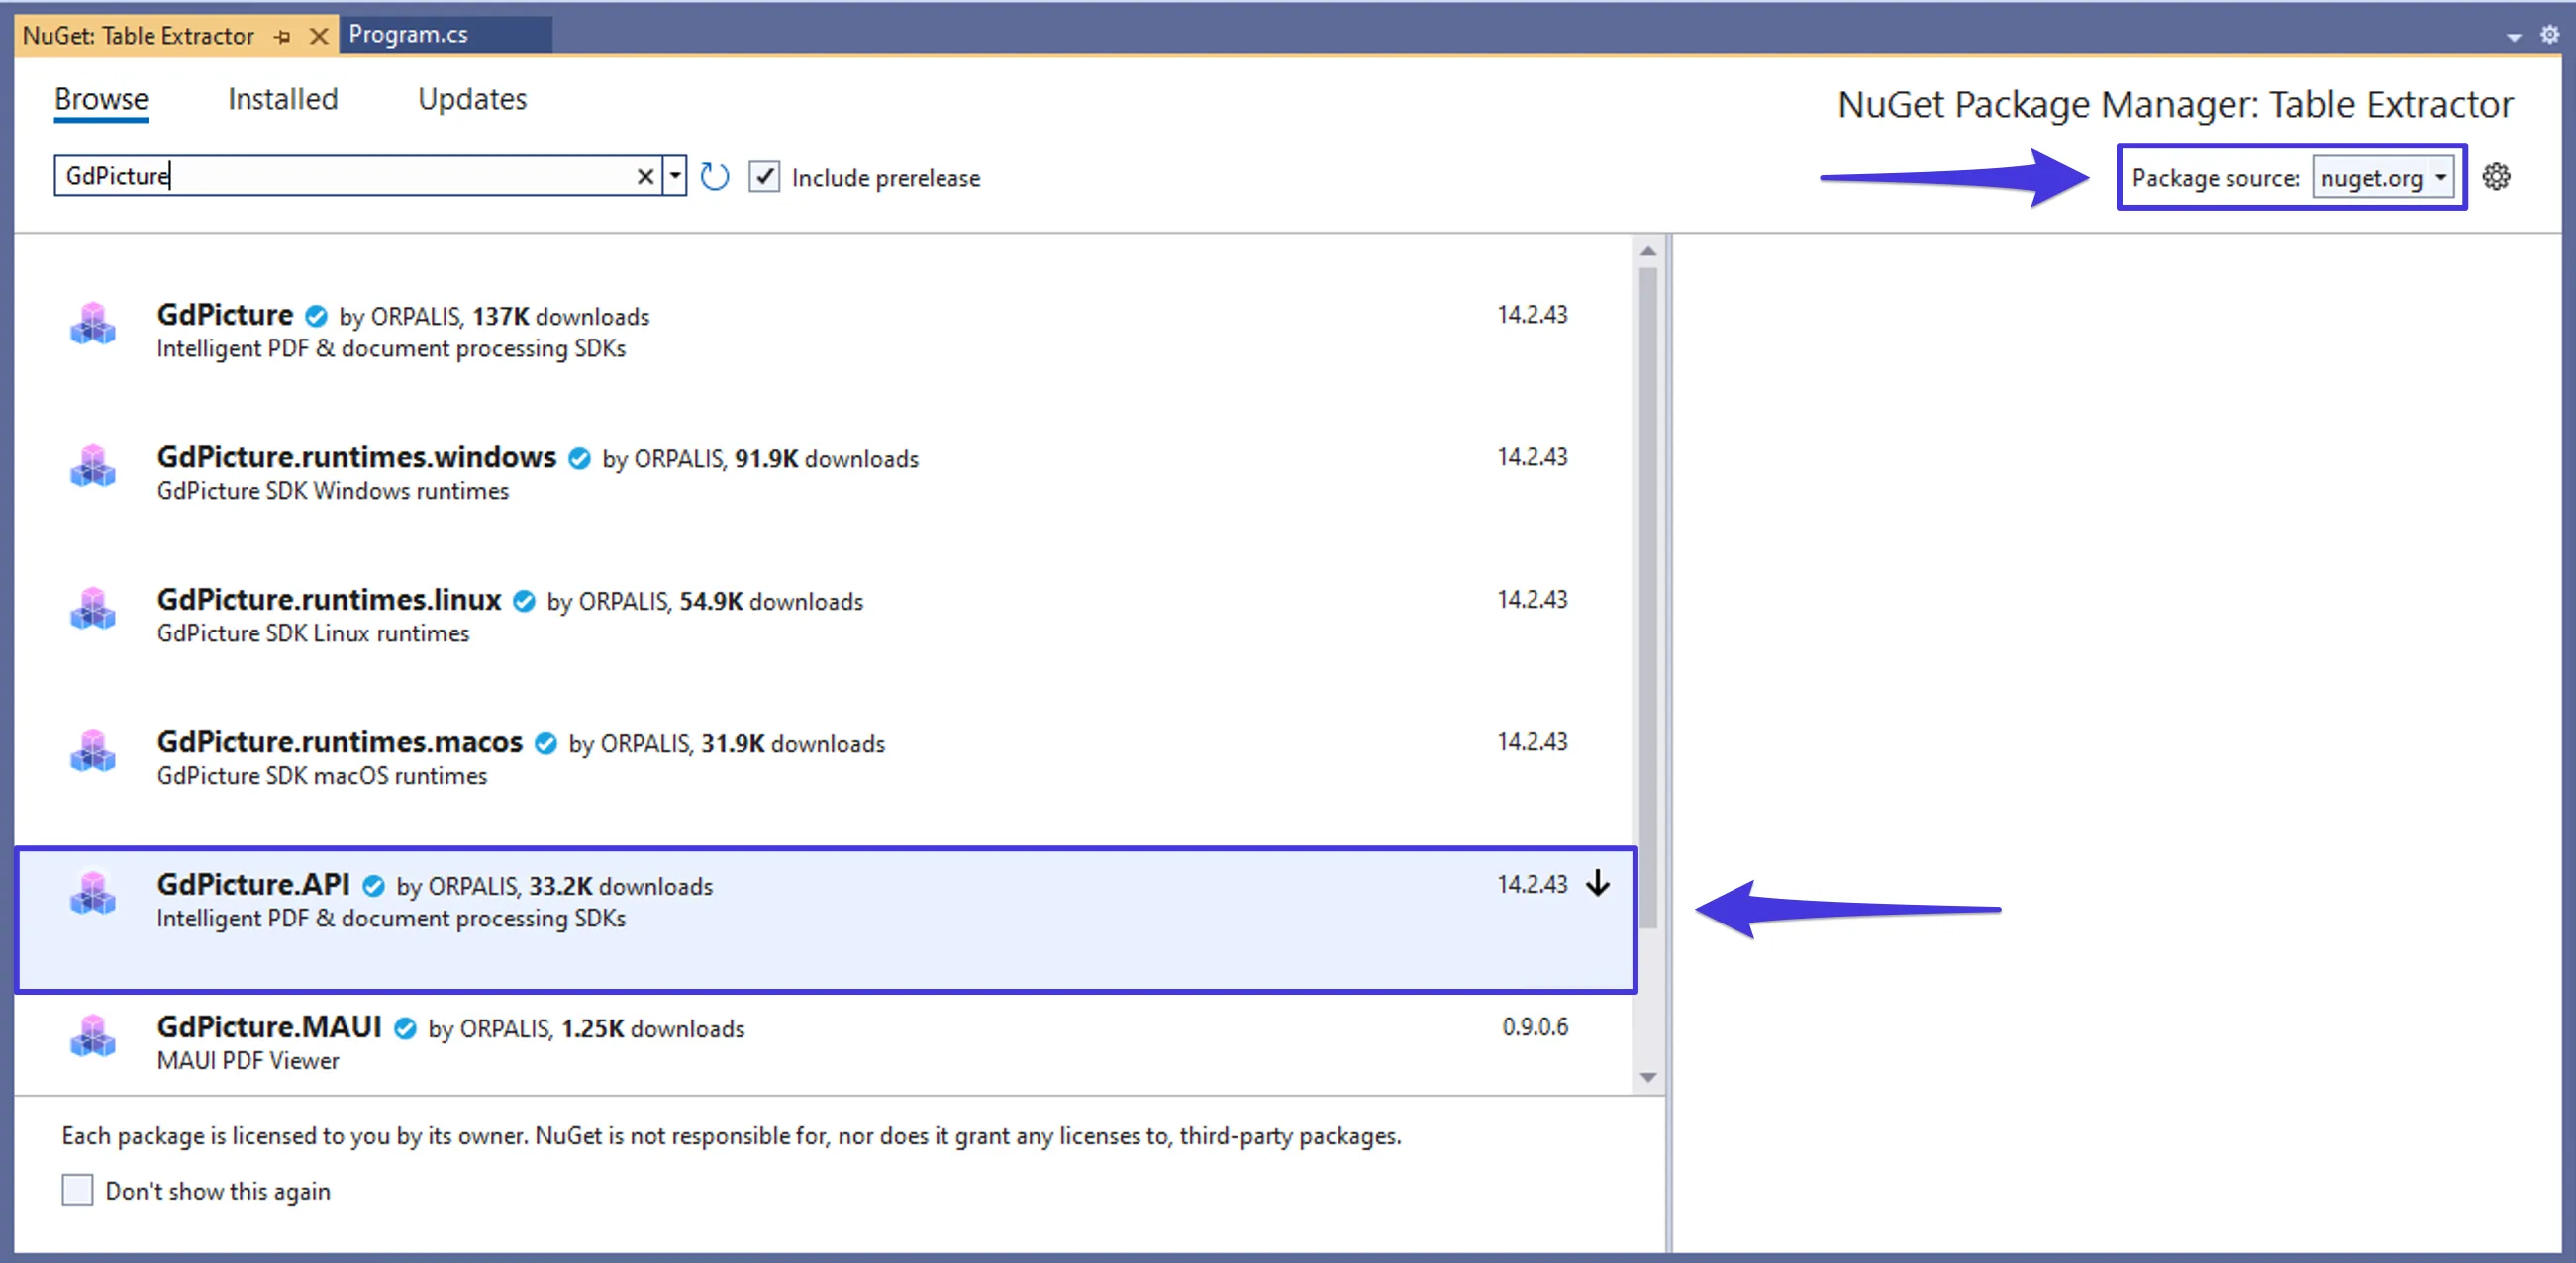
Right-click the project name in the solutions explorer and select Manage NuGet Packages....
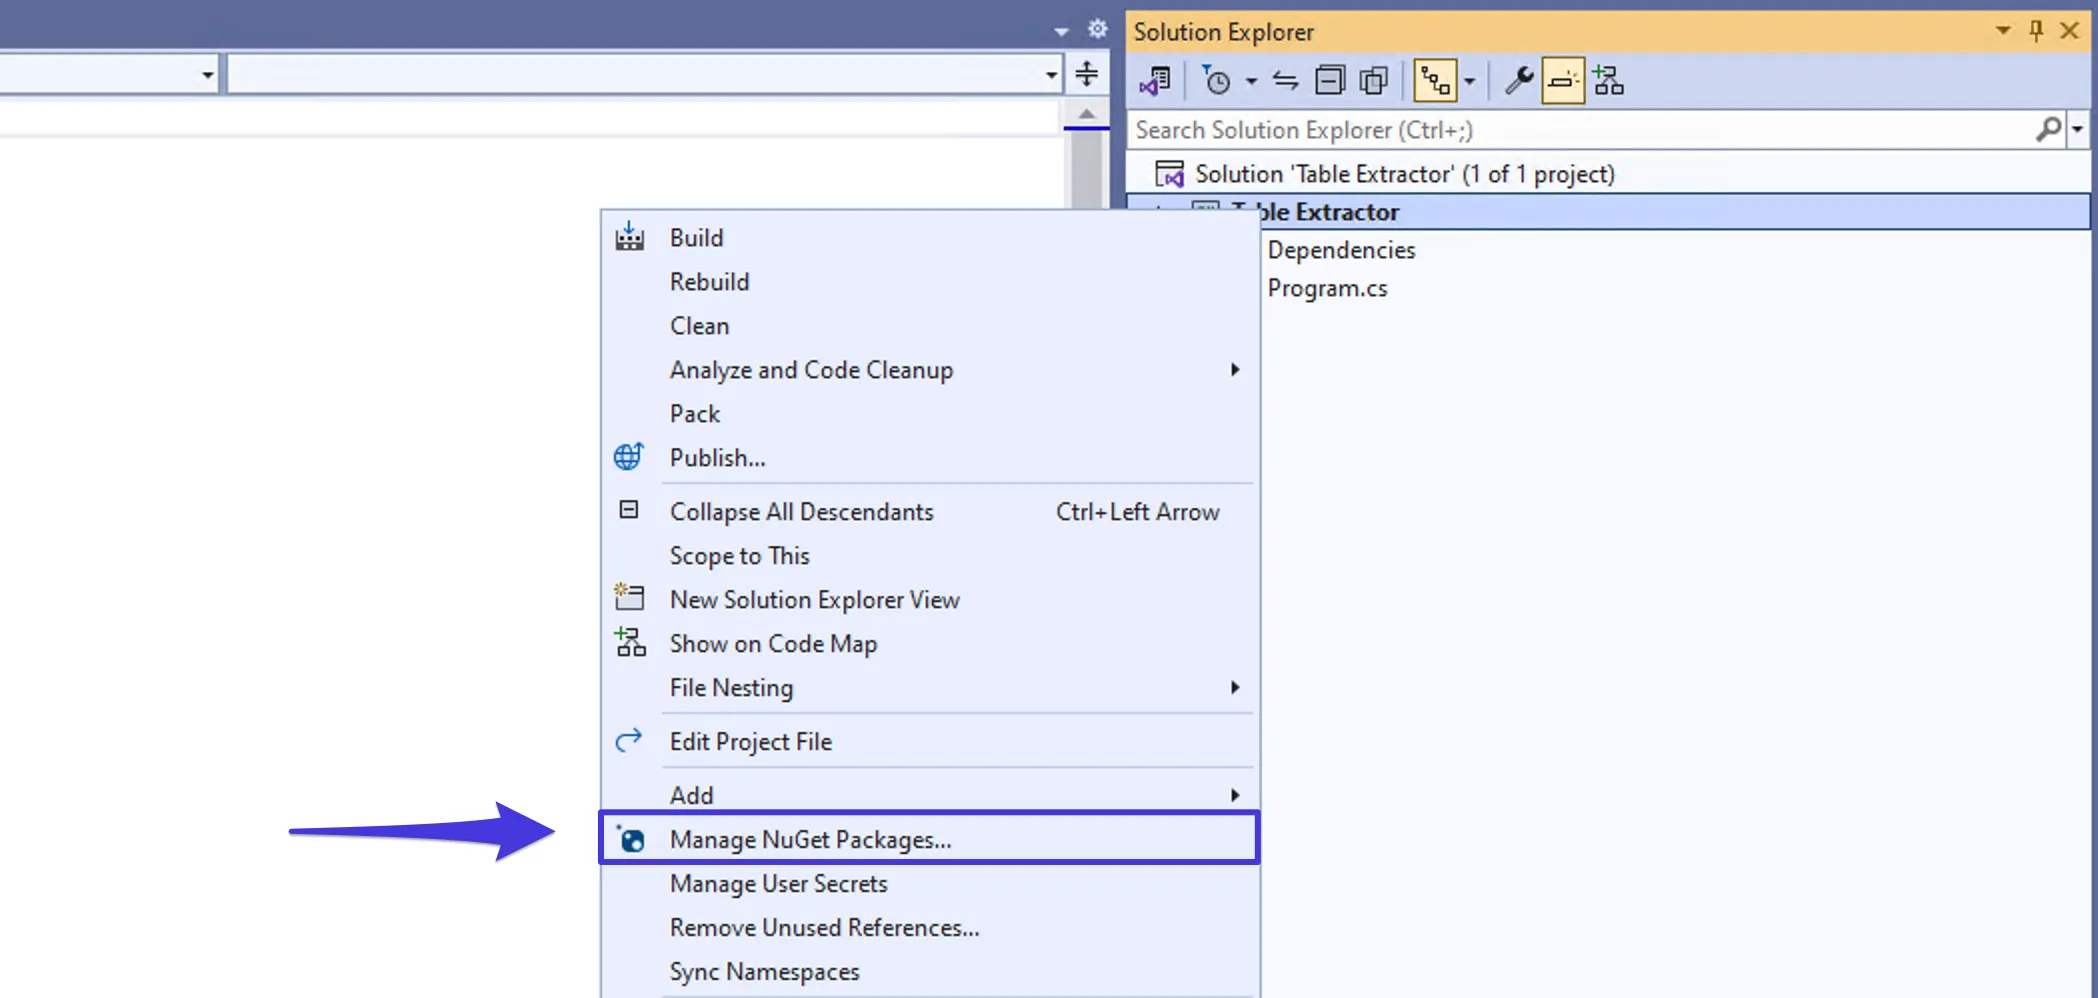
Make sure your Package source is set to nuget.org, and search for GdPicture. This will return multiple results. Choose GdPicture.API.
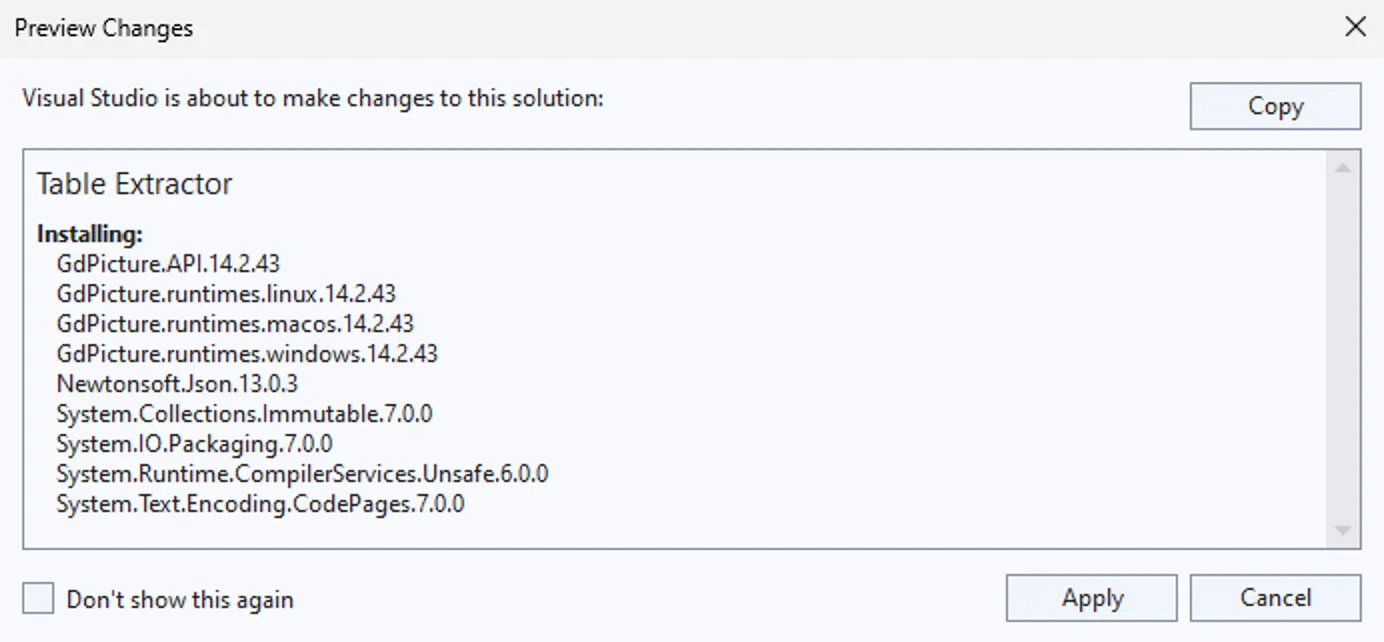
You’ll be warned about the resulting changes. You can safely click Apply.
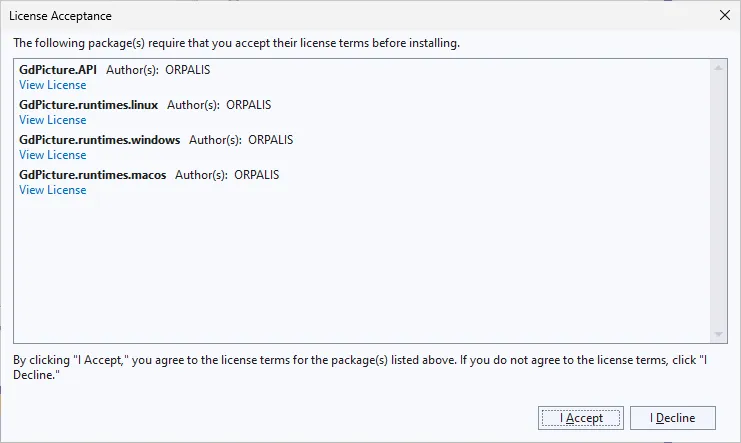
As part of the installation, you’ll also be prompted to accept the GdPicture license.
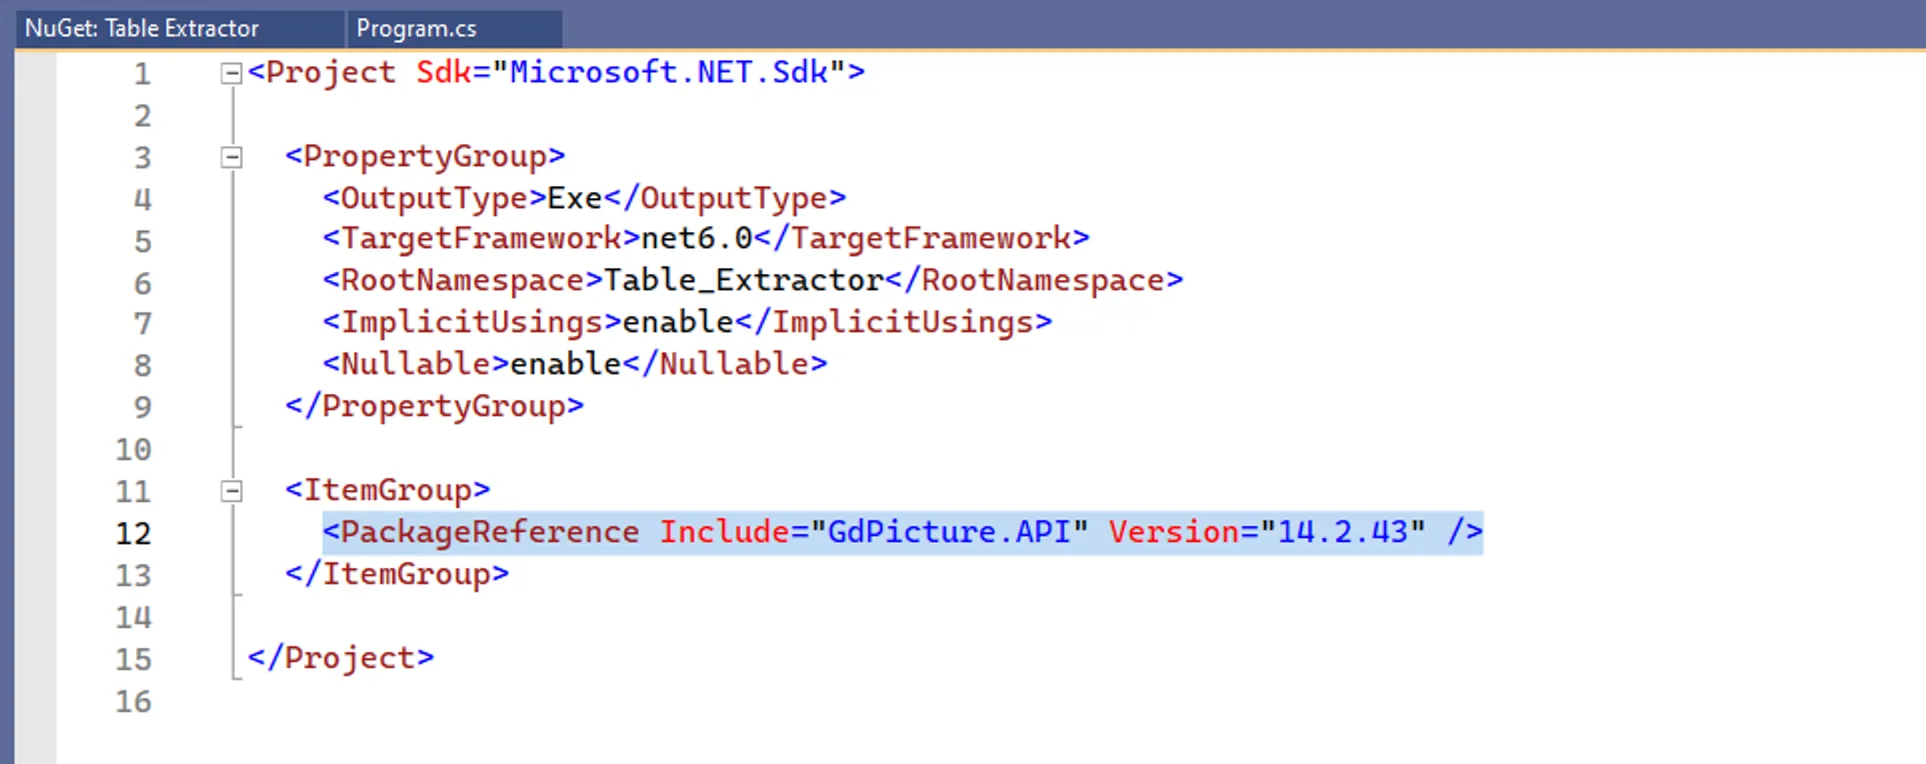
Once the installation is finished, navigate to your project’s csproj file, where you’ll be able to see the PackageReference file that was added to the GdPicture package.
This next section will demonstrate how you can use GdPicture.NET to extract tables from PDFs and images and convert them into Excel, Markdown, and JSON formats.
Working with GdPicture.NET
In this section, you’ll learn how to properly import and make use of GdPicture.NET.
Importing the GdPicture.NET Namespace
Start by replacing everything in the default Program.cs file with this:
using GdPicture14;The 14 at the end of the namespace import might differ if you’re using a newer or older version of GdPicture. This is the major version of the GdPicture package you installed in the previous step.
Before you can use anything from GdPicture.NET, you need to unlock it using the license key you received in your email. You can do so using this code:
LicenseManager licenseManager = new LicenseManager();licenseManager.RegisterKEY("YOUR_LICENSE_KEY");Replace YOUR_LICENSE_KEY with the key from your email to unlock GdPicture.NET.
Extracting the Table from PDF
The image below shows what the sample PDF with the table looks like.
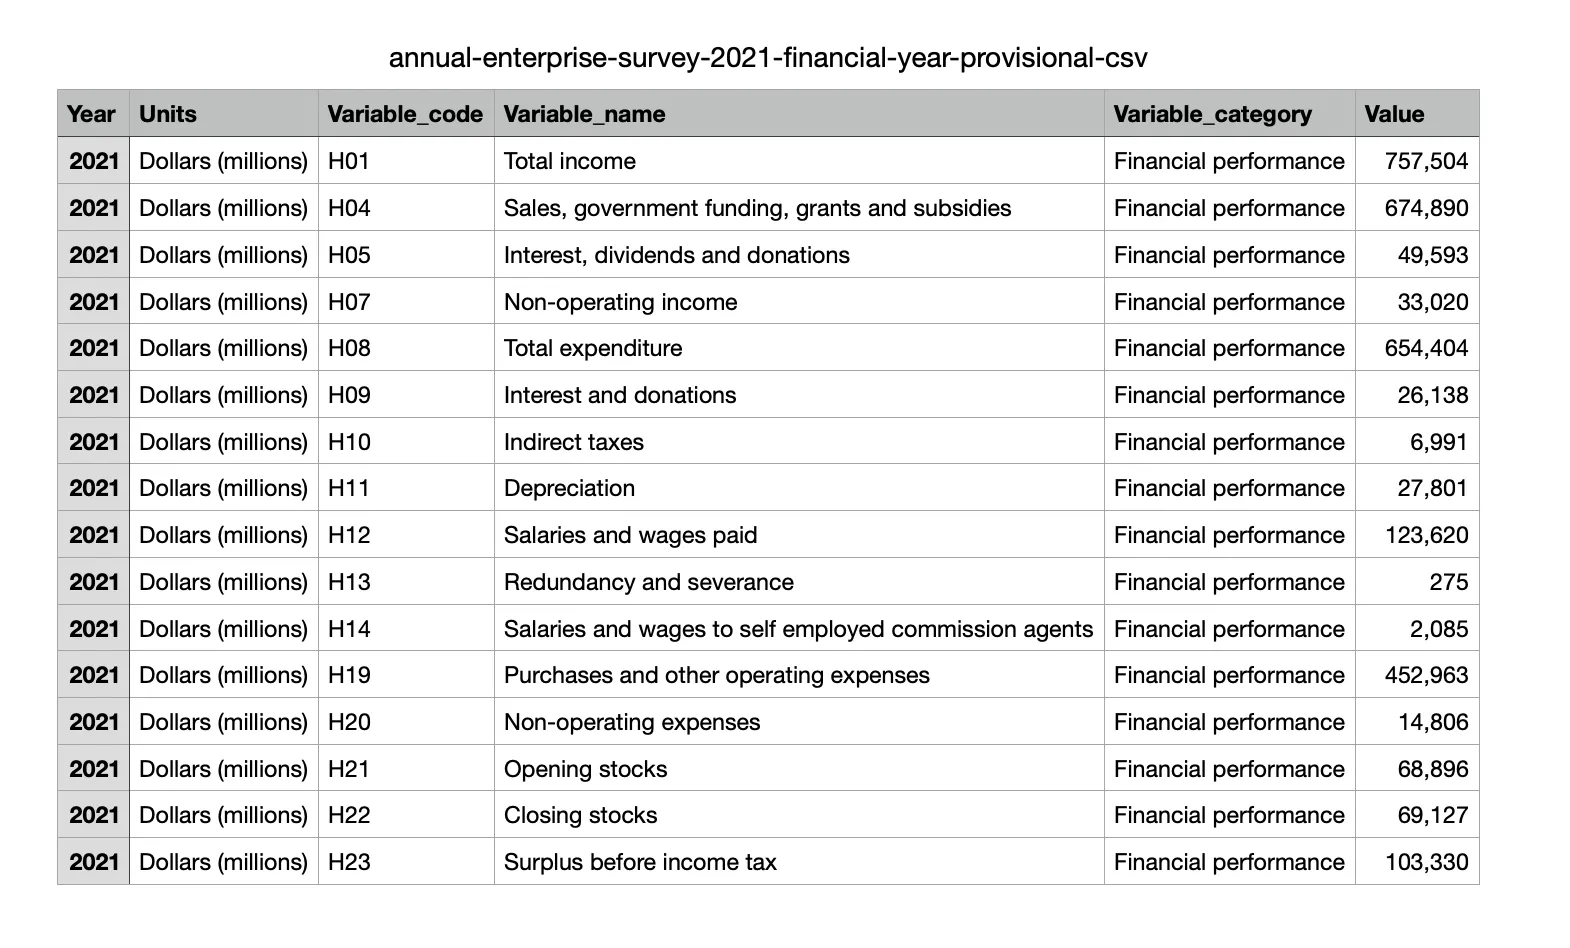
Table extraction works by first converting the PDF into a high-DPI image (configurable) and then running our proprietary OCR algorithm on top of that image. GdPicture.NET comes with all the required classes and methods for performing these steps.
But first, take a look at how you can perform OCR on a PDF. Then, you’ll see how to convert the OCR output to different formats.
Converting PDF to Image and Performing OCR
To convert PDF to image, start by creating two new instances of the GdPictureOCR and GdPicturePDF classes:
using GdPictureOCR gdpictureOCR = new GdPictureOCR();using GdPicturePDF gdpicturePDF = new GdPicturePDF();Next, load the sample PDF via the GdPicturePDF object, navigate to the page with the table, and convert the page into a high-DPI image:
// Load the source document.gdpicturePDF.LoadFromFile(@"C:\temp\source.pdf");// Select the first page.gdpicturePDF.SelectPage(1);// Render the first page to a 300-DPI image.int imageId = gdpicturePDF.RenderPageToGdPictureImageEx(300, true);Now you can pass this image reference to the GdPictureOCR object and run OCR on it. However, before you can run OCR, you also need to provide the GdPictureOCR object with the target language (English in this case) and with the path to the OCR resource folder that was installed as part of the SDK installation at the very beginning:
// Pass the image to the `GdPictureOCR` object.gdpictureOCR.SetImage(imageId);// Configure the table extraction process.gdpictureOCR.ResourceFolder = @"C:\GdPicture.NET 14\Redist\OCR";gdpictureOCR.AddLanguage(OCRLanguage.English);// Run the table extraction process and save the result ID in a list.string result = gdpictureOCR.RunOCR();If you followed the default SDK installation options, the GdPicture.NET SDK should be installed at C:\GdPicture.NET 14\Redist\OCR.
Performing OCR on an Input Image
If you instead have an image as input, you can use the following code to directly perform OCR on it:
using GdPictureOCR gdpictureOCR = new GdPictureOCR();using GdPictureImaging gdpictureImaging = new GdPictureImaging();
// Load the source image.int imageId = gdpictureImaging.CreateGdPictureImageFromFile(@"C:\temp\source.png");// Pass the image to the `GdPictureOCR` object.gdpictureOCR.SetImage(imageId);// Configure the OCR process.gdpictureOCR.ResourceFolder = @"C:\GdPicture.NET 14\Redist\OCR";gdpictureOCR.AddLanguage(OCRLanguage.English);// Run the table extraction process.string result = gdpictureOCR.RunOCR();
The only difference, in this case, is that instead of loading the input using the GdPicturePDF object, you load it using the GdPictureImaging object. The rest of the steps are the same.
Converting a Table to an Excel Sheet
Now that you have the OCR output, you can convert it into whatever format you want. In the first example, you’ll see how to convert the OCR output to an Excel sheet.
Here’s the code to convert the OCR output to an Excel sheet:
List<string> resultsList = new List<string>();resultsList.Add(result);// Configure the output spreadsheet.GdPictureOCR.SpreadsheetOptions spreadsheetOptions = new GdPictureOCR.SpreadsheetOptions(){ SeparateTables = true};// Save the output in an Excel spreadsheet.gdpictureOCR.SaveAsXLSX(resultsList, @"C:\temp\output.xlsx", spreadsheetOptions);// Release unnecessary resources.gdpictureOCR.ReleaseOCRResults();GdPictureDocumentUtilities.DisposeImage(imageId);The code first creates a list to store the OCR result reference. This is because the SaveAsXLSX method of the GdPictureOCR object expects a list of OCR result references instead of a single reference, because you can pass in multiple OCR results to create an Excel file in one go.
Next, the code creates a new SpreadsheetOptions object and specifies the SeparateTables property as true. This instructs GdPictureOCR to save each OCR table in a separate sheet in the Excel file.
Lastly, it calls the SaveAsXLSX method to save output to an Excel file. Then, it calls a few additional methods to release resources for garbage collection.
If you try opening the output.xlsx file in Excel, you’ll see the original table in a spreadsheet.
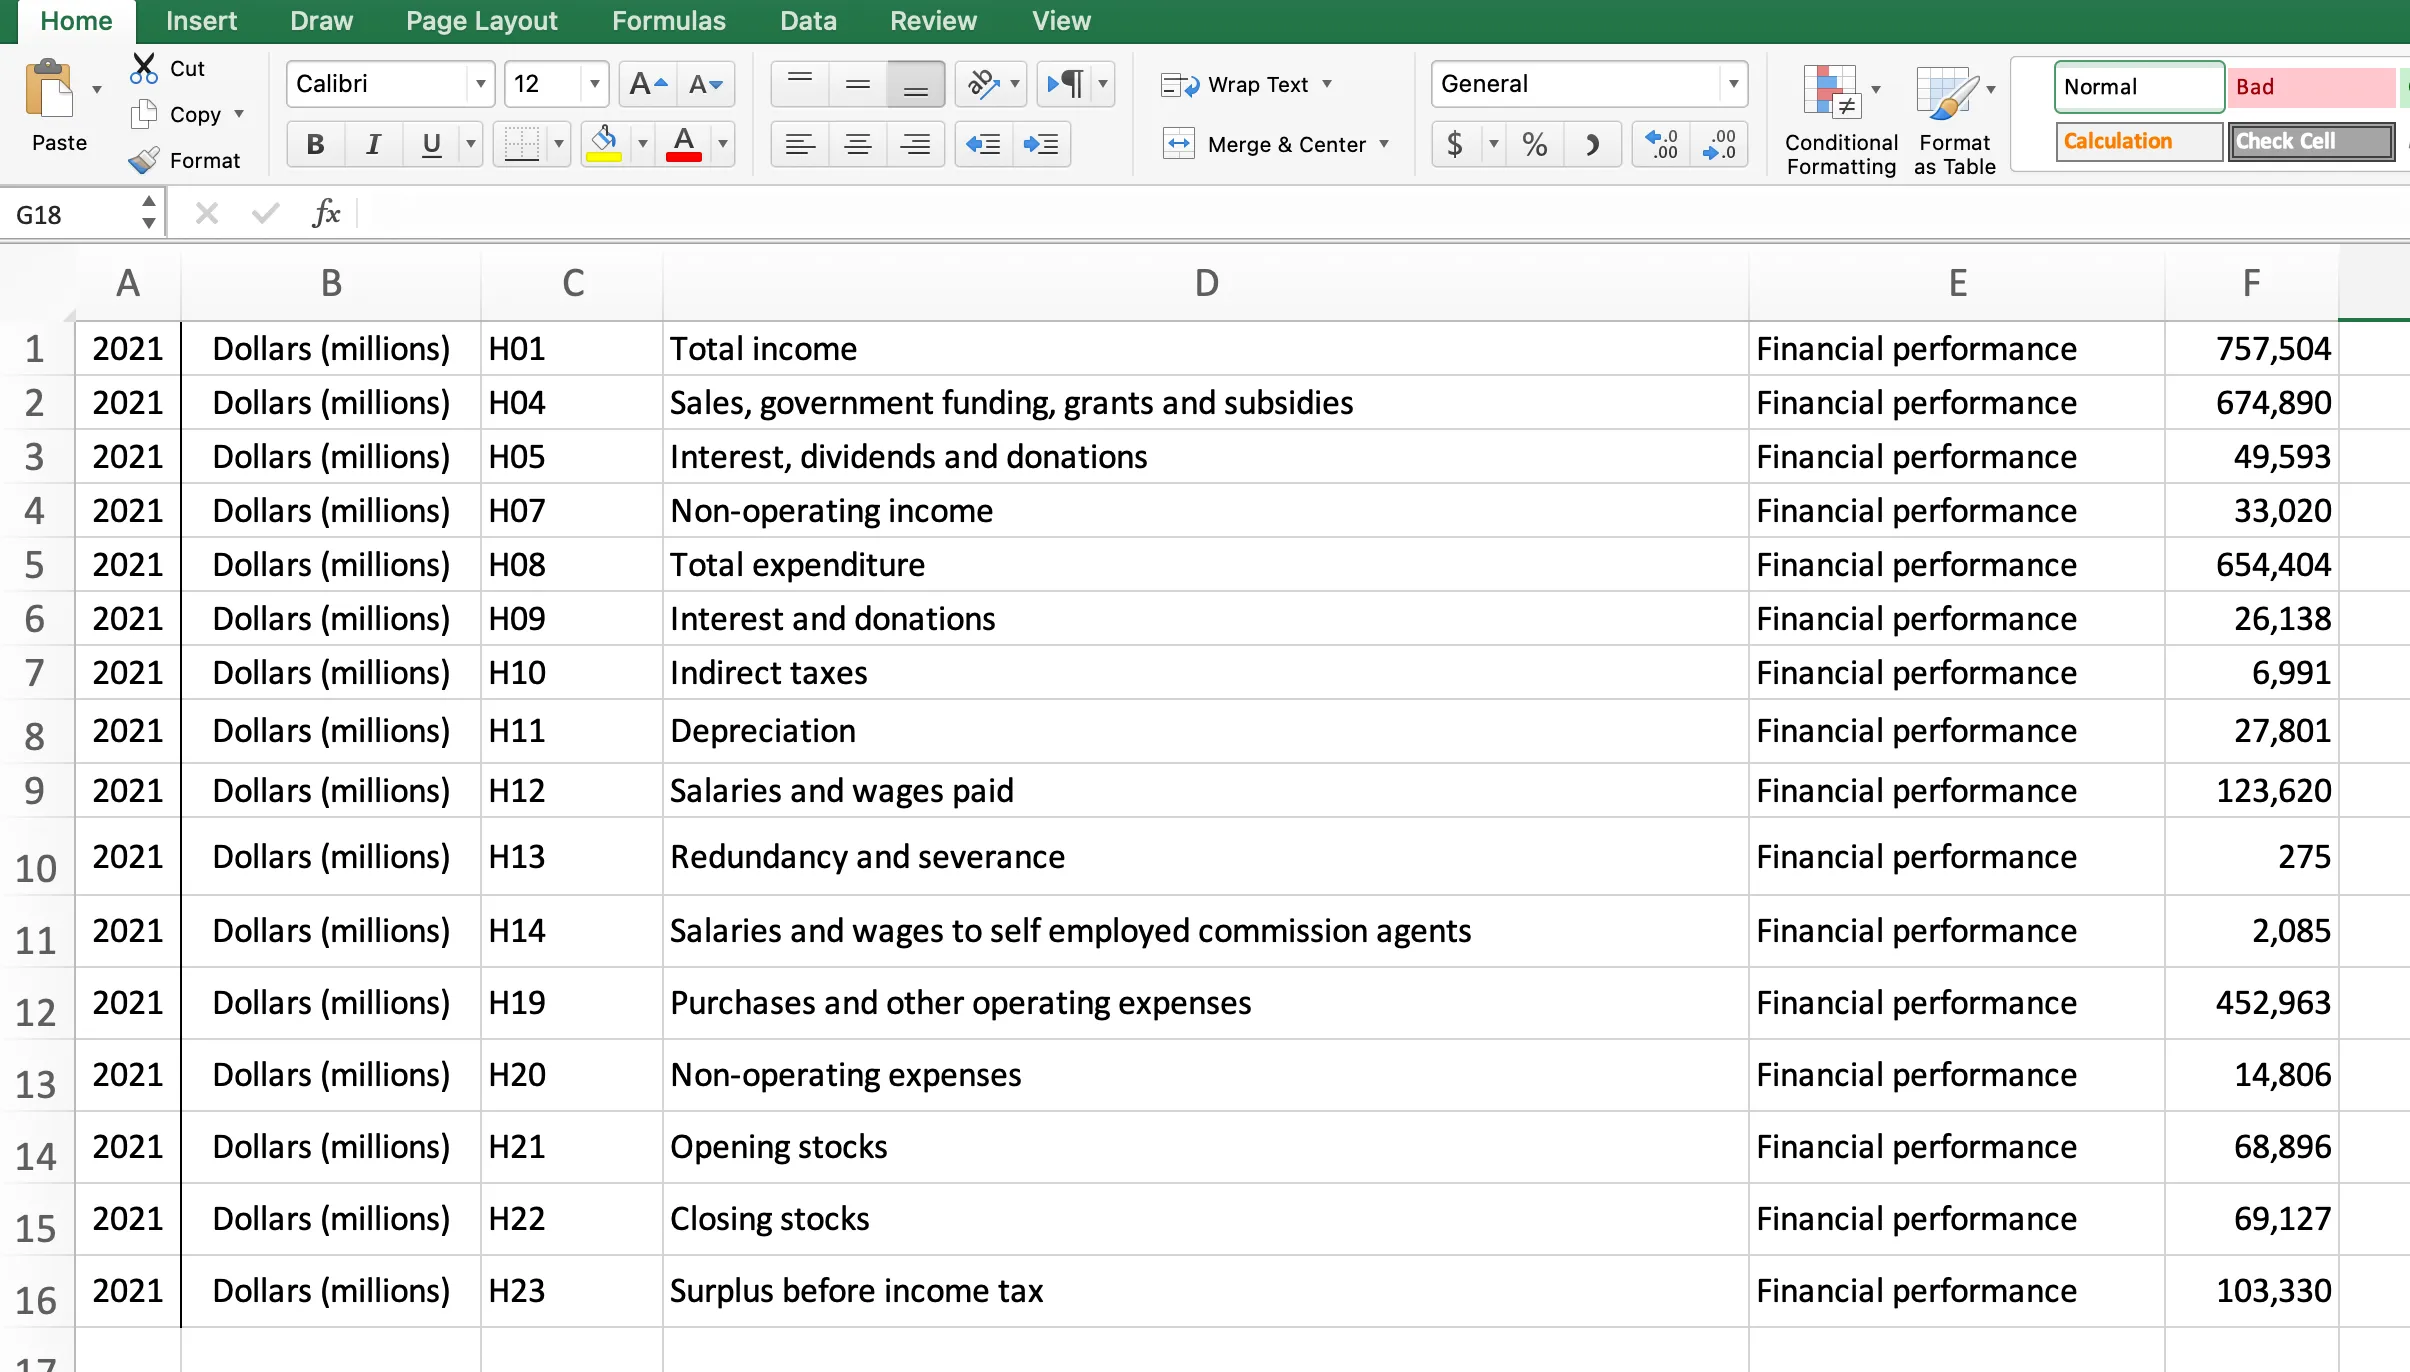
Depending on whether you used an image as input or a PDF as input, you also have to release those resources:
// If using an image as input, release `GdPictureImage`.gdpictureImaging.ReleaseGdPictureImage(imageId);
// If using a PDF as input, close the PDF document.gdpicturePDF.CloseDocument();
A few of the next steps need to use the resources that you release in this section. Make sure you add the code from the next sections before these release statements.
Converting a Table to Markdown
If you’ve performed the OCR and want to convert the table into Markdown instead of an Excel sheet, you can use the following code:
for (int tableIndex = 0; tableIndex < gdpictureOCR.GetTableCount(result); tableIndex++){    int columnCount = gdpictureOCR.GetTableColumnCount(result, tableIndex);    int rowCount = gdpictureOCR.GetTableRowCount(result, tableIndex);
    // Print the table to the console.    Console.Write($"\nTable {tableIndex}");    for (int rowIndex = 0; rowIndex < rowCount; rowIndex++)    {        Console.Write("\n| ");        for (int columnIndex = 0; columnIndex < columnCount; columnIndex++)        {            string cellContent = gdpictureOCR.GetTableCellText(result, tableIndex, columnIndex, rowIndex).Replace(Environment.NewLine, "");            Console.Write($" {cellContent} |");        }    }    Console.WriteLine("");}
The GdPictureOCR object provides the GetTableCount method to find the number of tables in the OCR output, the GetTableColumnCount method to find the column count of a particular table, the GetTableRowCount method to find the row count of a particular table, and finally, the GetTableCellText method to find the text of a particular cell in a table.
The code above uses all of these methods to traverse each cell of the table and puts them in valid Markdown format for a table. Here’s what the output looks like for the sample file you used:
Table 0| 2021 | Dollars (millions) | H01 | Total income | Financial performance | 757,504 || 2021 | Dollars (millions) | H04 | Sales, government funding, grants and subsidies | Financial performance | 674,890 || 2021 | Dollars (millions) | H05 | Interest, dividends and donations | Financial performance | 49,593 || 2021 | Dollars (millions) | H07 | Non-operating income | Financial performance | 33,020 || 2021 | Dollars (millions) | H08 | Total expenditure | Financial performance | 654,404 || 2021 | Dollars (millions) | H09 | Interest and donations | Financial performance | 26,138 || 2021 | Dollars (millions) | H10 | Indirect taxes | Financial performance | 6,991 || 2021 | Dollars (millions) | H11 | Depreciation | Financial performance | 27,801 || 2021 | Dollars (millions) | H12 | Salaries and wages paid | Financial performance | 123,620 || 2021 | Dollars (millions) | H13 | Redundancy and severance | Financial performance | 275 || 2021 | Dollars (millions) | H14 | Salaries and wages to self employed commission agents | Financial performance | 2,085 || 2021 | Dollars (millions) | H19 | Purchases and other operating expenses | Financial performance | 452,963 || 2021 | Dollars (millions) | H20 | Non-operating expenses | Financial performance | 14,806 || 2021 | Dollars (millions) | H21 | Opening stocks | Financial performance | 68,896 || 2021 | Dollars (millions) | H22 | Closing stocks | Financial performance | 69,127 || 2021 | Dollars (millions) | H23 | Surplus before income tax | Financial performance | 103,330 |If the input image had multiple tables, this output would have included all of them. Here’s what the rendered Markdown output would look like:
| Year | Units | Variable_code | Variable_name | Variable_category | Value |
|---|---|---|---|---|---|
| 2021 | Dollars (millions) | H01 | Total income | Financial performance | 757,504 |
| 2021 | Dollars (millions) | H04 | Sales, government funding, grants and subsidies | Financial performance | 674,890 |
| 2021 | Dollars (millions) | H05 | Interest, dividends and donations | Financial performance | 49,593 |
| 2021 | Dollars (millions) | H07 | Non-operating income | Financial performance | 33,020 |
| 2021 | Dollars (millions) | H08 | Total expenditure | Financial performance | 654,404 |
| 2021 | Dollars (millions) | H09 | Interest and donations | Financial performance | 26,138 |
| 2021 | Dollars (millions) | H10 | Indirect taxes | Financial performance | 6,991 |
| 2021 | Dollars (millions) | H11 | Depreciation | Financial performance | 27,801 |
| 2021 | Dollars (millions) | H12 | Salaries and wages paid | Financial performance | 123,620 |
| 2021 | Dollars (millions) | H13 | Redundancy and severance | Financial performance | 275 |
| 2021 | Dollars (millions) | H14 | Salaries and wages to self employed commission agents | Financial performance | 2,085 |
| 2021 | Dollars (millions) | H19 | Purchases and other operating expenses | Financial performance | 452,963 |
| 2021 | Dollars (millions) | H20 | Non-operating expenses | Financial performance | 14,806 |
| 2021 | Dollars (millions) | H21 | Opening stocks | Financial performance | 68,896 |
| 2021 | Dollars (millions) | H22 | Closing stocks | Financial performance | 69,127 |
| 2021 | Dollars (millions) | H23 | Surplus before income tax | Financial performance | 103,330 |
Converting a Table to JSON
It shouldn’t be too hard to predict what the process of converting the table to JSON would look like, as you already have the OCR output. You just need to traverse over each table cell and put it in a JSON object. However, before you continue, make sure you have the Newtonsoft.Json NuGet package installed.
You can install this package by again going to Manage NuGet Packages... and searching for Newtonsoft.Json.
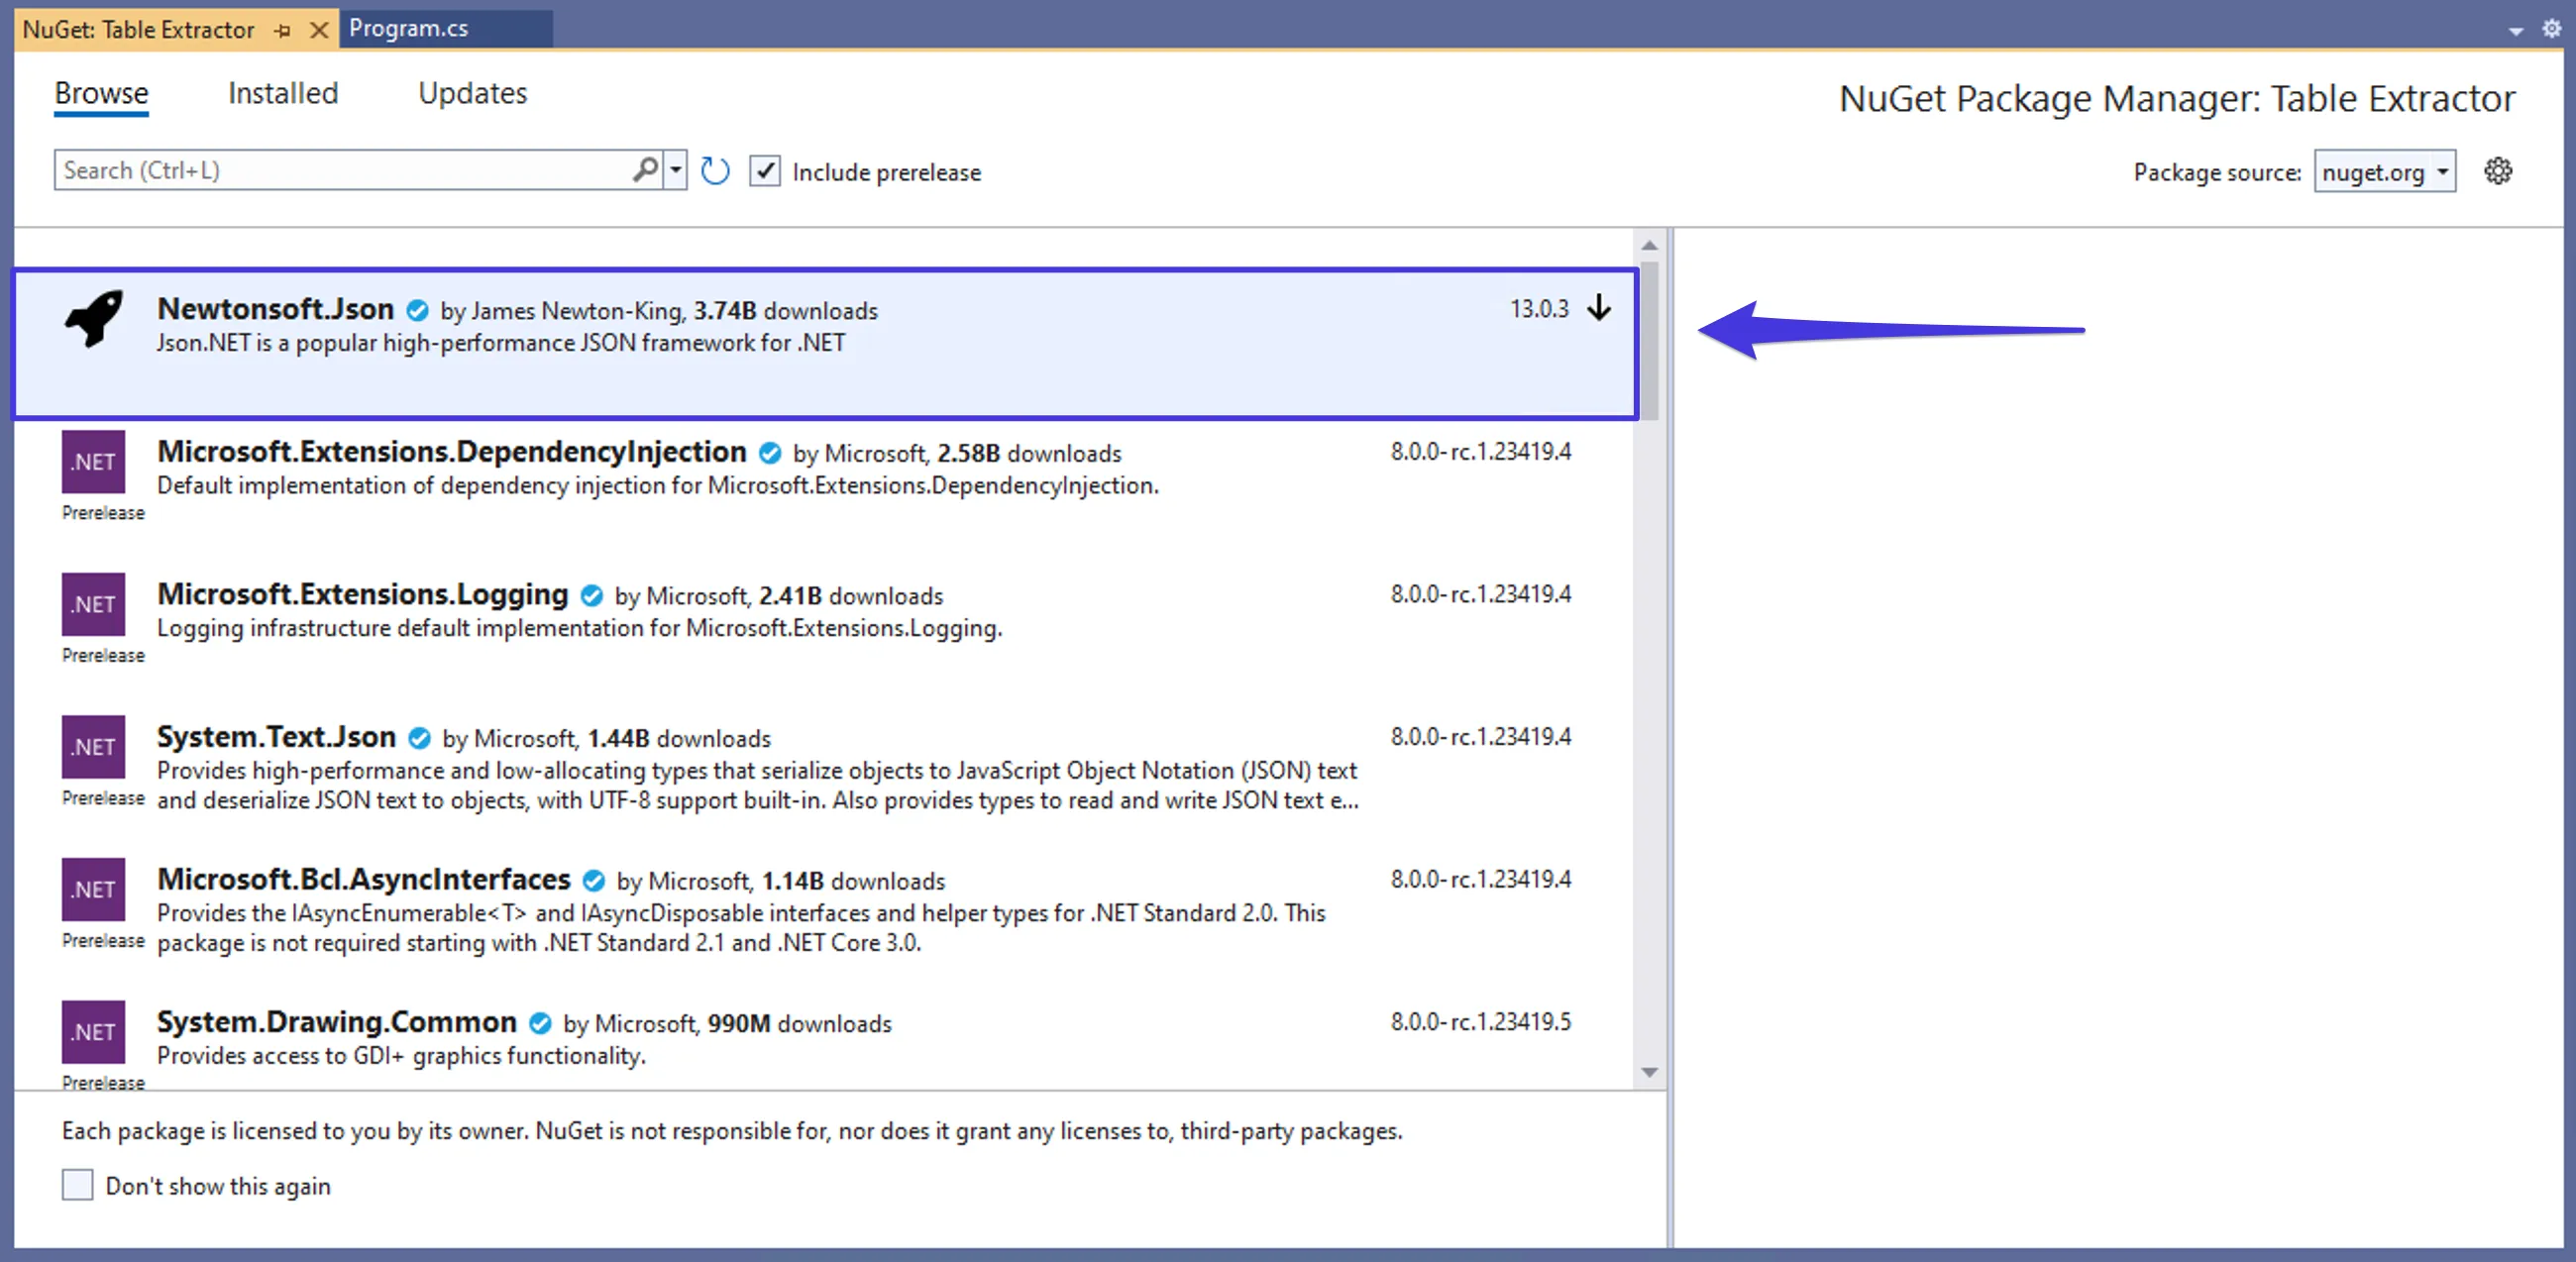
Once it’s installed, add the following code to the Program.cs file right before you release and dispose of all resources:
// Create the JSON object that contains the tables on the page and loop through the tables.int tableCount = gdpictureOCR.GetTableCount(result);dynamic[] tables = new JObject[tableCount];for (int tableIndex = 0; tableIndex < tableCount; tableIndex++){ int columnCount = gdpictureOCR.GetTableColumnCount(result, tableIndex); int rowCount = gdpictureOCR.GetTableRowCount(result, tableIndex); // Create the JSON object that contains the rows in the table and loop through the rows. dynamic[] rows = new JObject[rowCount]; for (int rowIndex = 0; rowIndex < rowCount; rowIndex++) { // Create the JSON object that contains the cells in the row and loop through the cells. dynamic[] cells = new JObject[columnCount]; for (int columnIndex = 0; columnIndex < columnCount; columnIndex++) { cells[columnIndex] = new JObject(); cells[columnIndex].RowIndex = rowIndex; cells[columnIndex].ColumnIndex = columnIndex; // Read the content of the cell and save it in the JSON object. cells[columnIndex].Text = gdpictureOCR.GetTableCellText(result, tableIndex, columnIndex, rowIndex); } rows[rowIndex] = new JObject(); rows[rowIndex].Cells = new JArray(cells); } tables[tableIndex] = new JObject(); tables[tableIndex].Rows = new JArray(rows);}dynamic tablesOnPage = new JObject();tablesOnPage.Tables = new JArray(tables);// Print the tables to the console in JSON format.Console.WriteLine(tablesOnPage.ToString());Even though this code might look a bit different from the code you saw in the previous Markdown section, it follows the same general pattern. It uses the GetTableCount, GetTableColumnCount, and GetTableRowCount methods to loop over each cell in the table, and it creates nested JObjects and JArrays. There’s very little GdPicture.NET-specific code here.
If you run it on the sample input table, it’ll produce a similar JSON output:
{ "Tables": [ { "Rows": [ { "Cells": [ { "RowIndex": 0, "ColumnIndex": 0, "Text": "Year" }, { "RowIndex": 0, "ColumnIndex": 1, "Text": "Units" }, { "RowIndex": 0, "ColumnIndex": 2, "Text": "Variable_code" }, { "RowIndex": 0, "ColumnIndex": 3, "Text": "Variable_name" }, { "RowIndex": 0, "ColumnIndex": 4, "Text": "Variable_category" }, { "RowIndex": 0, "ColumnIndex": 5, "Text": "Value" } ] }, { "Cells": [ // ...truncated... ] } ] } ]}You can read more about all of these different output formats in our official extraction documentation.
Conclusion
This tutorial showed how to convert a table from a PDF or an image into an Excel, Markdown, or JSON output. You became acquainted with different classes and methods that are available in GdPicture.NET that can help you in traversing table cells and converting them into whatever output you want. This was just a glimpse of how powerful GdPicture.NET SDK is! There’s a reason why many Fortune 500 companies use this SDK to power their products and processes.
If your product requires working with documents, chances are that GdPicture.NET has some sort of support for it. This includes advanced AI and machine learning (ML) techniques and fuzzy logic algorithms. Take our SDK for a spin with a free trial and see if it meets your requirements. If you have any questions, check out our guides or reach out to our Sales and Support teams.


