


Generating PDFs in Angular with jsPDF and Nutrient Web SDK
Table of contents

This guide compares two approaches to PDF generation in Angular:
- jsPDF + AutoTable — Fast and easy for generating simple PDFs with tables and text. Ideal for receipts, reports, or exports that don’t require templates or layout precision.
- Nutrient Web SDK — A more powerful and flexible approach for structured, production-quality documents. Use it to generate PDFs from templates, overlay annotations, insert dynamic content, flatten output, and operate headlessly — all within the browser.
Use jsPDF for basic exports. Use Nutrient when you need dynamic forms, template-driven layouts, multipage merging, or enterprise-grade workflows.
What is jsPDF?
jsPDF(opens in a new tab) is a lightweight JavaScript library that lets you generate PDF files entirely in the browser, without needing any server-side tools. It’s particularly well-suited for simple, static documents like invoices, receipts, certificates, and reports with tables and text.
jsPDF outputs documents in real time and supports basic features like:
- Adding text and images
- Drawing shapes
- Generating tables (with
jspdf-autotable) - Downloading files directly from the client
It’s fast, easy to integrate, and perfect for developers who want a quick solution for exporting content to PDF inside a web app — especially in Angular applications where component-based UI maps nicely to document content.
However, jsPDF has limitations when it comes to:
- Template-based workflows
- Dynamic layout positioning
- Multipage document assembly
- Flattening annotations or form elements
That’s where Nutrient Web SDK shine, and the second half of this tutorial will cover this.
Prerequisites
- Node.js(opens in a new tab) v18.13 or higher and npm(opens in a new tab) (Node Package Manager)
Generating PDFs using jsPDF
In this section, you’ll focus on using jsPDF(opens in a new tab) to convert web content into PDF format, providing a straightforward approach to PDF generation in your Angular projects.
Step 1 — Angular installation
Start by installing Angular CLI(opens in a new tab), a powerful tool for creating and managing Angular projects. Open your terminal and run the following command:
npm install -g @angular/cliThis command installs Angular CLI globally on your system, allowing you to create and manage Angular projects.
Step 2 — Creating a new Angular project
With Angular CLI installed, you can create a new Angular project. Navigate to the directory where you want to create your project and run the following command:
ng new angular-pdf-generatorAngular CLI will prompt you to choose various project configuration options. You can either accept the defaults or customize them according to your preferences.
After creating the project, navigate to the project directory using the following command:
cd angular-pdf-generatorStep 3 — Installing the required packages
To generate PDFs in Angular, you’ll use two libraries: jspdf(opens in a new tab) and jspdf-autotable(opens in a new tab). Install them using npm:
npm install jspdf jspdf-autotableThese packages will enable you to create and customize PDFs within your Angular application.
Step 4 — Creating a PDF generation component
Angular follows a component-based architecture. Create a component dedicated to PDF generation and run the following command:
ng generate component pdf-generatorThis command will generate a new component named pdf-generator with associated files for HTML, CSS, and TypeScript.
Step 5 — Writing the PDF generation code
Inside the pdf-generator component, open the pdf-generator.component.ts file. In this file, you’ll write the code responsible for generating PDFs:
import { Component } from "@angular/core";import jsPDF from "jspdf";import autoTable from "jspdf-autotable";
@Component({ selector: "app-pdf-generator", templateUrl: "./pdf-generator.component.html", styleUrls: ["./pdf-generator.component.css"],})export class PdfGeneratorComponent { generatePDF() { // Create a new PDF document. const doc = new jsPDF();
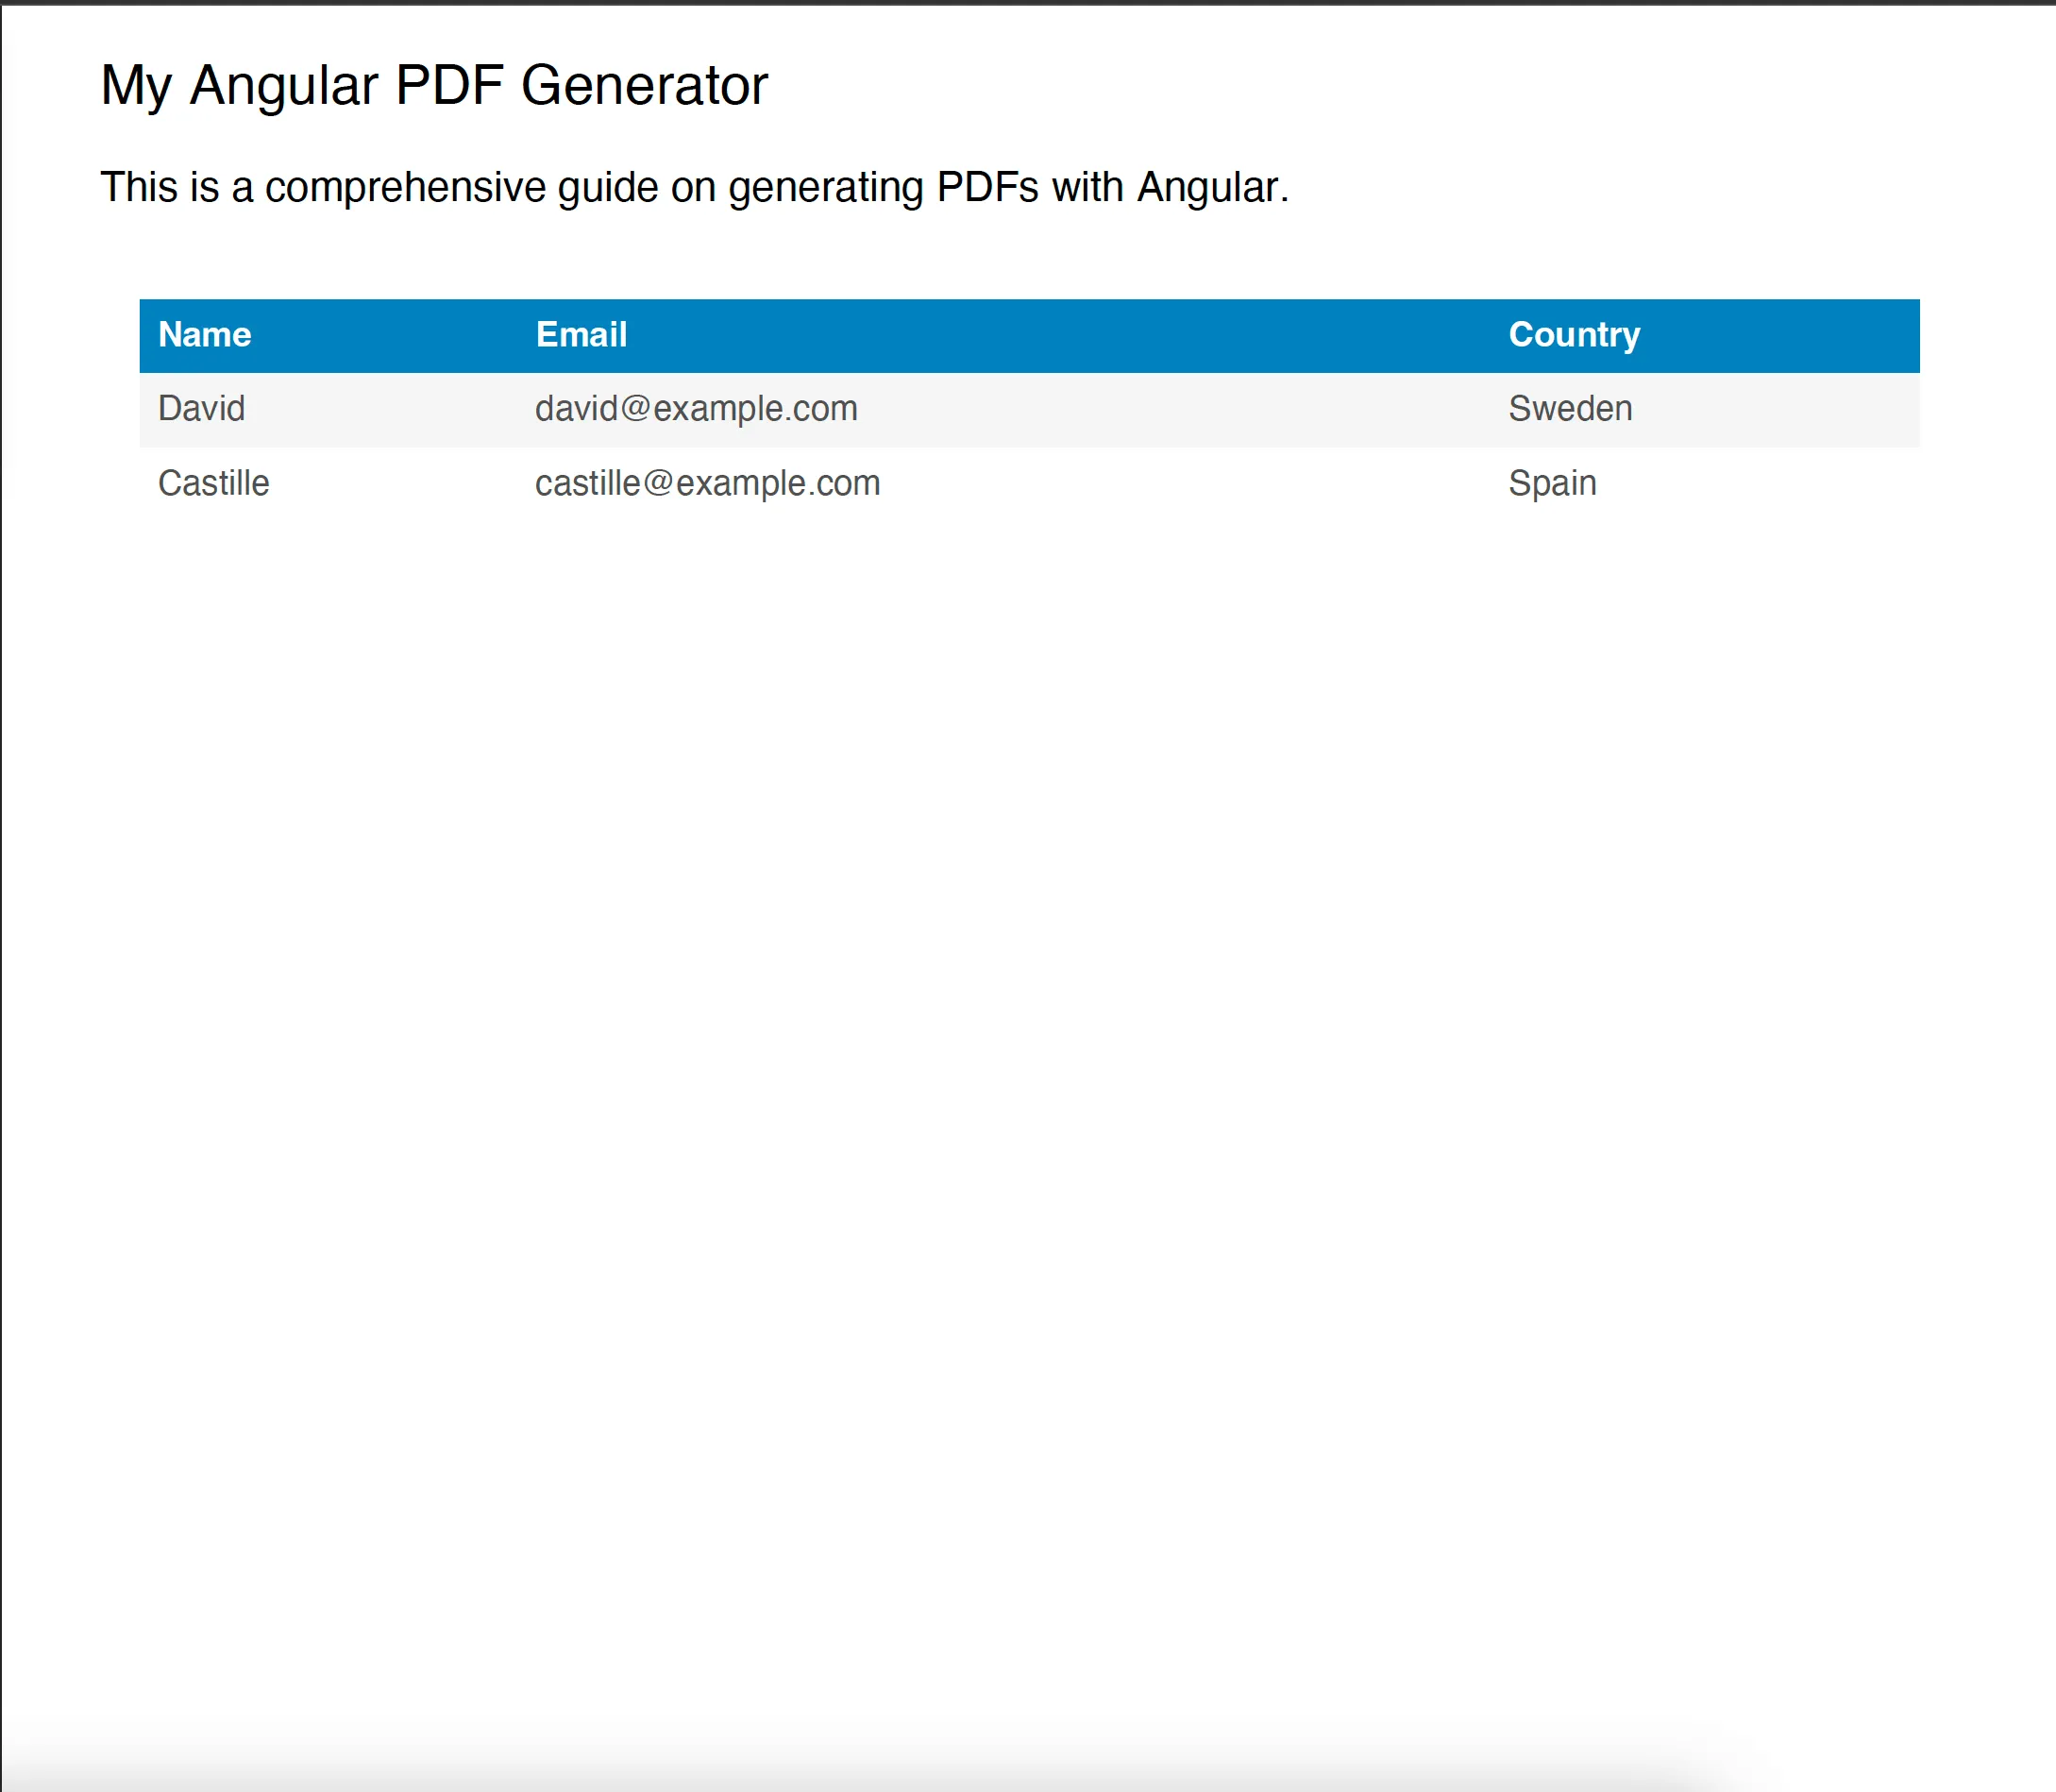
// Add content to the PDF. doc.setFontSize(16); doc.text("My Angular PDF Generator", 10, 10); doc.setFontSize(12); doc.text( "This is a comprehensive guide on generating PDFs with Angular.", 10, 20, );
// Create a table using `jspdf-autotable`. const headers = [["Name", "Email", "Country"]]; const data = [ ["David", "david@example.com", "Sweden"], ["Castille", "castille@example.com", "Spain"], // ... ];
autoTable(doc, { head: headers, body: data, startY: 30, // Adjust the `startY` position as needed. });
// Save the PDF. doc.save("table.pdf"); }}Here, the code defines an Angular component named PdfGeneratorComponent that generates a PDF document with text and a table when a button is clicked. It uses the jsPDF library for PDF creation and jspdf-autotable for building tables within the PDF. The PDF is saved with the name table.pdf.
Now, open the pdf-generator.component.html file. Add a button element that will trigger the generatePDF() function when clicked. Place this button within your component’s template:
<div> <button (click)="generatePDF()">Generate PDF</button></div>Step 6 — Displaying the PDF generation component
Now that you have your PdfGeneratorComponent, you’ll display it in your Angular application. Open the app.component.html file and add the <app-pdf-generator></app-pdf-generator> tag inside the template:
<div> <!-- Your navigation or other content can go here --> <app-pdf-generator></app-pdf-generator></div>To incorporate the PdfGeneratorComponent into your Angular application, you need to import it into your app.component.ts file. This is achieved by adding the following import statement at the top:
import { PdfGeneratorComponent } from "./pdf-generator/pdf-generator.component";Next, include PdfGeneratorComponent in the imports array of the @Component decorator. This setup allows you to use the <app-pdf-generator></app-pdf-generator> tag in your application’s HTML template, enabling users to generate PDFs directly from the main interface.
Here’s how your app.component.ts will look:
import { Component } from "@angular/core";import { RouterOutlet } from "@angular/router";import { PdfGeneratorComponent } from "./pdf-generator/pdf-generator.component";
@Component({  selector: "app-root",  standalone: true,  imports: [RouterOutlet, PdfGeneratorComponent],  templateUrl: "./app.component.html",  styleUrls: ["./app.component.css"],})export class AppComponent {  title = "angular-pdf-generator";}
Step 7 — Starting the development server
To see your Angular application in action, start the development server with the following command:
ng serveYour application will be available at http://localhost:4200/. The application will display a Generate PDF button. When this button is clicked, the PDF will be generated as specified in the generatePDF() function.
Angular PDF generation library: Nutrient Web SDK
While the steps outlined above demonstrate PDF generation using jsPDF, an alternative approach is to use a specialized library like Nutrient Web SDK. This JavaScript library is designed for generating and manipulating PDF documents in Angular-based web applications. Nutrient Web SDK offers a wide range of capabilities, making it a powerful tool for your PDF needs:
- Create from template — Insert text or images and prefill forms.
- Generate from images — Convert JPGs, PNGs, or TIFFs into PDF.
- Assemble documents — Merge multiple PDFs and insert pages.
- Thumbnail previews — Render pages as thumbnail images.
- Saving options — Save PDFs to an array buffer, local storage, or a remote server.
- Headless — Optionally, generate PDFs without displaying the user interface.
- Client-side — Create PDFs directly in a browser (no server needed).
- Extendable — Add viewing, forms, signing, annotation, and more.
Now, you’ll learn how to use Nutrient with Angular to generate PDF documents from predefined PDF templates by merging them with data. This can be incredibly useful for various applications, like generating invoices, contracts, tickets, or any structured documents.
Step 1 — Setting up your Angular project
Create a new Angular project:
ng new nutrient-web-angular-exampleChoose:
Nofor routingCSSfor stylesheets
Then navigate to your project folder:
cd nutrient-web-angular-exampleEnsure you have an assets folder under src:
mkdir src/assetsStep 2 — Installing the Nutrient Web SDK
Add the SDK:
yarn add @nutrient-sdk/viewerOr use
npm install @nutrient-sdk/viewerif you prefer.
Then update your angular.json to expose the SDK assets:
"assets": [ "src/assets", { "glob": "**/*", "input": "./node_modules/@nutrient-sdk/viewer/dist/nutrient-viewer-lib/", "output": "./assets/nutrient-viewer-lib/" }]Step 3 — Adding the template and data
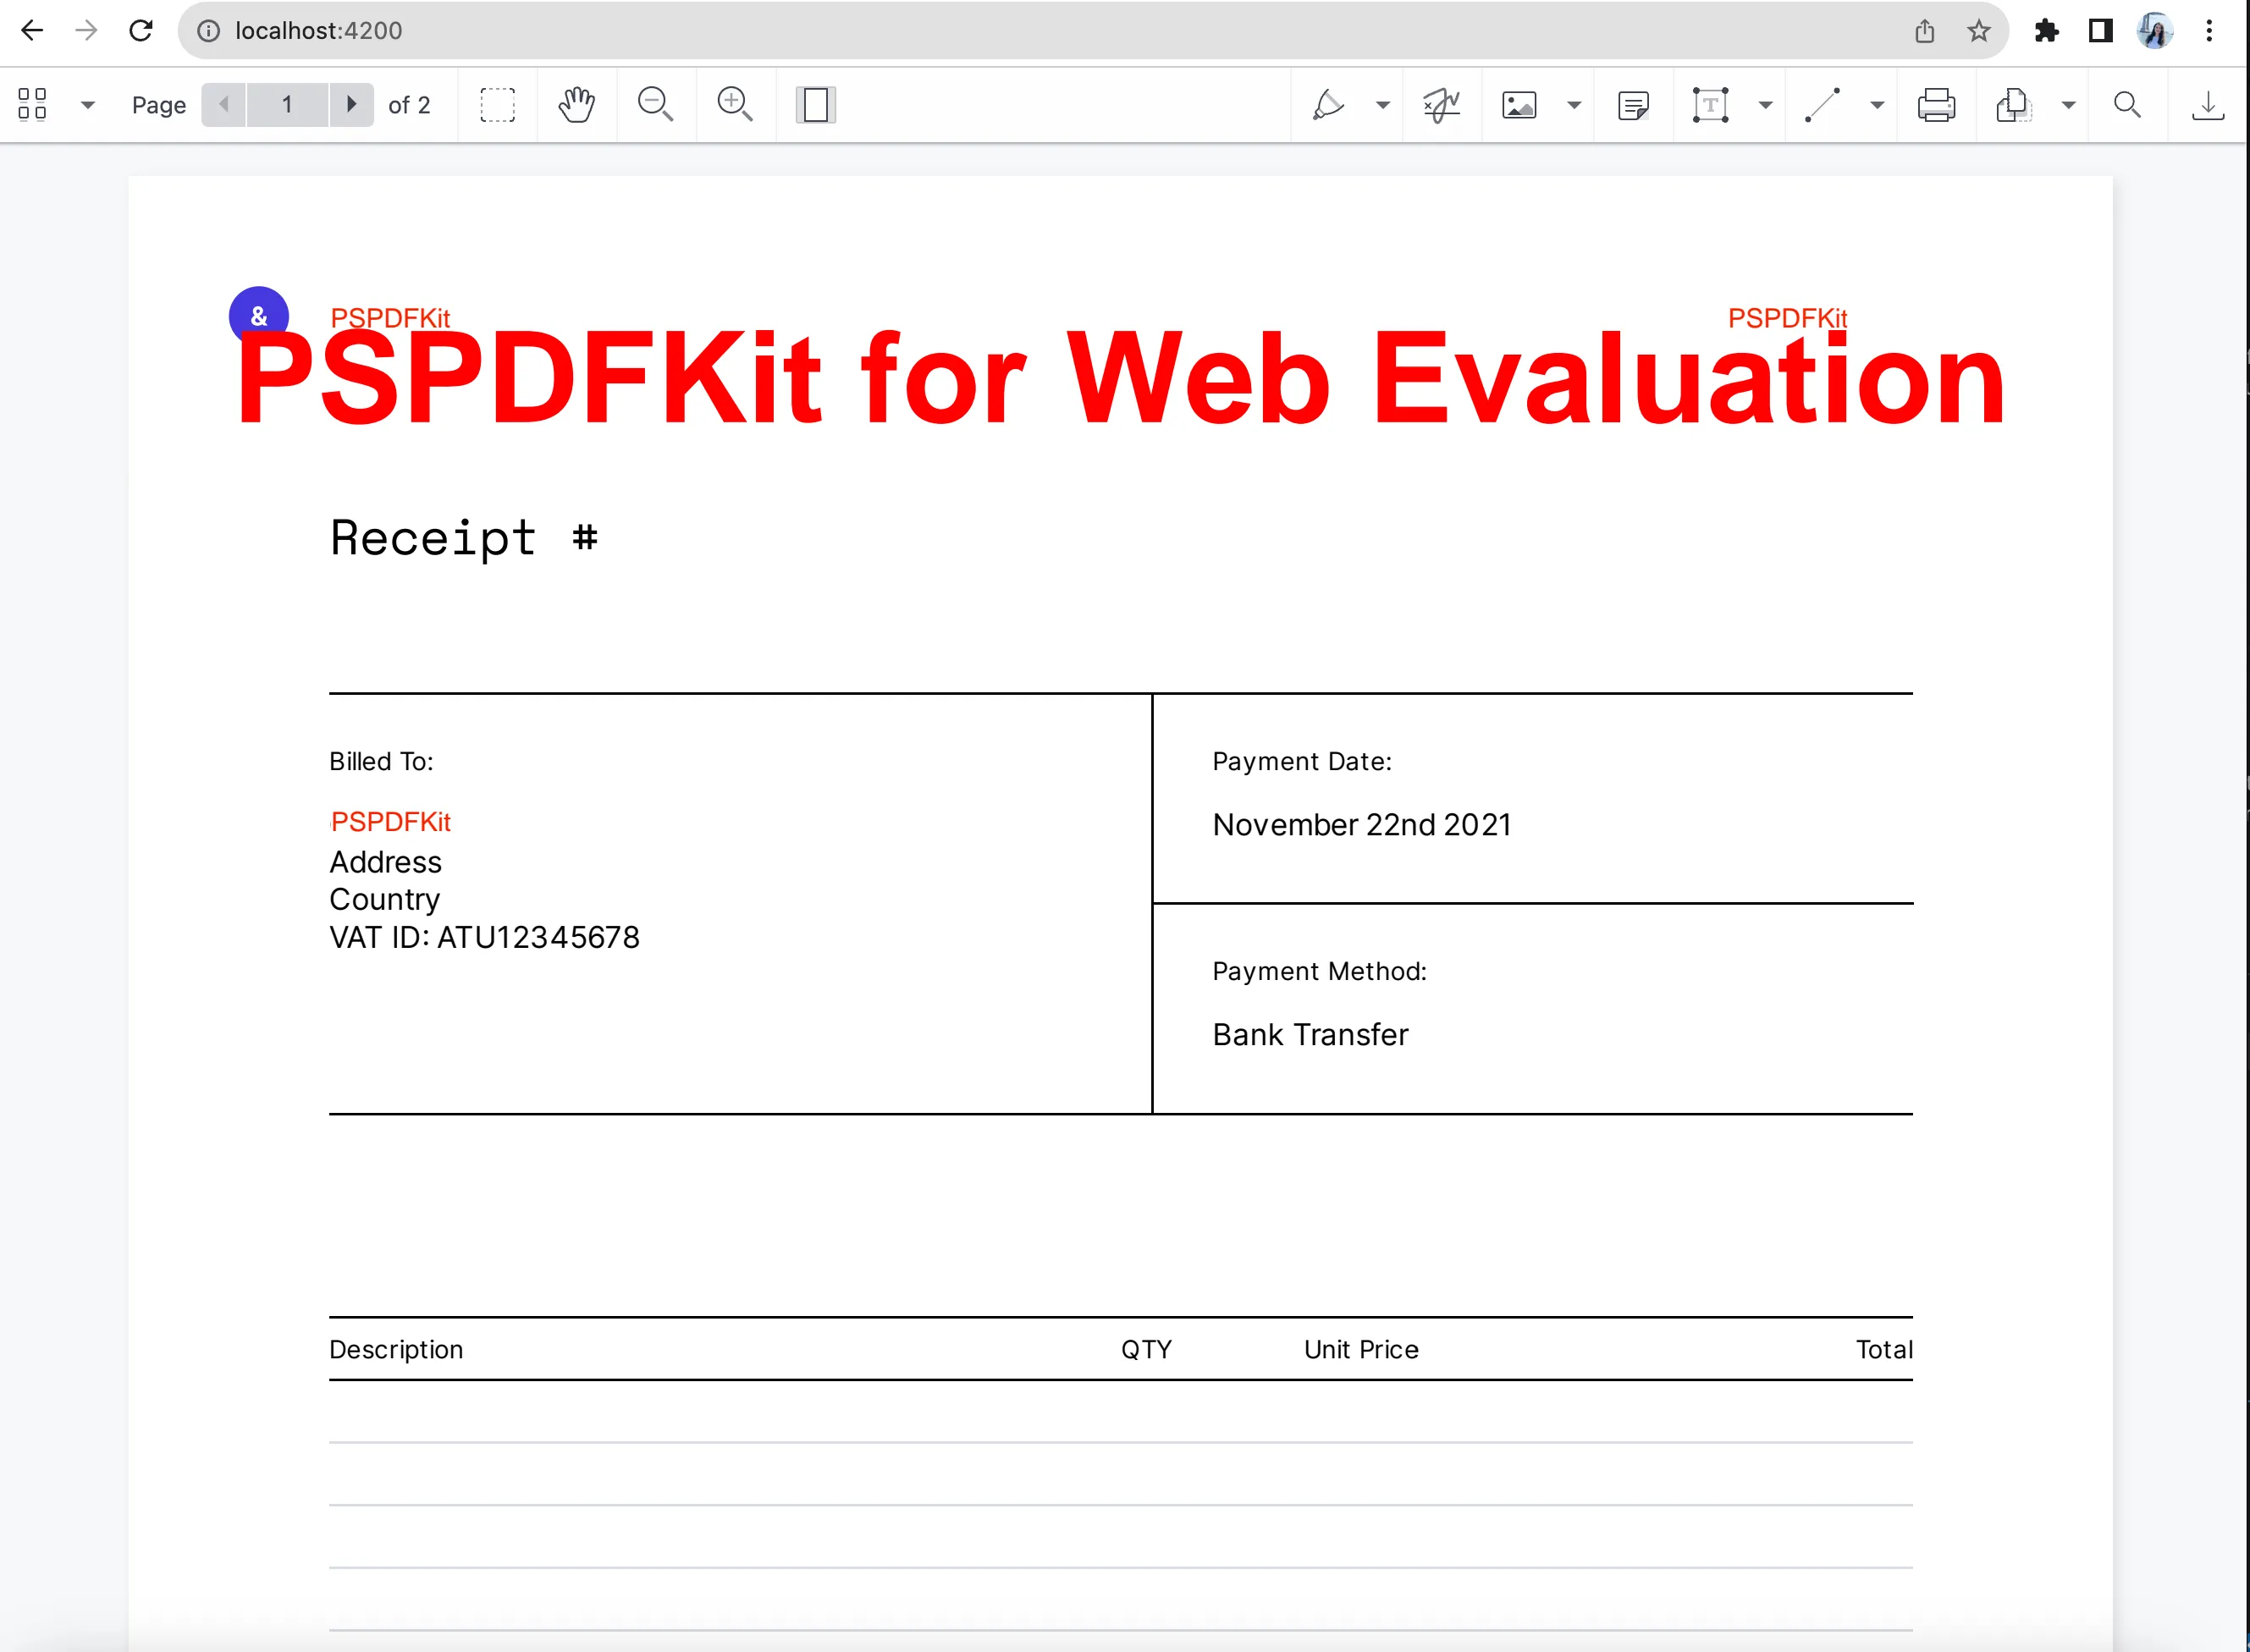
Place your PDF template in the assets folder: src/assets/document.pdf
Create a JSON file with the data you want to inject: src/assets/data.json
{ "company": "Nutrient", "companyInfo": "Nutrient Technologies", "companyName": "Nutrient Inc."}Step 4 — Creating and rendering the PDF viewer
Generate a new component:
ng generate component pdf-viewerUpdate the HTML template to define a viewer container:
<div class="pdf-viewer"> <div id="nutrient-container" style="width: 100%; height: 100vh;"></div></div>Step 5 — Populating the PDF with annotations
Once the PDF is loaded in headless mode, you can inject dynamic data using annotations.
Here’s how you can do this by creating a TextAnnotation:
const textAnnotation = new NutrientViewer.Annotations.TextAnnotation({  boundingBox: new NutrientViewer.Geometry.Rect({    height: 9.0675,    left: 60.375,    top: 37.7399,    width: 46.905,  }),  fontSize: 8,  text: {    format: "plain",    value: data.company,  },  pageIndex: 0,  fontColor: NutrientViewer.Color.RED,  backgroundColor: NutrientViewer.Color.WHITE,});
await instance.create(textAnnotation);boundingBox— Define the position and size of the text annotation.fontSize— Set the font size.text— Provide the text content within the value property.pageIndex— Specify the page index where you want to overlay the text.
Repeat this process for other data points that you want to overlay on the document.
To replace existing placeholder text in your PDF, you can use the SDK’s built-in search method:
const bbox = (await instance.search("Company Ltd.")).first().rectsOnPage.get(0);
const dynamicAnnotation = new NutrientViewer.Annotations.TextAnnotation({  boundingBox: bbox,  fontSize: 8,  text: {    format: "plain",    value: data.companyName,  },  pageIndex: 0,  fontColor: NutrientViewer.Color.RED,  backgroundColor: NutrientViewer.Color.WHITE,});
await instance.create(dynamicAnnotation);
Step 6 — Flattening the annotations
Once all annotations are added, you can optionally flatten them to make the text part of the PDF content (so users can’t edit them):
const flattened = await instance.exportPDF({ flatten: true });This returns a binary buffer (ArrayBuffer) of the modified PDF, ready to be reloaded in the viewer or downloaded.
Step 7 — Putting it all together
Now, update your pdf-viewer.component.ts file with the full flow: load → annotate → flatten → reload.
93 collapsed lines
import { Component, OnInit } from "@angular/core";import NutrientViewer from "@nutrient-sdk/viewer";
@Component({ selector: "pdf-viewer", templateUrl: "./pdf-viewer.component.html", styleUrls: ["./pdf-viewer.component.css"], standalone: true,})export class PdfViewerComponent implements OnInit { async ngOnInit(): Promise<void> { const baseUrl = `${location.protocol}//${location.host}/assets/`; const searchQuery = "Company Ltd.";
try { const res = await fetch("/assets/data.json"); if (!res.ok) throw new Error("Failed to fetch data.json"); const data = await res.json();
const instance: any = await NutrientViewer.load({ baseUrl, document: "/assets/document.pdf", container: "#nutrient-container", headless: true, });
const textAnnotation = new NutrientViewer.Annotations.TextAnnotation({ boundingBox: new NutrientViewer.Geometry.Rect({ height: 9.0675, left: 60.375, top: 37.7399, width: 46.905, }), fontSize: 8, text: { format: "plain", value: data.company, }, pageIndex: 0, fontColor: NutrientViewer.Color.RED, backgroundColor: NutrientViewer.Color.WHITE, });
const textAnnotation2 = new NutrientViewer.Annotations.TextAnnotation({ boundingBox: new NutrientViewer.Geometry.Rect({ height: 9.0675, left: 478.635, top: 37.7399, width: 82.695, }), fontSize: 8, text: { format: "plain", value: data.companyInfo, }, pageIndex: 0, fontColor: NutrientViewer.Color.RED, backgroundColor: NutrientViewer.Color.WHITE, });
// Search-based bounding box const bbox = (await instance.search(searchQuery)) .first() .rectsOnPage.get(0);
const textAnnotation3 = new NutrientViewer.Annotations.TextAnnotation({ boundingBox: bbox, fontSize: 8, text: { format: "plain", value: data.companyName, }, pageIndex: 0, fontColor: NutrientViewer.Color.RED, backgroundColor: NutrientViewer.Color.WHITE, });
// Add annotations await instance.create([textAnnotation, textAnnotation2, textAnnotation3]);
// Flatten the PDF const flattened = await instance.exportPDF({ flatten: true });
await NutrientViewer.load({ baseUrl, document: flattened, container: "#nutrient-container", }); } catch (error) { console.error("PDF population error:", error); } }}Step 8 — Using the viewer in your app
Update your root component to include the viewer:
import { Component } from "@angular/core";import { PdfViewerComponent } from "./pdf-viewer/pdf-viewer.component";
@Component({ selector: "app-root", standalone: true, imports: [PdfViewerComponent], templateUrl: "./app.component.html", styleUrls: ["./app.component.css"],})export class AppComponent { title = "Nutrient Angular PDF Generator";}<pdf-viewer></pdf-viewer>Step 9 — Run the app
Start your Angular development server:
yarn run devOr use
npm start.
Your browser should now display the PDF template, dynamically populated with data from data.json.
Summary
You now have a working Angular app that dynamically:
- Loads a PDF template
- Injects structured data with annotations
- Optionally flattens annotations into the document
- Displays the final result in the browser
This approach is fast and scalable and requires no backend processing.
For a detailed explanation, check out our guide on how to generate PDFs from a template using JavaScript.
Conclusion
In summary, while basic libraries like jspdf can fulfill simpler PDF generation needs, Nutrient Web SDK excels in scenarios where you require more advanced capabilities, better control, and enhanced functionality. It’s the go-to choice for projects that involve creating structured documents, managing various aspects of PDF files, and empowering your Angular application with a versatile PDF generation and manipulation library.
To get started, you can either:
- Start your free trial to test the library and see how it works in your application.
- Launch our demo to see the viewer in action.
FAQ
You can generate PDFs in an Angular application using libraries like jsPDF, pdfmake(opens in a new tab), or html2pdf.js(opens in a new tab). These libraries help convert HTML content to PDF format within Angular components.
Install jsPDF using npm with the command npm install jspdf. Then import it into your Angular component and use its methods to create and customize PDF documents.
Angular’s component-based architecture allows for modular and maintainable code, making it easy to create, manage, and reuse the content that will be converted to PDF.
Nutrient Web SDK is a powerful JavaScript library designed for generating and manipulating PDF documents in web applications. It provides advanced capabilities such as creating PDFs from templates, converting images to PDFs, assembling documents, rendering thumbnails, and more, making it an ideal choice for complex and feature-rich PDF generation needs.
Nutrient offers a wide range of advanced features, such as creating PDFs from templates, generating PDFs from images, assembling documents, rendering thumbnails, and more. It provides better control and enhanced functionality, making it suitable for projects requiring complex and structured document creation and management.
Yes. Nutrient enables you to generate PDFs in headless mode, which means you can create PDFs directly in the browser without displaying any user interface.


