Moving Your Gradle Build Scripts to Kotlin
Table of contents

The Kotlin programming language continues its victory march, having been voted one of the most loved and wanted programming languages in 2018(opens in a new tab). Needless to say, we at PSPDFKit fully embrace Kotlin and use it wherever it makes sense. If you’re new to Kotlin, make sure to check out our post featuring beginner tips and tricks for Kotlin to get started.
In this blog post, I’m introducing Kotlin in yet another area of Android development: the Gradle build scripts.
Looking at Gradle and Groovy
Gradle(opens in a new tab) is Android’s default build system. Whenever you start a new Android project inside Android Studio, it will contain a couple of build.gradle files that configure your app’s build setup. The content of any build.gradle file is written in Groovy(opens in a new tab), a dynamically typed JVM language that allows developers to write software in a domain-specific language (DSL).
Here’s a small example of a build.gradle file that configures an app module of an Android project:
apply plugin: 'com.android.application'apply plugin: 'kotlin-android'apply plugin: 'kotlin-android-extensions'
android {    compileSdkVersion 27    defaultConfig {        applicationId "examples.pspdfkit.com.kotlingradlesetup"        minSdkVersion 24        targetSdkVersion 27        versionCode 1        versionName "1.0"    }    buildTypes {        release {            minifyEnabled false            proguardFiles getDefaultProguardFile('proguard-android.txt'),                'proguard-rules.pro'        }    }}
dependencies {    ...    // list of app dependencies}
The various names of properties and methods used by this build.gradle file are not part of the Groovy language itself. This Android build-specific DSL is provided by the Android Gradle plugin, and Groovy “merely” provides the foundation for creating libraries in a way that allows expressive and domain-specific usage.
About Groovy’s Downsides
Although Groovy is a great general-purpose language for writing scripts in domain-specific language, the use of Groovy in Gradle build scripts (especially in Android Studio) comes with some downsides:
- Groovy is dynamically typed. This means that your IDE won’t be able to verify your build script’s validity while writing it. While you are used to immediate typo checking when writing code in statically typed languages (like Java or Kotlin), you won’t get that benefit in Gradle files.
- Slow and incomplete code assistance. Due to the dynamic nature of the Groovy language, your IDE has a hard time providing valuable coding assistance to you, the developer. Since the IDE needs to dynamically evaluate (i.e. execute) your script to know about existing methods and properties, code completion is unresponsive and delivers poor results compared to the results in statically typed languages.
- Gradle build files are not debuggable. This is not a problem of the Groovy language, but rather of the combination of Groovy and Gradle. Right now, it’s simply not possible to attach a step debugger to your
build.gradlefile to inspect its execution.
While these downsides can be neglected in build.gradle files as large as the example above, they start causing real problems when writing and maintaining build scripts with several thousand lines of code. One easy way of alleviating these problems is to move parts of your scripts to Kotlin. The simplest way to do this is by adding a buildSrc module to your Android project.
Turning Your Scripts into Programs
The buildSrc module is a special module that can live in any Gradle multi-module project (which Android projects are). buildSrc is the first module compiled during a Gradle build, and its source artifacts are available throughout your entire build script. Things you can do with buildSrc include but are not limited to:
- Writing custom Gradle plugins you can apply to your build scripts.
- Extracting utility functions and configurations to make them globally available in your build scripts.
- Writing custom task classes that can derive from any of the existing Gradle and Android task types.
- Organizing your custom Gradle task graph (for example, by using a custom plugin).
- Step debugging any code inside your
buildSrcmodule during a Gradle build. Just place a step debugger breakpoint and launch your build using the./gradlew -Dorg.gradle.debug=true --no-daemon :app:myTask.
To add the buildSrc module to your project, all you need to do is to create a buildSrc folder in the root of your Android project. After you sync your Gradle files (using Sync Project with Gradle Files), Android Studio will detect the folder and populate it with the standard build folders (build/ and .gradle/).
Although, for the largest parts, the buildSrc module behaves like any other Gradle module in your project, it does not require being registered in your project’s settings.gradle file, nor does it need its own module-level build.gradle file. However, the latter is required to customize the module’s dependencies and facettes — something we will do in a minute.
Default Source Sets Inside buildSrc
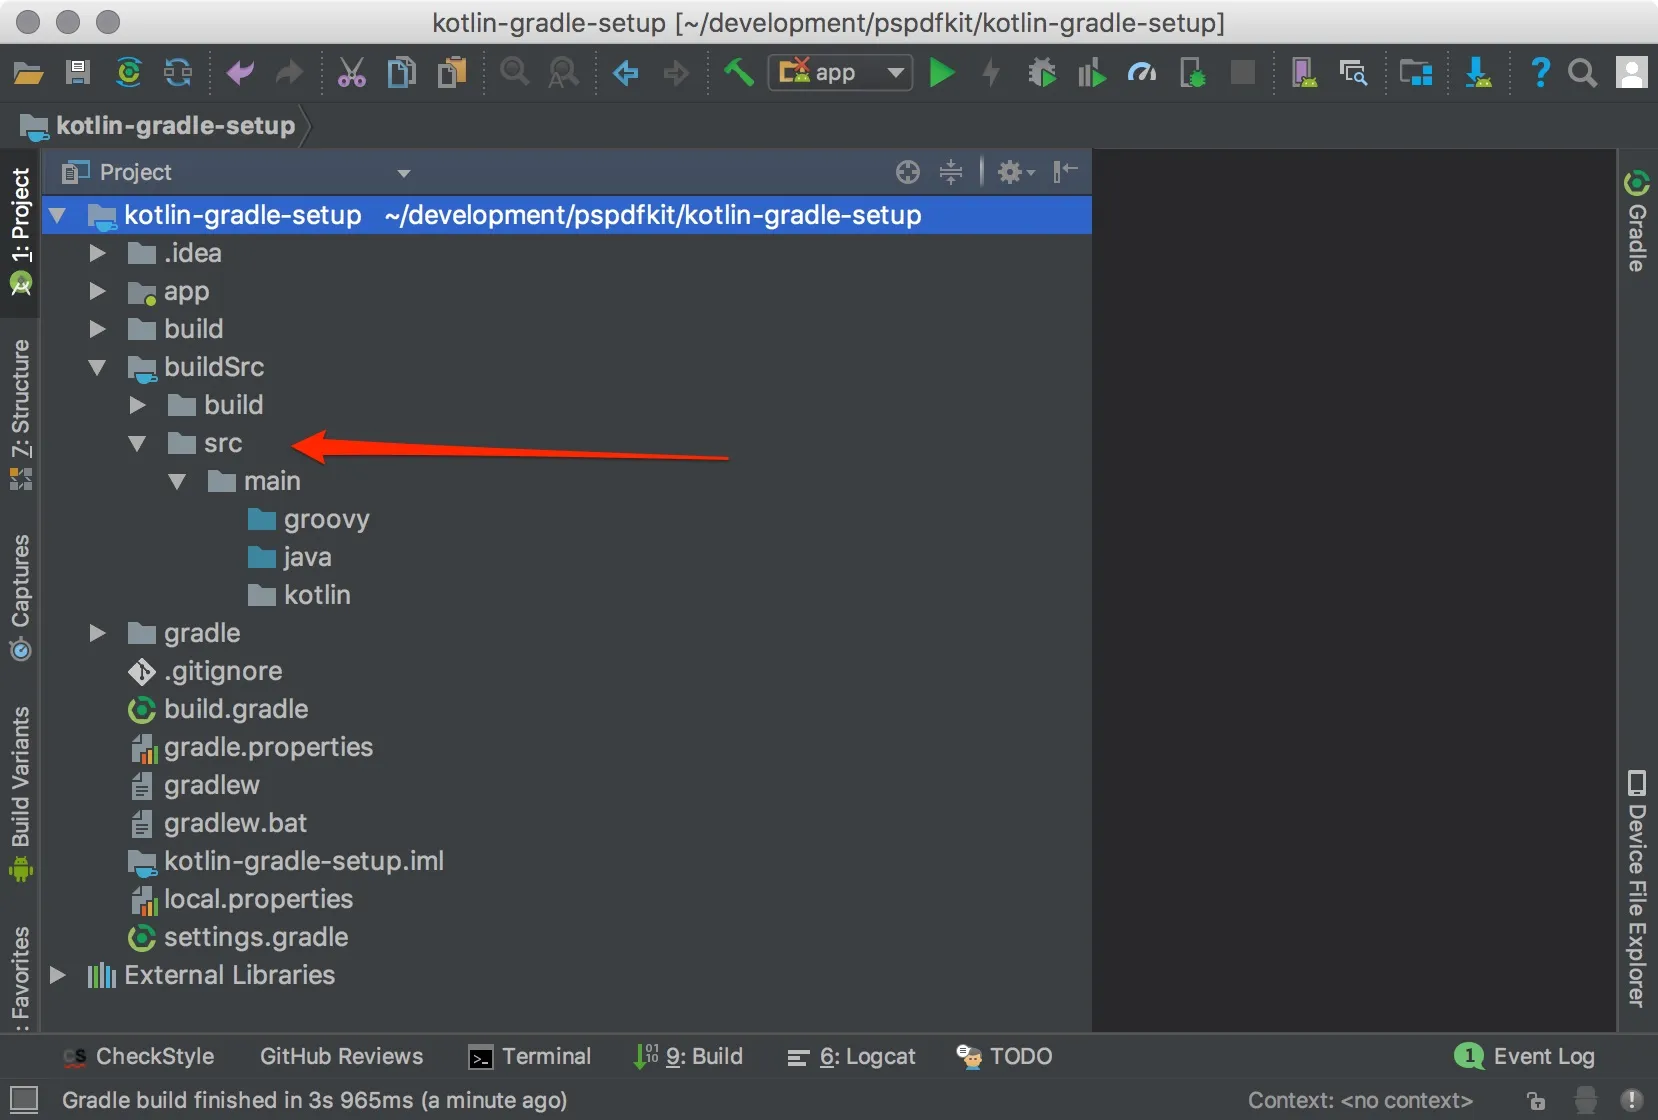
First, however, let’s have a look at the folder structure inside the buildSrc module. After you create the standard Android source folder structure inside the buildSrc module and resync the Gradle scripts, Android Studio will mark valid source folders.

In the example above, I created three source folders — src/main/java/, src/main/groovy/, and src/main/kotlin/ — for their respective programming languages. You can see that, without further configuration, the buildSrc module supports only Java and Groovy as programming languages (the Kotlin sources are not marked in blue like the other two are).
To enable Kotlin support in our buildSrc module, let’s create a module-level build.gradle file with the following content:
buildscript {    ext.kotlin_version = '1.2.21'    ext.android_gradle_plugin_version = '3.0.1'    repositories {        jcenter()        google()    }    dependencies {        classpath "org.jetbrains.kotlin:kotlin-gradle-plugin:$kotlin_version"    }}
repositories {    jcenter()    google()}
apply plugin: 'java'apply plugin: 'kotlin'
dependencies {    implementation "com.android.tools.build:gradle:$android_gradle_plugin_version"    implementation "com.android.tools.build:gradle-api:$android_gradle_plugin_version"    implementation "org.jetbrains.kotlin:kotlin-stdlib-jdk8:$kotlin_version"}
compileKotlin {    kotlinOptions {        jvmTarget = "1.8"    }}compileTestKotlin {    kotlinOptions {        jvmTarget = "1.8"    }}
Et voilà! You can now add Kotlin sources too. Moreover, we added the Android Gradle plugin as dependency to our buildSrc source code right away so that we can write build code using Android Gradle plugin-specific classes.
Adding a Custom Build Plugin
The first use case I’d like to demonstrate is how to write a custom Gradle plugin for your build scripts. Begin by creating a class, MyPlugin, within the kotlin sources of your buildSrc module. Then paste the following content:
package com.pspdfkit.example
import org.gradle.api.Pluginimport org.gradle.api.Project
/** * My first small Gradle plugin written in Kotlin! */class MyPlugin : Plugin<Project> {    override fun apply(target: Project) {        target.logger.lifecycle("MyPlugin was successfully applied " +            "to your project named '${target.name}'!")
        // This is an example of how you can iterate all app variants        // your Android project defines.        project.android.app            .applicationVariants            .matching { it.buildType.name == "debug" }            .all {                // Make great use of all debug variants.            }    }}
/** * Access the `android` extension of this project. If the project is not an * Android app or library module, this method will throw. */val Project.android: BaseExtension    get() = extensions.findByName("android") as? BaseExtension        ?: error("Project '$name' is not an Android module. Can't " +            "access 'android' extension.")
/** * Accesses the app module-specific extensions of an Android module. */val BaseExtension.app: AppExtension    get() = this as? AppExtension        ?: error("Android module is not an app module. Can't " +            "access 'android' app extension.")
You can now apply this plugin like you would with any other Gradle plugin in your build scripts. The only difference is that instead of using a plugin string ID, you use the plugin class directly in your build script. Here’s how to apply the plugin to the app module of your Android project:
import com.pspdfkit.example.MyPlugin
apply plugin: 'com.android.application'apply plugin: MyPlugin.class
// Here comes the rest of your build script....
Once you synchronize your Gradle build scripts, you can see the plugin in action. Here is the output of Gradle in Android Studio’s Build tool window (I shortened it for the sake of brevity):
Executing tasks: [:app:generateDebugSources]
...:buildSrc:check UP-TO-DATE:buildSrc:build UP-TO-DATEMyPlugin was successfully applied to your project named 'app'!:app:preBuild UP-TO-DATE:app:preDebugBuild...:app:generateDebugSources
BUILD SUCCESSFUL in 3s12 actionable tasks: 12 executed
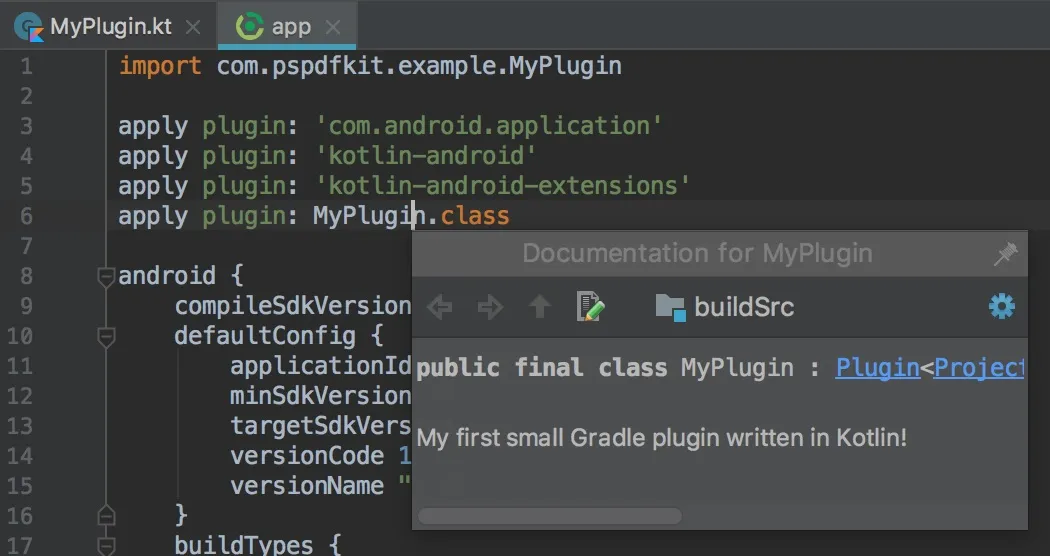
That was easy! Another nice side effect of having the Gradle plugin within Kotlin is that any KDoc comments on symbols from your buildSrc module are automatically available in your build.gradle files too.

Adding Utilities to Your Build Scripts
Another simple trick to enhance your build scripts with buildSrc and Kotlin is to add utility classes and functions. For example, you could add a class named DependencyVersions for globally exposing all version numbers for your various module’s dependencies, like so:
package com.pspdfkit.example
object DependencyVersions {    // General dependencies    const val Kotlin = "1.2.21"    const val SupportLibraries = "27.1.0"
    // Test dependencies    const val Junit = "4.12"    const val AndroidTestRunner = "1.0.1"    const val Espresso = "3.0.1"}
By adding DependencyVersions, you can now access version numbers on this object in any of your build.gradle scripts, like so:
import com.pspdfkit.example.DependencyVersions
...
dependencies {    implementation "org.jetbrains.kotlin:kotlin-stdlib-jre7:${DependencyVersions.Kotlin}"    implementation "com.android.support:appcompat-v7:${DependencyVersions.SupportLibraries}"    testImplementation "junit:junit:${DependencyVersions.Junit}"    androidTestImplementation "com.android.support.test:runner:${DependencyVersions.AndroidTestRunner}"    androidTestImplementation "com.android.support.test.espresso:espresso-core:${DependencyVersions.Espresso}"}
Writing Custom Build Tasks
The last example I’d like to give is how to create a custom Gradle task and add it to your project. To do this, simply create the class MyTask inside your buildSrc module using the following content:
package com.pspdfkit.example
import org.gradle.api.DefaultTaskimport org.gradle.api.tasks.TaskAction
/** * A custom task that warmly greets you. */open class MyTask : DefaultTask() {
    /**     * The name of the developer. This will be used for greeting.     */    var yourName = "developer"
    @TaskAction    fun greet() {        logger.lifecycle("Hello, $yourName! I warmly greet you.")    }}
Using MyTask in your build scripts is straightforward and works just like with any other Gradle task:
import com.pspdfkit.example.MyTask
...
task("greetMyself", type: MyTask) {    yourName = "David"}
And here is the terminal output when I execute this task:
➜ ./gradlew :app:greetMyself
> Configure project :appMyPlugin was successfully applied to your project named ’app'!
> Task :app:greetMyselfHello, David! I warmly greet you.
Summary
In this blog post, I explained how you can move parts of your Gradle build scripts to Kotlin — how to convert them to “real programs.” Having parts of the build logic in Kotlin has many benefits over pure Groovy-based Gradle builds:
- Build code written in Kotlin can be debugged using a step debugger.
- IDE code assistance like auto completion is way faster for Kotlin symbols than for Groovy symbols, since code written in Kotlin be better indexed upfront.
- You can use your favorite programming language. 🤗
I hope you enjoyed the blog post. If you like the topic and would like to hear more about it, let me know by pinging me on Twitter(opens in a new tab).
Keep coding!


