Spicing up status messages
Table of contents
Competition in the App Store has grown to be extremely fierce, so unless you’re inventing a whole new market, you are unlikely to succeed with an app that is just "good enough." It needs to be great!
One of the things you can do to make your product stand out is to put some effort into providing a great user experience and making sure your UI is a delight to use. You might think UI is something that only app developers need to focus on and that those of us working on, say, a PDF framework, would not have to worry about all that much. You would be mistaken.
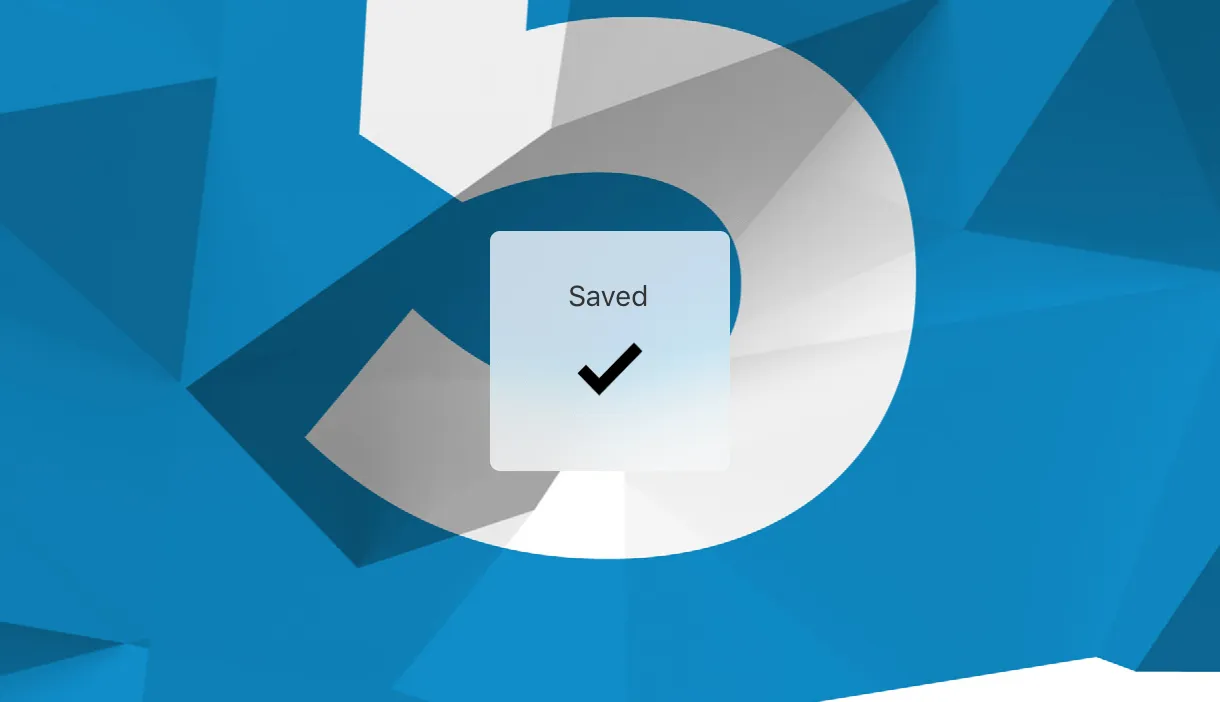
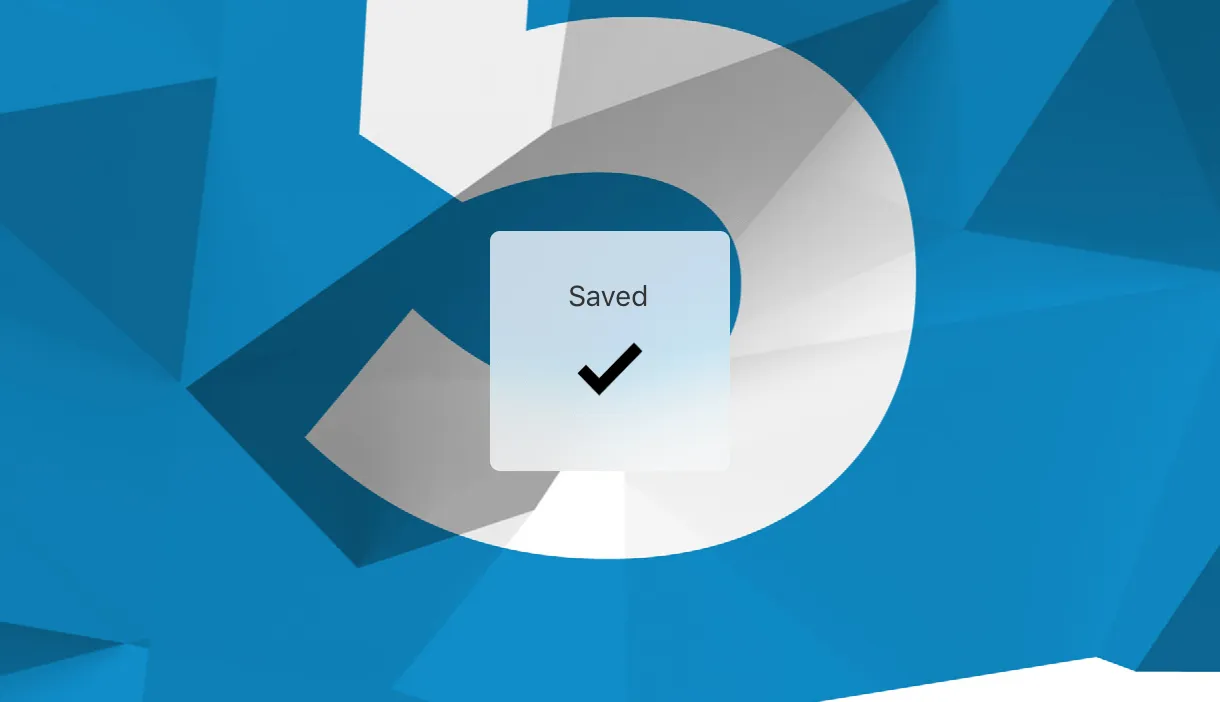
At PSPDFKit, we likely spend just as much time polishing the UI as we do implementing PDF features or tweaking performance. Recently, I spent some time improving our status messages by making the associated symbols animate and thought the approach I took might be an interesting topic for a short blog post.
Subtle Animations
The human vision works, roughly, on two levels: (a) Central vision, which includes the shapes we focus on (recognizing great detail in terms of shapes and colors); and (b) Peripheral vision, which works with contrast shifts and is very effective at recognizing movement. In practice, what this means is that we notice movement on the very edges of our vision way before we even know the shapes and colors of the object that moved.
Movement in our peripheral vision is easily recognized and begs for attention, therefore too much or too frequent movement (animations) as well as abrupt contrast changes ("blinking" colors) gets irritating really quickly. Our instinct is always to look at what is causing the movement first — just in case it’s a lion trying to eat us! That instinct prevents us from focusing our attention on any single area. The cognitive load increases with the continual prioritization of the importance of the movement and whether we need to react to it.
This is also why subtle animations can be used to great effect in interface and information design. Whenever we want to point out a state change, we can emphasize it with a subtle animation or change in hue/brightness. Status messages that appear only briefly and disappear, can benefit from such an additional call for attention.
The HUD
We’re probably all familiar with the concept of using a HUD view ("heads up display") to show either progress or short status messages. Apple has used a component like this since the very first iOS versions in the Settings app and various other places throughout the system. Unfortunately, Apple's UIProgressHUD is still a private class to this day, but there are a bunch of open source implementations(opens in a new tab) that you can use instead.
At PSPDFKit, we also have a little progress HUD helper, which we use in a few cases to show the status of longer running operations. When those operations are complete, we frequently show a predefined HUD configuration with a symbol and a short message. The graphics we used were from the iOS 6 days, so the whole thing looked a bit too chubby when used on modern iOS versions. It was time to freshen this up a bit.
Drawing
This time, instead of using images, I opted to draw the symbols in code. Writing the bezier path code for a checkmark or "x" symbol is really not that hard and it both saves a bit of space as well as opens up the possibility for additional customization. To make the whole process even simpler, you can get PaintCode(opens in a new tab), a vector drawing app that can generate Swift or Objective-C drawing code for you.
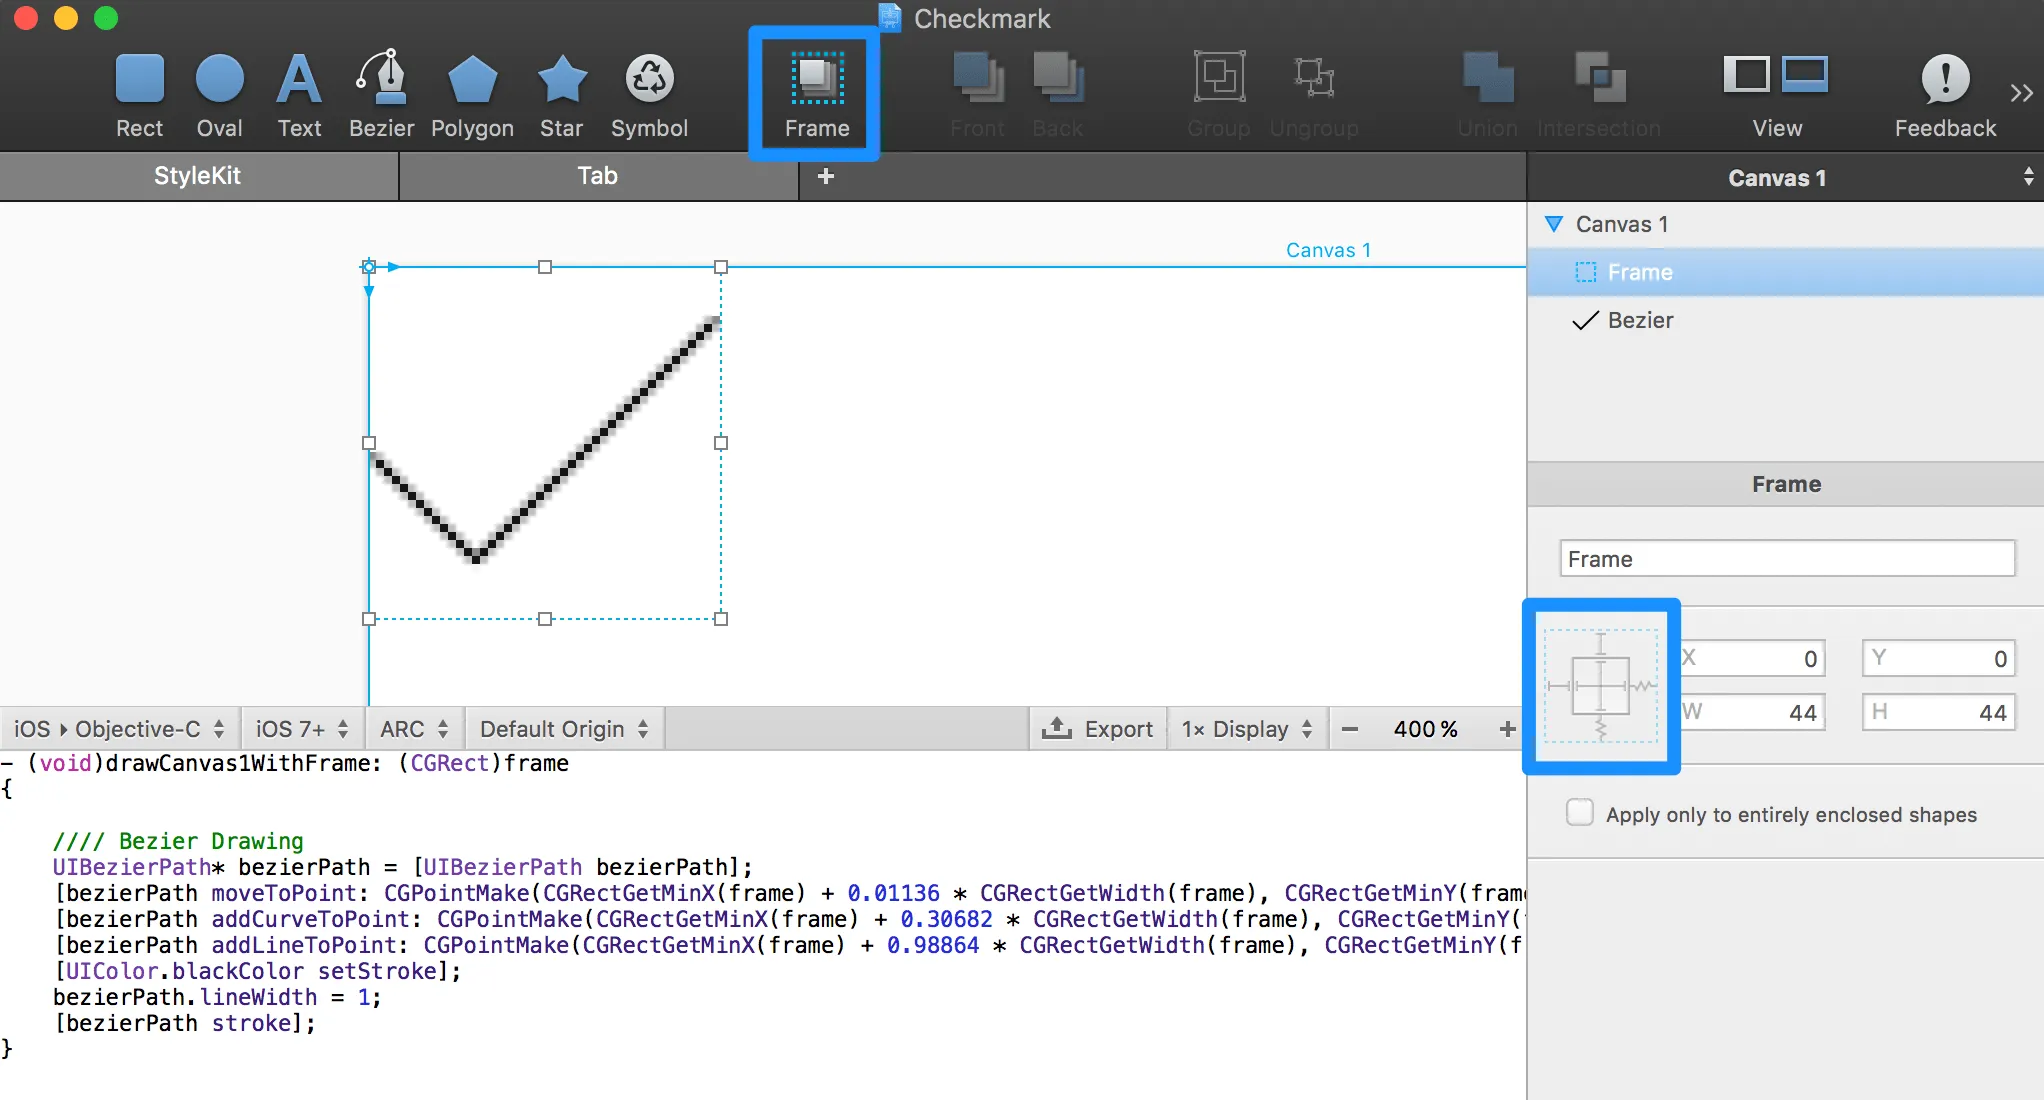
A good idea here is to use PaintCode’s frame tool(opens in a new tab) to draw a bounding box for your symbol first and then draw the symbol inside using the various vector drawing tools. Doing so will put the generated code in a method that accepts a CGRect as input. The frame can be configured with autoresizing rules, similar to UIView’s autoresizing masks, which in turn affects how the code is generated. With the correct autoresizing masks, you can make your symbol resizable based on the passed in frame.
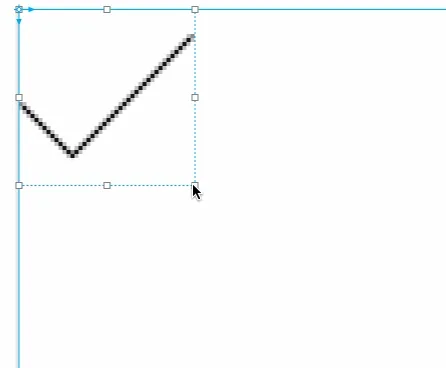
If you draw a shape like I did and select the iOS > Objective-C output format you should get code that is similar to the following:
- (void)drawCanvas1WithFrame: (CGRect)frame{ //// Bezier Drawing UIBezierPath* bezierPath = [UIBezierPath bezierPath]; [bezierPath moveToPoint: CGPointMake(CGRectGetMinX(frame) + 0.01136 * CGRectGetWidth(frame), CGRectGetMinY(frame) + 0.53409 * CGRectGetHeight(frame))]; [bezierPath addCurveToPoint: CGPointMake(CGRectGetMinX(frame) + 0.30682 * CGRectGetWidth(frame), CGRectGetMinY(frame) + 0.82955 * CGRectGetHeight(frame)) controlPoint1: CGPointMake(CGRectGetMinX(frame) + 0.26136 * CGRectGetWidth(frame), CGRectGetMinY(frame) + 0.78409 * CGRectGetHeight(frame)) controlPoint2: CGPointMake(CGRectGetMinX(frame) + 0.30682 * CGRectGetWidth(frame), CGRectGetMinY(frame) + 0.82955 * CGRectGetHeight(frame))]; [bezierPath addLineToPoint: CGPointMake(CGRectGetMinX(frame) + 0.98864 * CGRectGetWidth(frame), CGRectGetMinY(frame) + 0.14773 * CGRectGetHeight(frame))]; [UIColor.blackColor setStroke]; bezierPath.lineWidth = 1; [bezierPath stroke];}Shape Layer
The code above is set up so it creates a UIBezierPath and then draws it into the current context. What we want to do, instead, is to pass that path into a CAShapeLayer. CAShapeLayer is a CALayer subclass that takes a CGPathRef, which it draws in its coordinate space. A shape layer is a great way to draw resolution independent vector shapes in a high performant way. Being a CoreAnimation class, it also opens the door to animating various shape properties.
To use a shape layer conveniently in our interface, we first want to create a wrapper UIView for our symbols. Here is the gist of the interface we use:
NS_ASSUME_NONNULL_BEGIN
typedef UIBezierPath * _Nonnull (^PSPDFPathCreationBlock)(CGRect frame);
/// A view that can draw a provided path and optionally animate it.@interface PSPDFSymbolView : UIView
/// Crates a new symbol with the provided path block.- (instancetype)initWithPathBlock:(PSPDFPathCreationBlock)pathBlock NS_DESIGNATED_INITIALIZER;
/// A block that creates the path for a given rect.@property (nonatomic, copy, readonly) PSPDFPathCreationBlock pathBlock;
/// The internal shape layer used to draw the path./// @note Its `strokeColor` is automatically set based on the view `tintColor`.@property (nonatomic, readonly) CAShapeLayer *shapeLayer;
/// Inset from the view edge to the path symbol. Defaults to 6pt on every side.@property (nonatomic) UIEdgeInsets pathInsets;
/// If `YES`, the view is animated shortly after being inserted to the view hierarchy./// Defaults to `YES`.@property (nonatomic) BOOL animateWhenAddingToSuperview;
/// Delay for `animateWhenAddingToSuperview`. Defaults to 0.3.@property (nonatomic) NSTimeInterval superviewInsertionAnimationDelay;
@end
NS_ASSUME_NONNULL_END
We use a block to pass in the shape creation code during initialization, instead of setting the path directly. This allows us to dynamically adjust the path based on the view size and the provided margins. As we’ll be mostly using this view in our HUD component, I configured the animations to (optionally) start when the view is added to the view hierarchy. This provides a convenient way to animate the shape in when we first show the HUD.
The implementation is also fairly straightforward:
NS_ASSUME_NONNULL_BEGIN
@implementation PSPDFSymbolView
///////////////////////////////////////////////////////////////////////////////////////////#pragma mark - Lifecycle
- (instancetype)initWithPathBlock:(PSPDFPathCreationBlock)pathBlock {    PSPDFAssertBlock(pathBlock);
    if ((self = [super initWithFrame:CGRectMake(0.f, 0.f, 44.f, 44.f)])) {        _pathBlock = [pathBlock copy];        _pathInsets = UIEdgeInsetsMake(6.f, 6.f, 6.f, 6.f);        _animateWhenAddingToSuperview = YES;        _superviewInsertionAnimationDelay = 0.3;
        self.tintAdjustmentMode = UIViewTintAdjustmentModeNormal;
        CAShapeLayer *shapeLayer = self.shapeLayer;        shapeLayer.lineWidth = 1.f;        shapeLayer.strokeColor = self.tintColor.CGColor;;        shapeLayer.fillColor = NULL;    }    return self;}
- (void)didMoveToSuperview {    [super didMoveToSuperview];
    if (self.animateWhenAddingToSuperview && self.superview) {        [self animateShapeLayer:self.shapeLayer withDelay:self.superviewInsertionAnimationDelay];    }}
///////////////////////////////////////////////////////////////////////////////////////////#pragma mark - Layer
+ (Class)layerClass {    return CAShapeLayer.class;}
- (CAShapeLayer *)shapeLayer {    return (CAShapeLayer *)self.layer;}
///////////////////////////////////////////////////////////////////////////////////////////#pragma mark - Layout
- (void)layoutSubviews {    [super layoutSubviews];
    CGRect rect = UIEdgeInsetsInsetRect(self.bounds, self.pathInsets);    self.shapeLayer.path = self.pathBlock(rect).CGPath;}
///////////////////////////////////////////////////////////////////////////////////////////#pragma mark - Animations
- (void)animateShapeLayer:(CAShapeLayer *)layer withDelay:(NSTimeInterval)delay {    layer.strokeEnd = 0.f;    [layer pspdf_animateKeyPath:PROPERTY(strokeEnd) fromValue:@0.0 toValue:@1.0 duration:0.5 configurationBlock:^(CABasicAnimation *animation) {        animation.beginTime = CACurrentMediaTime() + delay;    } completionBlock:^{        layer.strokeEnd = 1.f;    }];}
- (void)tintColorDidChange {    [super tintColorDidChange];    self.shapeLayer.strokeColor = self.tintColor.CGColor;}
@end
NS_ASSUME_NONNULL_END
The crucial part is overriding +layerClass and returning CAShapeLayer.class. This will ensure that the view is backed by a shape layer.
Stroke End Animation
A great animation to do on shape layers is to animate the strokeEnd property. This property represents "the relative location at which to stop stroking the path". If we animate it from 0 to 1 we essentially get the effect of the shape being drawn in front of us from the first point to the last one.
In the above code, I cheated a bit and used an internal helper that we use to create basic animations. Since I’m in a good mood, I’ll share this with you as well:
- (nullable CABasicAnimation *)pspdf_animateKeyPath:(NSString *)keyPath fromValue:(id)oldValue toValue:(id)newValue duration:(NSTimeInterval)duration configurationBlock:(nullable PSPDFAnimationConfigurationBlock)configurationBlock completionBlock:(nullable dispatch_block_t)completionBlock {    PSPDFAssertString(keyPath);    PSPDFAssertNotNil(newValue, @"newValue is required");    PSPDFAssertNotNil(oldValue, @"oldValue is required");
    // Check if an animation is even required.    if (oldValue == newValue) {        if (completionBlock) {            completionBlock();        }        return nil;    }    if (duration <= 0) {        [self setValue:newValue forKeyPath:keyPath];        if (completionBlock) {            completionBlock();        }        return nil;    }
    // Animate    [CATransaction begin];
    // Notifies us when *subsequently* added animations in the CATransaction    // group complete. Needs to be thus added before adding the animation.    if (completionBlock) {        [CATransaction setCompletionBlock:completionBlock];    }
    CABasicAnimation *animation = [CABasicAnimation animationWithKeyPath:keyPath];    animation.duration = duration * PSPDFSimulatorAnimationDragCoefficient();    animation.fromValue = oldValue;    animation.toValue = newValue;    animation.timingFunction = [CAMediaTimingFunction functionWithName:kCAMediaTimingFunctionEaseInEaseOut];    if (configurationBlock) {        configurationBlock(animation);    }    [self addAnimation:animation forKey:keyPath];
    [CATransaction commit];
    return animation;}
An interesting pro-tip here is PSPDFSimulatorAnimationDragCoefficient(). It is essentially a safe way to slow down CAAnimations in the simulator when slow simulator animations are enabled. In contrast to regular UIView animations, the slowdown doesn’t happen automatically for core-animation-based animations so we need to handle it manually if we want to leverage the feature for debugging:
#if TARGET_IPHONE_SIMULATORUIKIT_EXTERN float UIAnimationDragCoefficient(void); // UIKit private drag coefficient.#endif
CGFloat PSPDFSimulatorAnimationDragCoefficient(void) {#if TARGET_IPHONE_SIMULATOR    return UIAnimationDragCoefficient();#else    return 1.0;#endif
With all of it in place, we can now take the UIBezierPath that PaintCode generated for us, clean it up a bit, and add it to the class as a convenience initializer:
+ (instancetype)checkMarkSymbolView { return [[self.class alloc] initWithPathBlock:^UIBezierPath *(CGRect frame) { UIBezierPath *path = [UIBezierPath bezierPath]; [path moveToPoint:CGPointMake(CGRectGetMinX(frame) + 0.01136f * CGRectGetWidth(frame), CGRectGetMinY(frame) + 0.53409f * CGRectGetHeight(frame))]; [path addCurveToPoint:CGPointMake(CGRectGetMinX(frame) + 0.30682f * CGRectGetWidth(frame), CGRectGetMinY(frame) + 0.82955f * CGRectGetHeight(frame)) controlPoint1: CGPointMake(CGRectGetMinX(frame) + 0.26136f * CGRectGetWidth(frame), CGRectGetMinY(frame) + 0.78409f * CGRectGetHeight(frame)) controlPoint2: CGPointMake(CGRectGetMinX(frame) + 0.30682f * CGRectGetWidth(frame), CGRectGetMinY(frame) + 0.82955f * CGRectGetHeight(frame))]; [path addLineToPoint:CGPointMake(CGRectGetMinX(frame) + 0.98864f * CGRectGetWidth(frame), CGRectGetMinY(frame) + 0.14773f * CGRectGetHeight(frame))]; return path; }];}We can now set the view on our status HUD by simply calling [PSPDFSymbolView checkMarkSymbolView]. If we repeat this for any other shapes we need, we will have a nice library of animatable shapes.
The end result looks something like this.

An interesting follow–up task would be to measure the bezier path length and come up with a heuristic that adjusts the animation duration based on the path length. The result would be more pleasant animations for longer, more complex shapes. I’ll leave that as an exercise for the reader.


